
Create a View
To create a new view, first create the view record by defining its name, primary object, and description. Once it is saved, you can then use the AppBase View Builder wizard to develop the view SQL or enter an already developed view SQL statement.
Steps
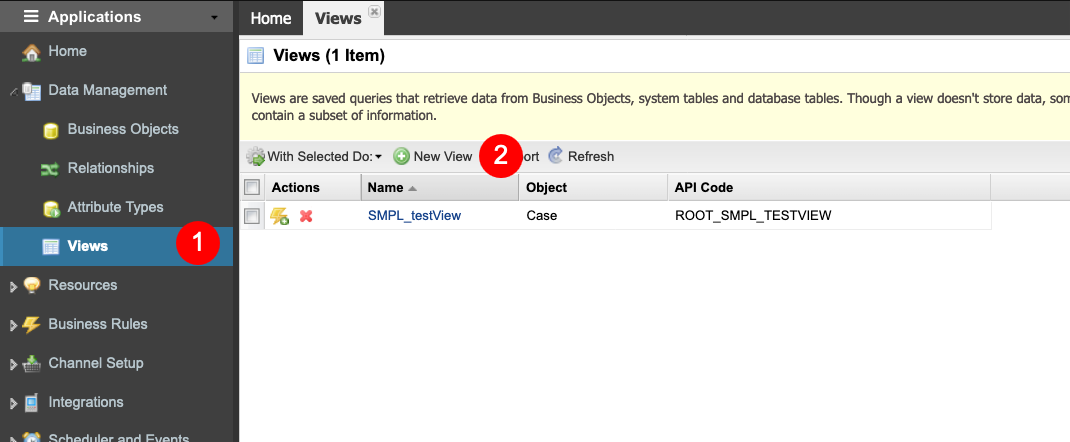
- Navigate to AppStudio → Data Management → Views (1)
- Click the New View button (2).
- Enter the Query Name that will be the name of the view.
- Select the Primary Object which is the business object that the view will primarily use as the main object. In our example, we selected Case.
- Enter a Description of the view. Depending upon how well you define what the view does, this is particularly useful to ensure another developer or administrator knows the purpose of the view and where it might be used.
- The API Permanent Code value is auto-populated based on the Query Name entered, but this can be overridden with a different value if required (please do not use whitespaces or any special characters).
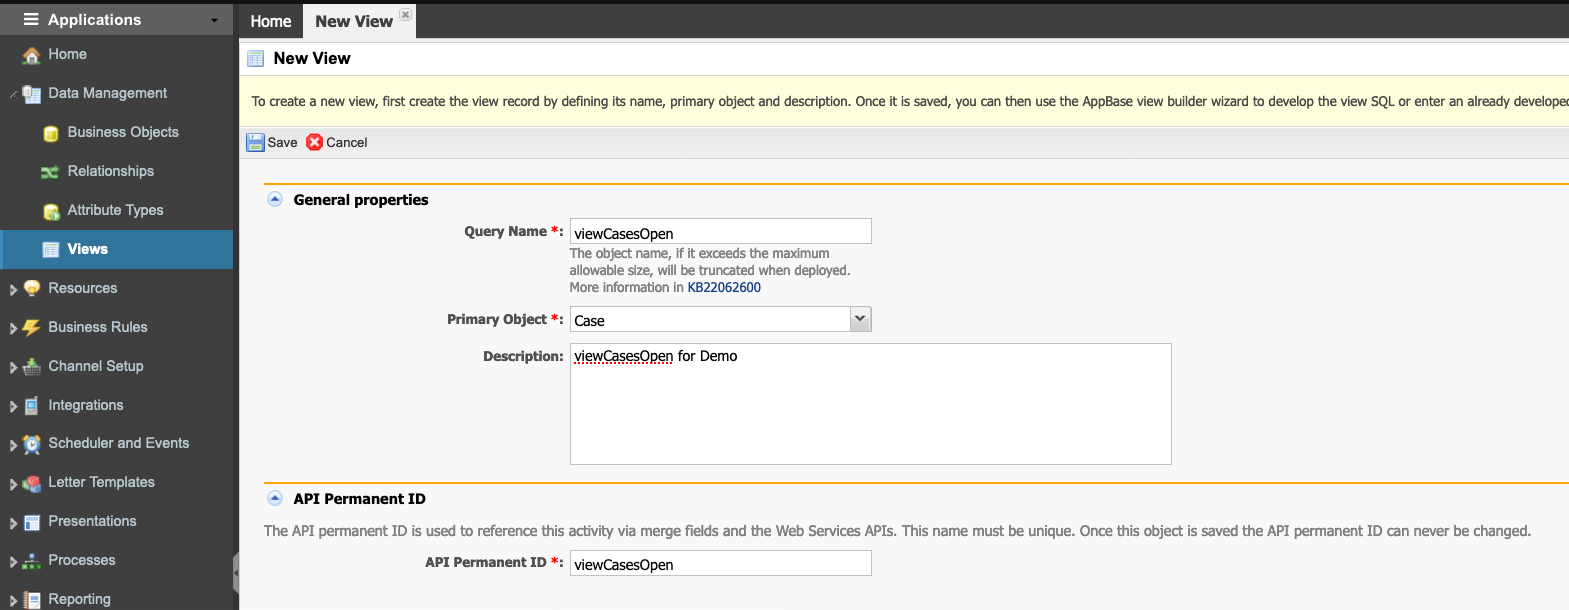
- Click Save to create the view or Cancel to exit without saving.
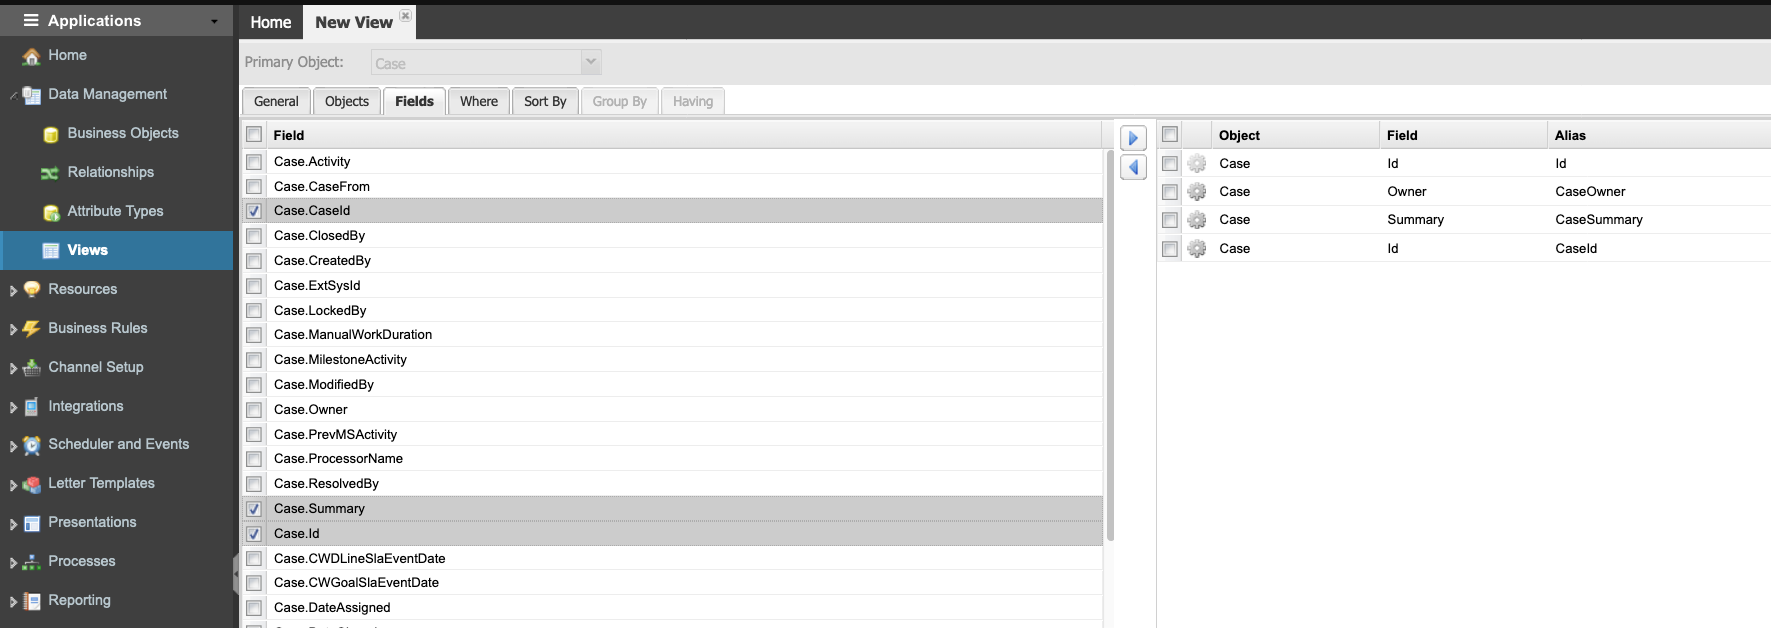
- Once you have saved the view, then the AppBase view builder will open. Here, you can use a wizard-like series of screens to build your view.
- You can enter directly the SQL of an already-developed view in the SQL section at the bottom of the page.
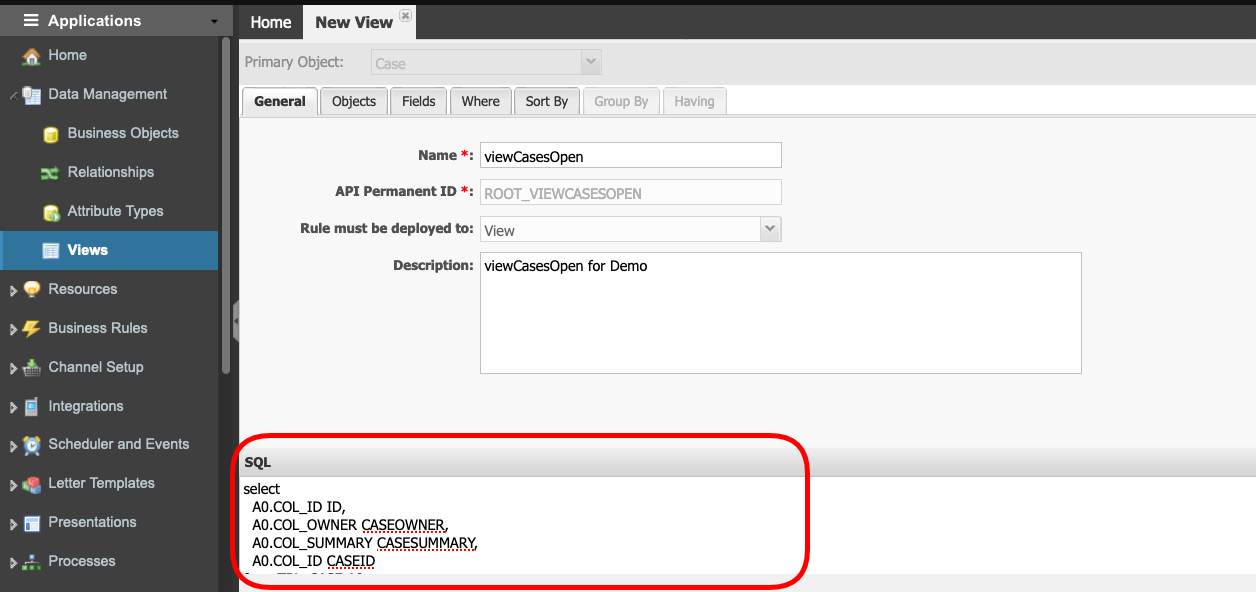
- Click Save to update the SQL for the view or Return to exit without saving and close the View Builder.