A DCM solution provides a range of mechanisms and fields that can be used to categorize and classify Cases. Whilst the number of classifying fields is unlimited by using Custom Fields, the primary useful classification for a Case is the Case Type.
A Case Type is determined first and cannot be changed later.
Steps
On the top right, navigate to→ <<your solution>>
On the left, navigate to → Setup
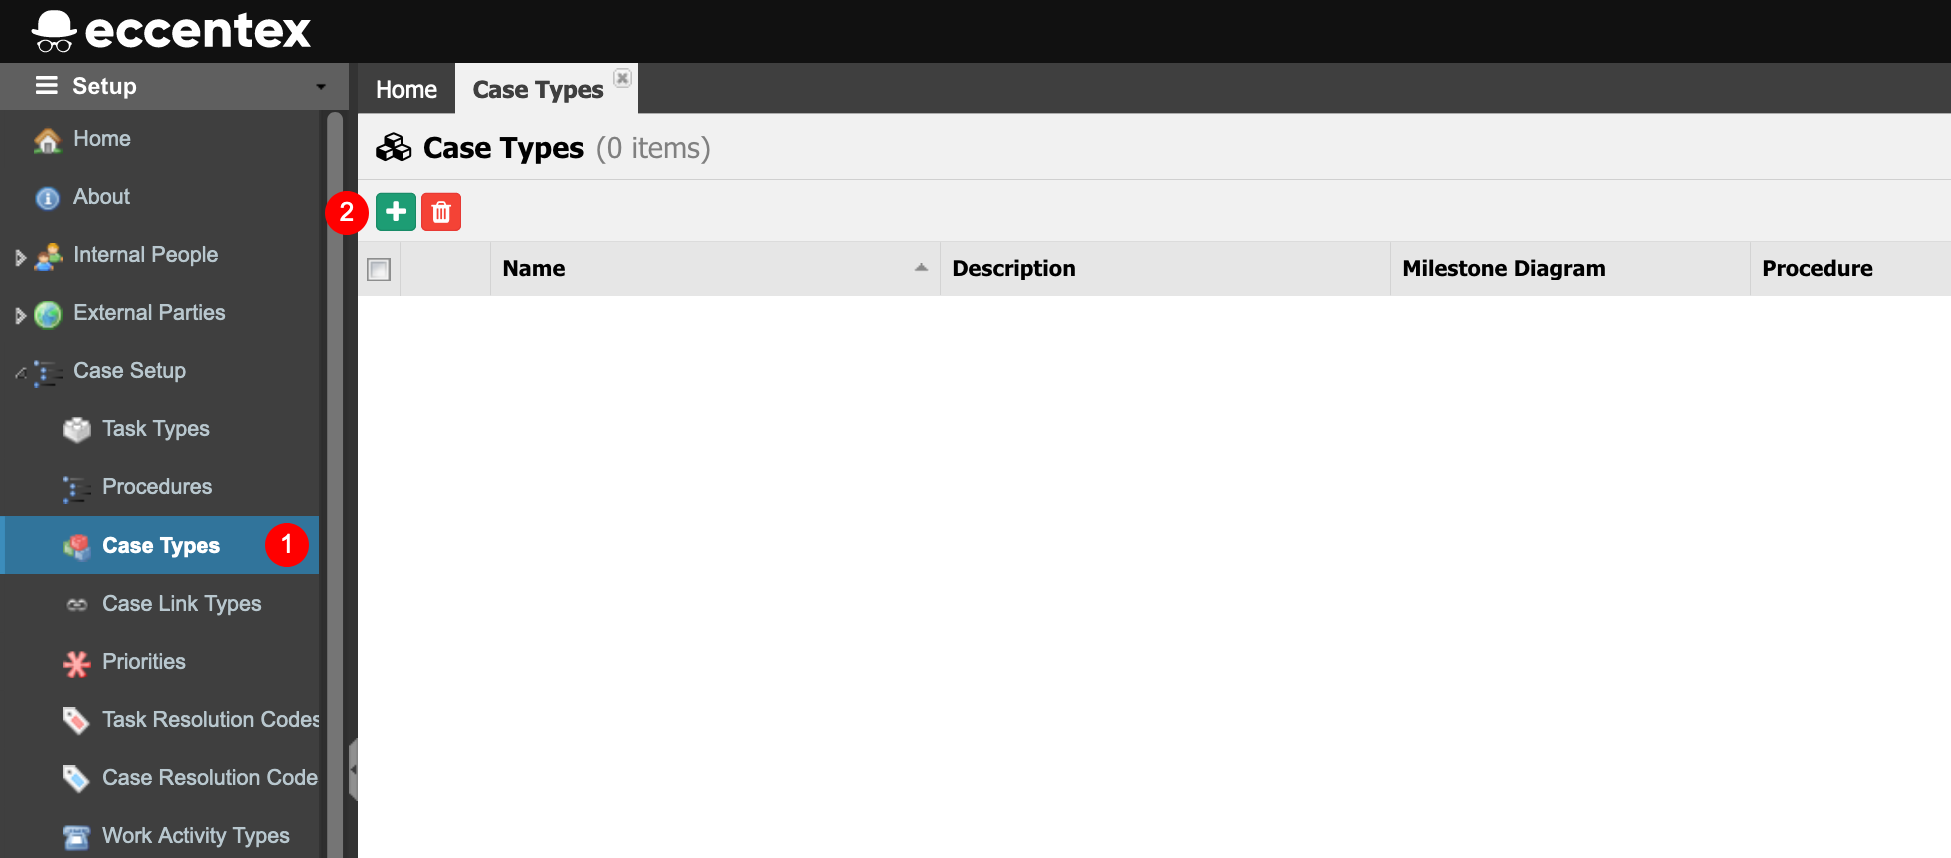
Navigate to Case Setup → Case Types(1), click on the New Case Typebutton (2).
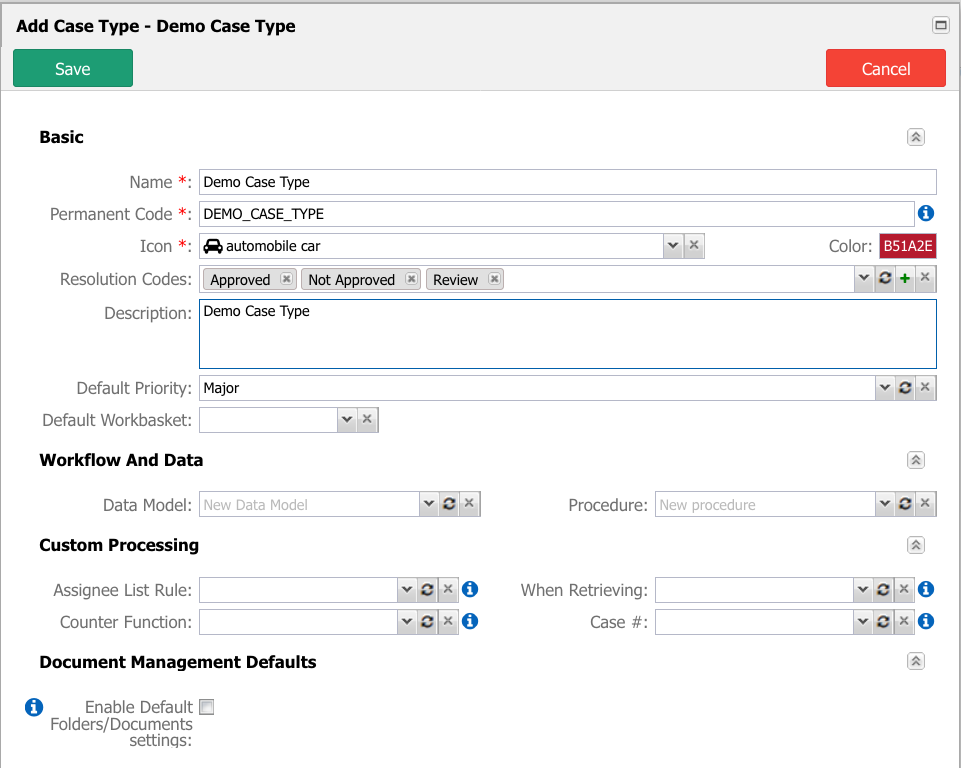
In the Add case Type popup window, enter aName for the case type. ThePermanent Codefield will be auto-populated using the Name field subtracting dash (-) and any spaces or special characters, it also changes to uppercase. You can override Code Value (ensuring no spaces or special characters are used). Code Value cannot be changed after saving
Type‘car’ in theIconfield and select theautomobile caricon as a pictorial representation of our Case Type.
Add some additional styling to the icon that represents the Case Type by choosing the alternativeColorcode. For example, B51A2E(You can use the palette to select a color).
Select theResolution Codesto the Case Type from the list of drop-down values that the caseworker can select when closing a Case to indicate the outcome. Add new Resolution Codes if needed using the plus button.
Insert a brief Descriptionof the Case Type. This is particularly useful for Case Workers when several Case Type options are available when first creating a Case, so your description helps explain when to use this type.
Select the Default Priority from the dropdown list. When a case of this type is created, it automatically will be assigned this priority. Note the caseworker can override this at the execution time for case creation.
LeaveWorkflow And Data, Custom ProcessingandDocument Management Defaultssections by default.DO NOT change anything here for now.
Savewhen done.
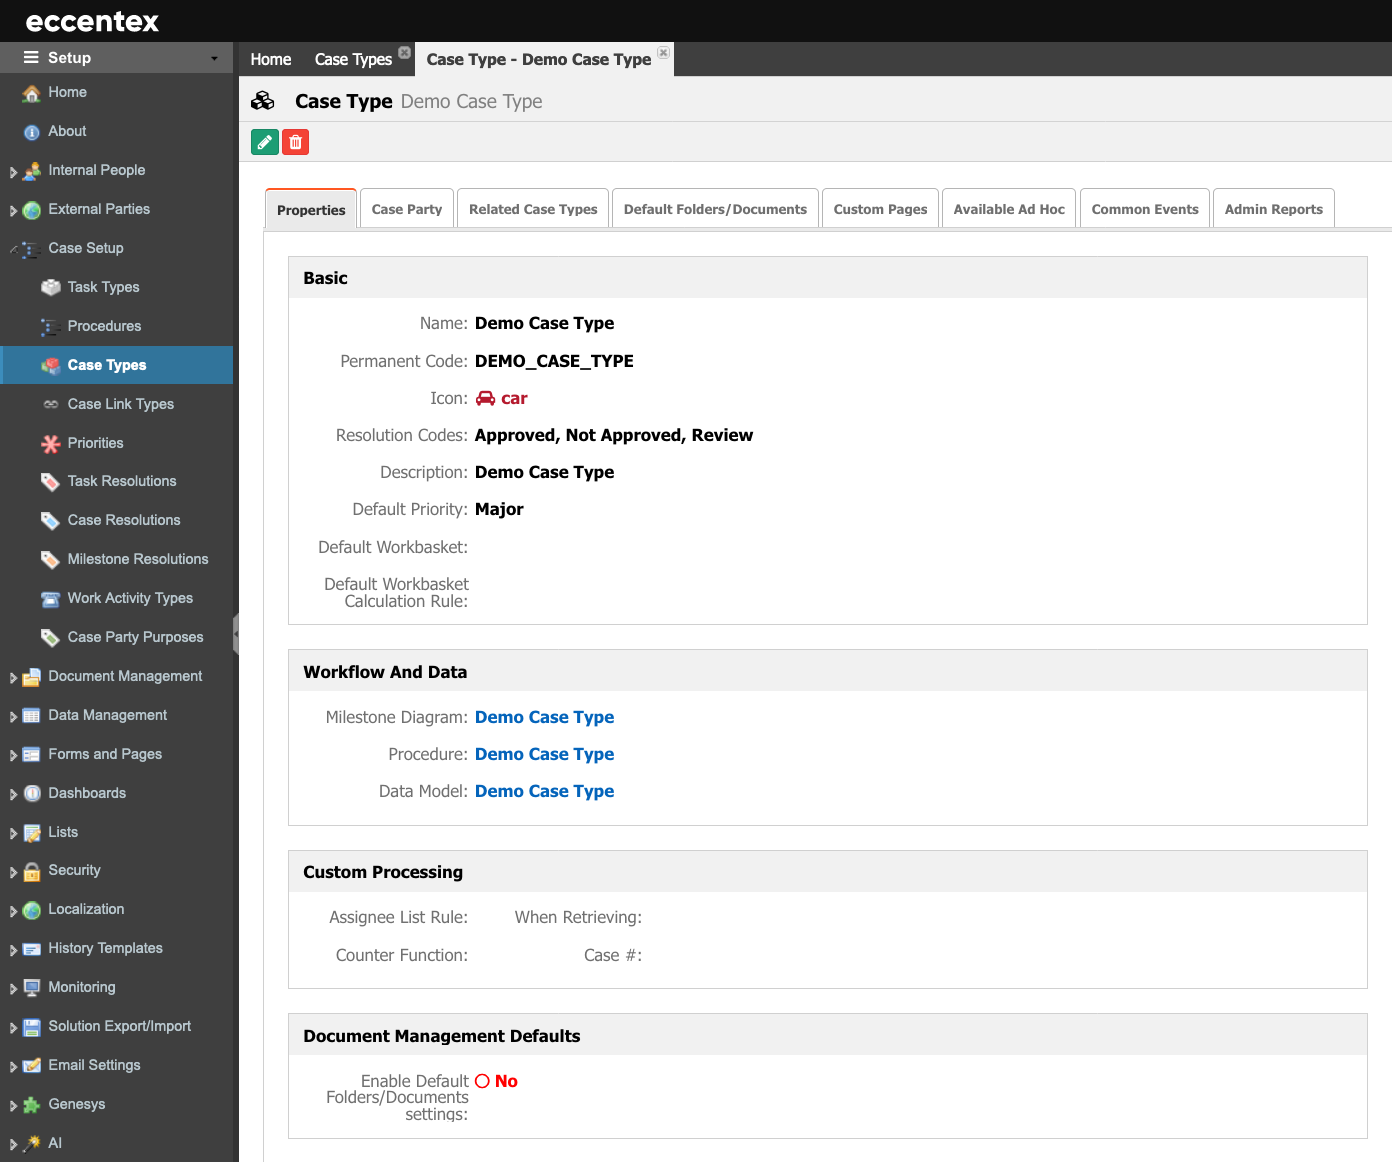
If there are no errors in the process of creating the Case Type, you will see the following summary screen after a short amount of time.
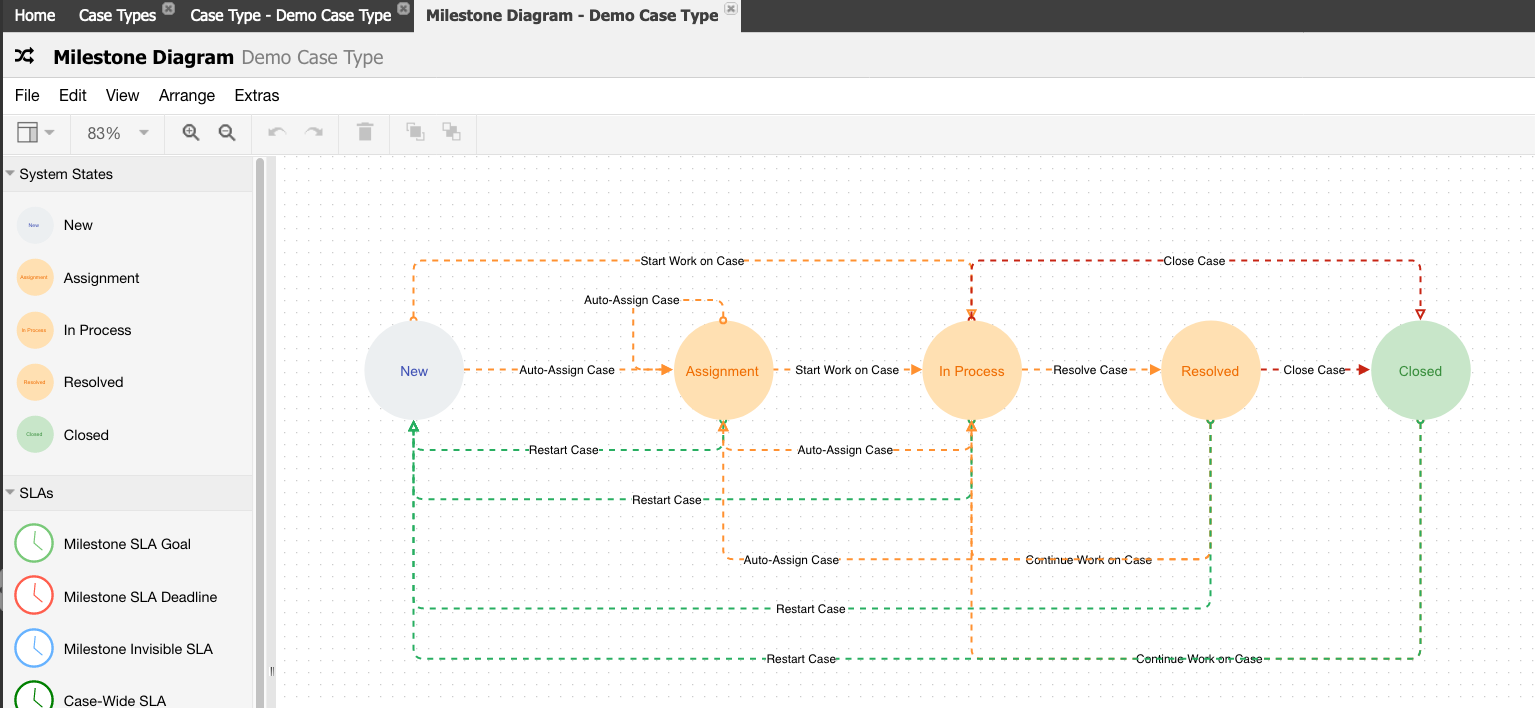
Clickon theMilestone Diagram hyperlink to validate that the default Milestone diagram is also created in creating a Case Type. You can modify this milestone definition later.Closethis window
Click on theProcedure hyperlink to see that in the process of creation of a Case Type the Procedure is created. The default procedure is empty.Closethe window.
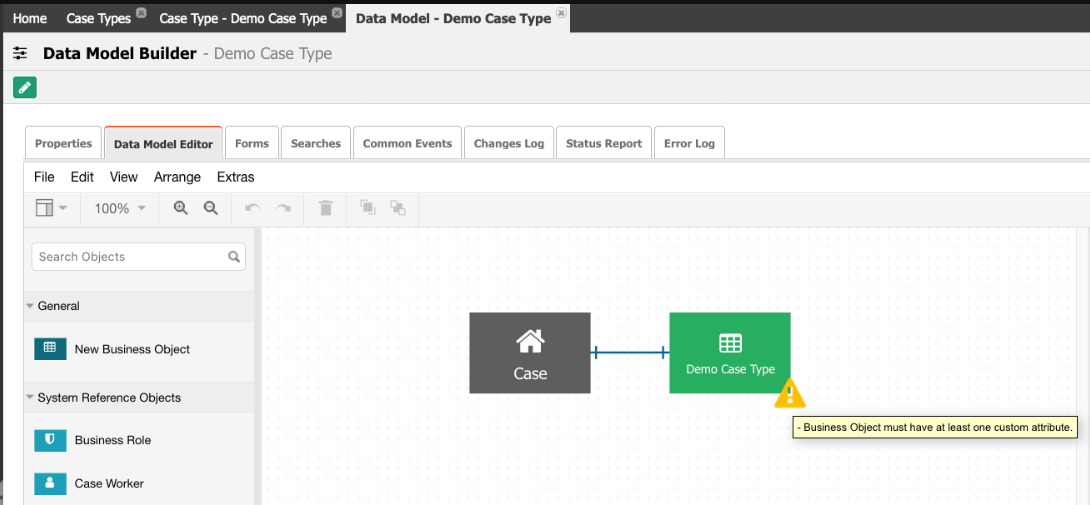
Finally, click on theData Model hyperlink to see that in the process of creating a Case Type, the Data Model is also created with two elements: The Case and the Business Object.Closethe window.
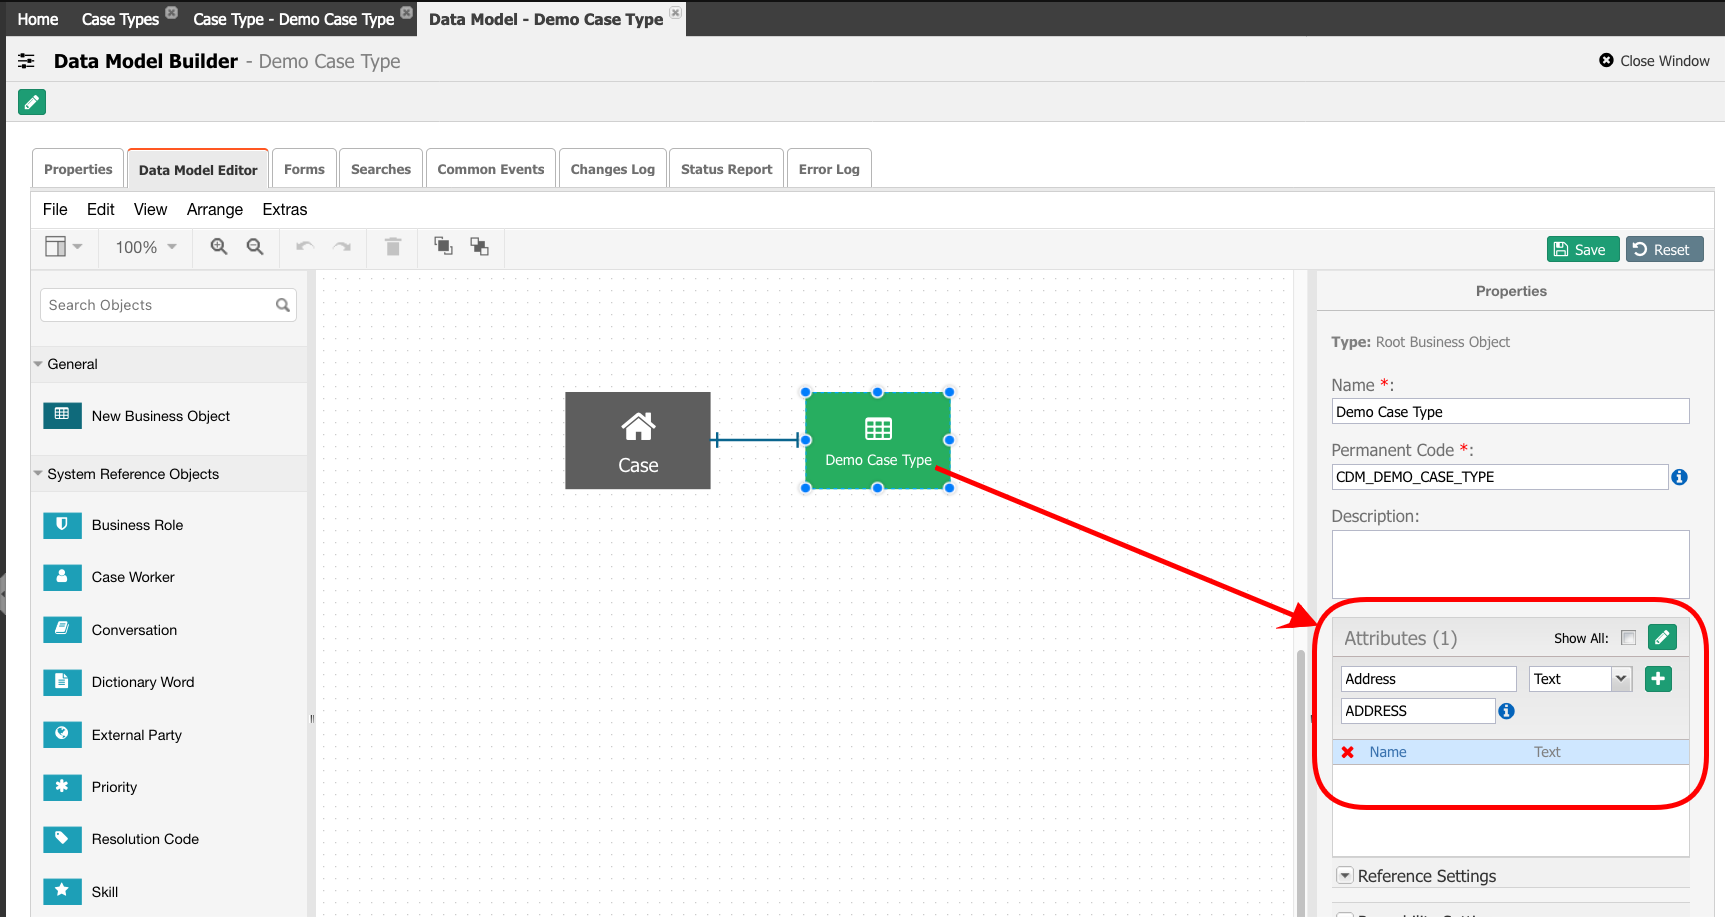
As the Warning indicates, you must add an Attribute to the model. Add attributes using the plus green button on the right panel to do so.
Save the changes to the Data Model.
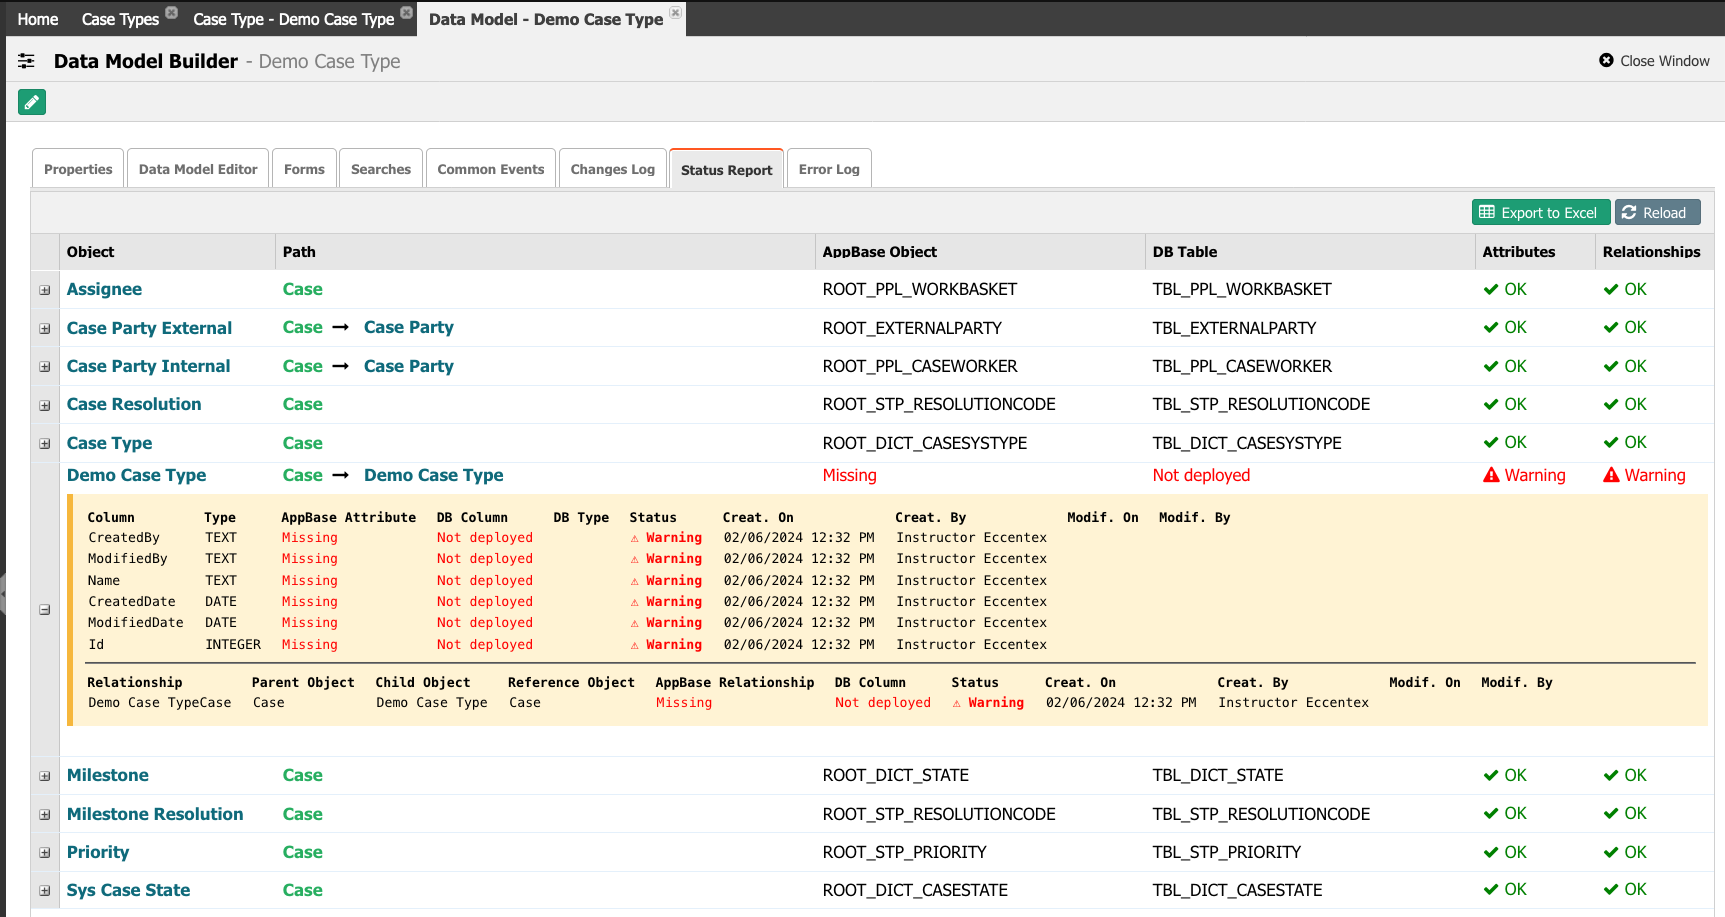
Go to the Status Report tab and validate the status of the model. There will be a Warning indicating that the table is Not deployed.