Conceptually, this is very similar to the DCM Dictionary concept, except it's inherently single-level and not key-value. This "List" concept is closer to an array.
The first use is for Inbound Emails such us Allowed/Blocked/Skipped Lists.
DCM has two list types:
Email Addresses and Domains: Values are validated for email addresses, domains, and subdomains. For example, valid values: blocked@google.com, google.com, gmail.google.com, and gmail.en.google.com.
Text Phrases: Values are validated spaces in first/last positions without <> characters.
It's possible to export/import the list using XLSX format.
Add a Text List
On the top right, navigate to → <<your solution>>
On the left, navigate to → Setup
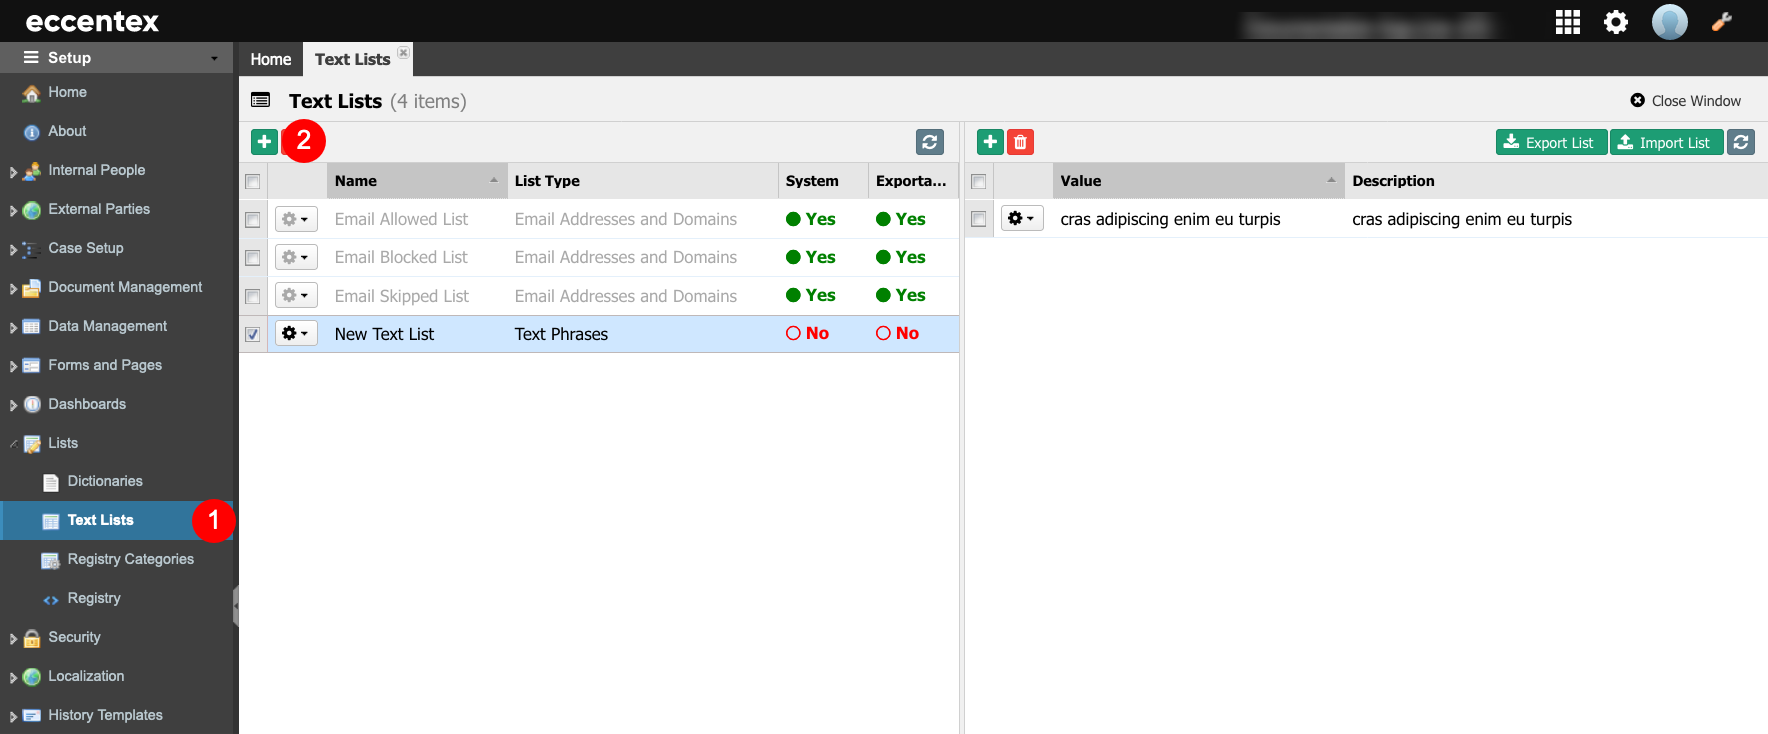
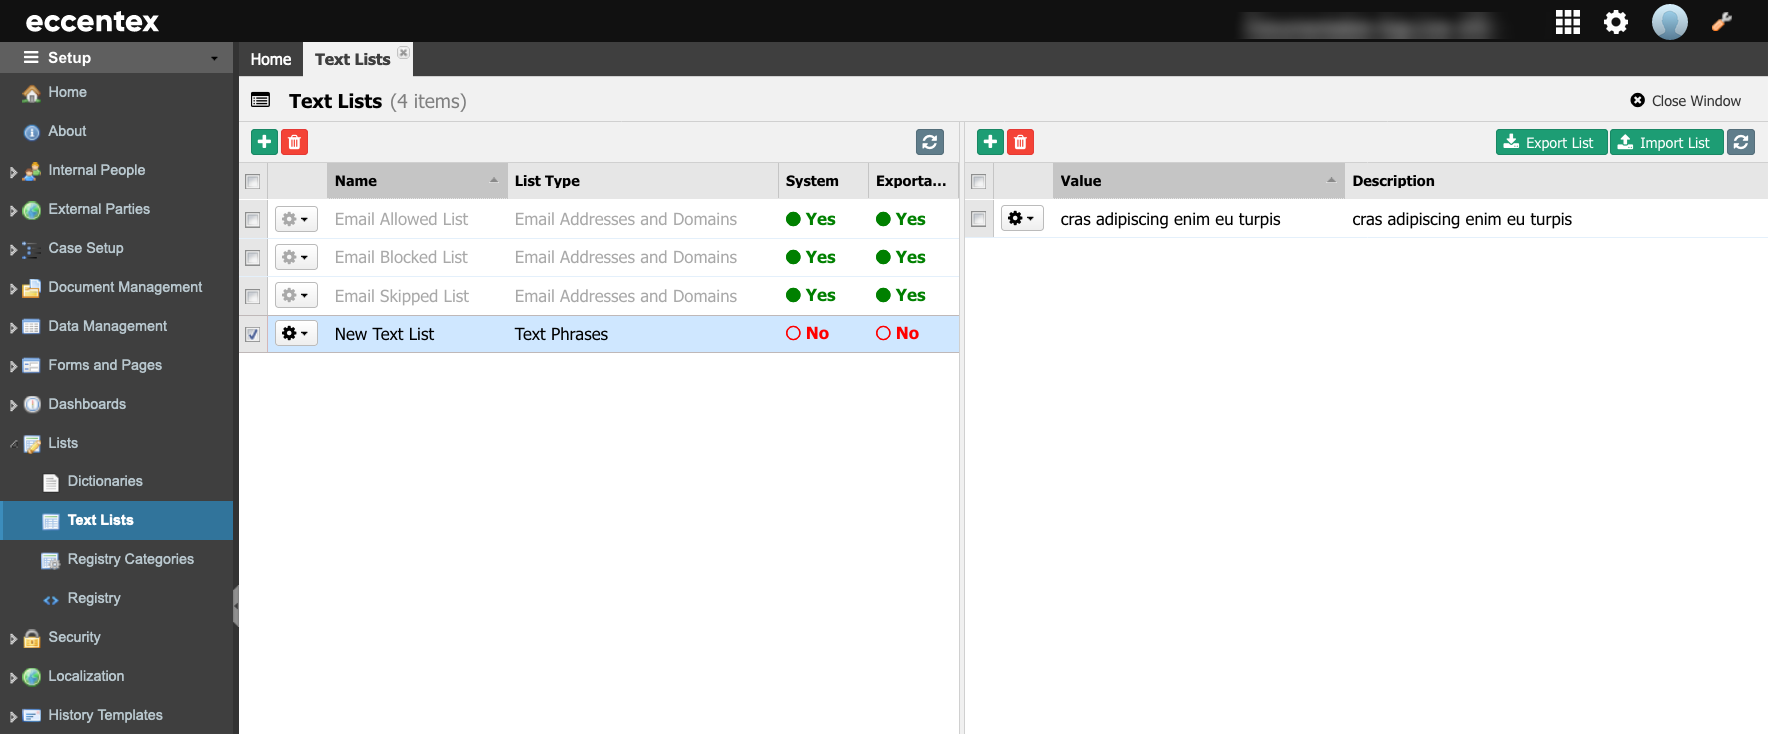
Navigate to Lists →Text Lists(1).
Click on the green plus button ()to Add New Text Lists (2).
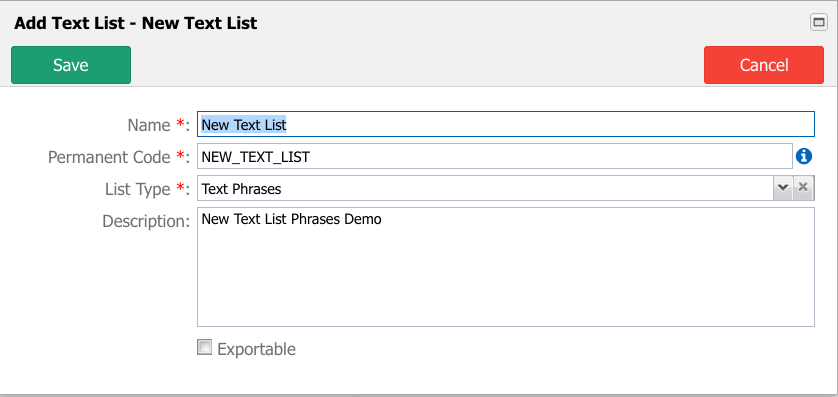
Insert aNamefor the Text Lists. In our example, ‘New Text List’.
ThePermanent Code field will be auto-populated using the Name field, subtracting dash (-) and any spaces or special characters; it also changes to uppercase.
You can override Code Value (ensuring no spaces or special characters are used). The code Value cannot be changed after saving.
Select theList Type. In our example, Text Phrases.
Insert a briefDescription.
The Exportable flag determines whether the list will be exported during DCM Export Full Configuration.
When done, Saveit.
Add a Value
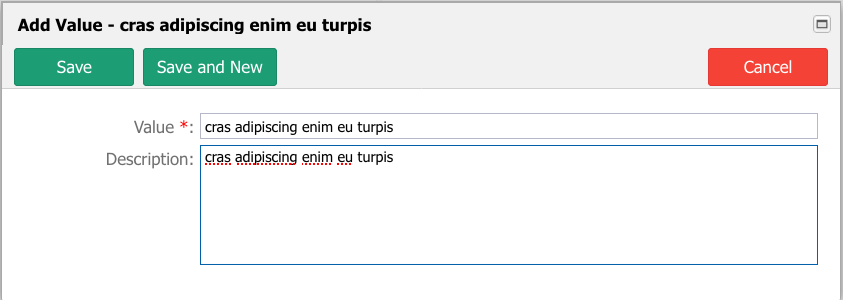
Select a list to add values.
Insert theValue to the list. In our example, "cras adipiscing enim eu turpis."
Insert a briefDescription.
Savethe new Word orSave and Newto create a new word without closing the popup window.
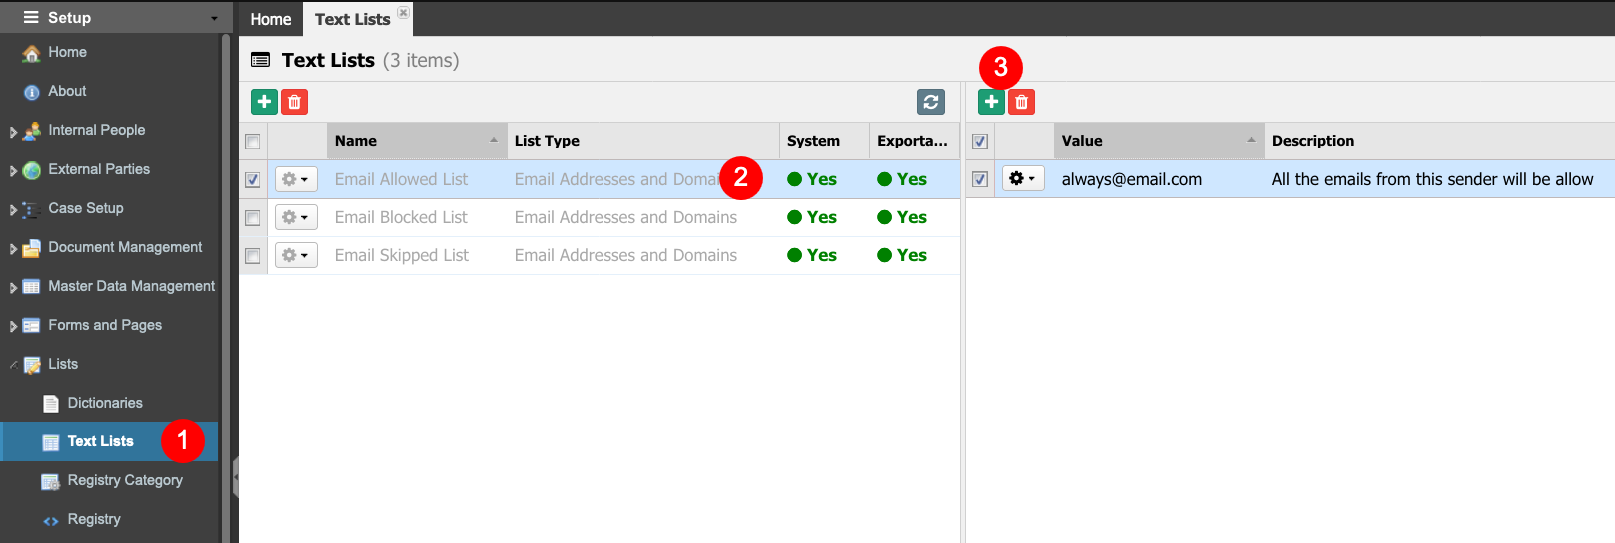
Managing Email Lists
Configuration of the Lists of email addresses used in the Inbound Email Settings -Rejection Criteria configuration. This configuration is intended to determine whether an email should be completely rejected.
On the left, navigate to → Setup
Navigate to Lists →Text Lists(1).
Select the List on the left panel (2).
Add a new email address on the right panel using the plus green button (3).
To remove an email address, click on the red trash can button.
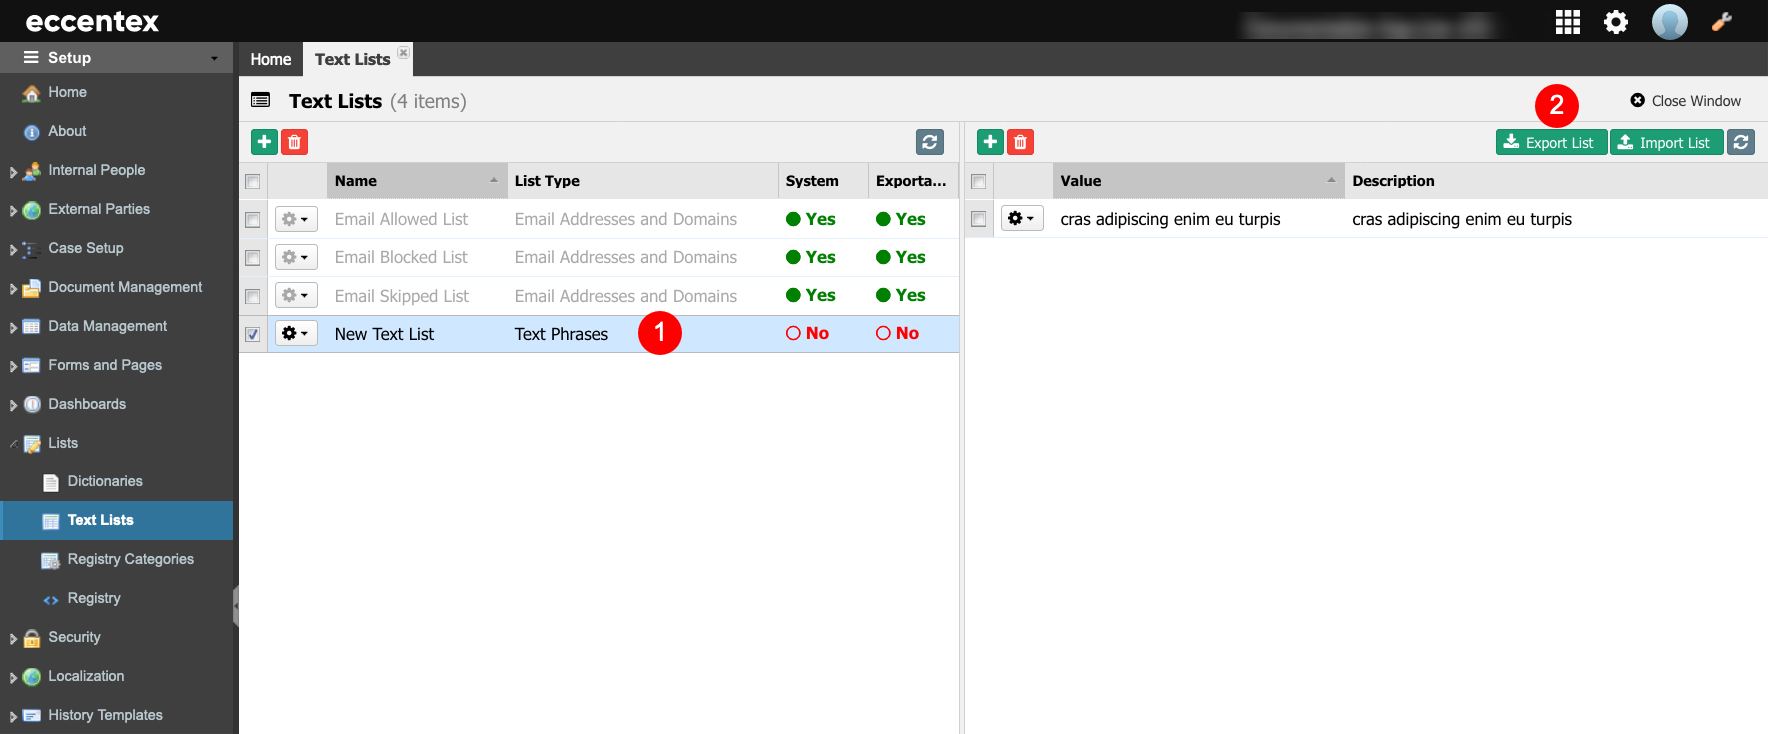
Migrating a Lists
On thesourcesolution, select theText Lists(1) to be exported, then click theExport Listbutton (2).
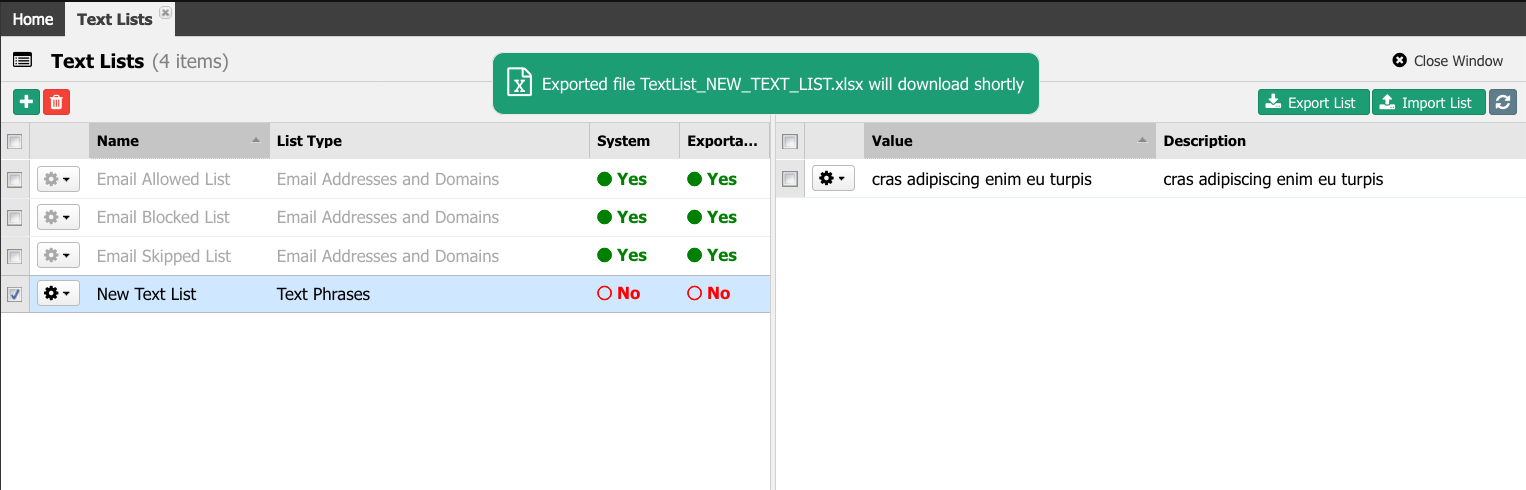
The MS Excel file will be downloaded to the local disc using a name pattern likeTextList_TEXT_LIST.xlsx. In this example, the file name will beTextList_NEW_TEXT_LIST.xlsx.
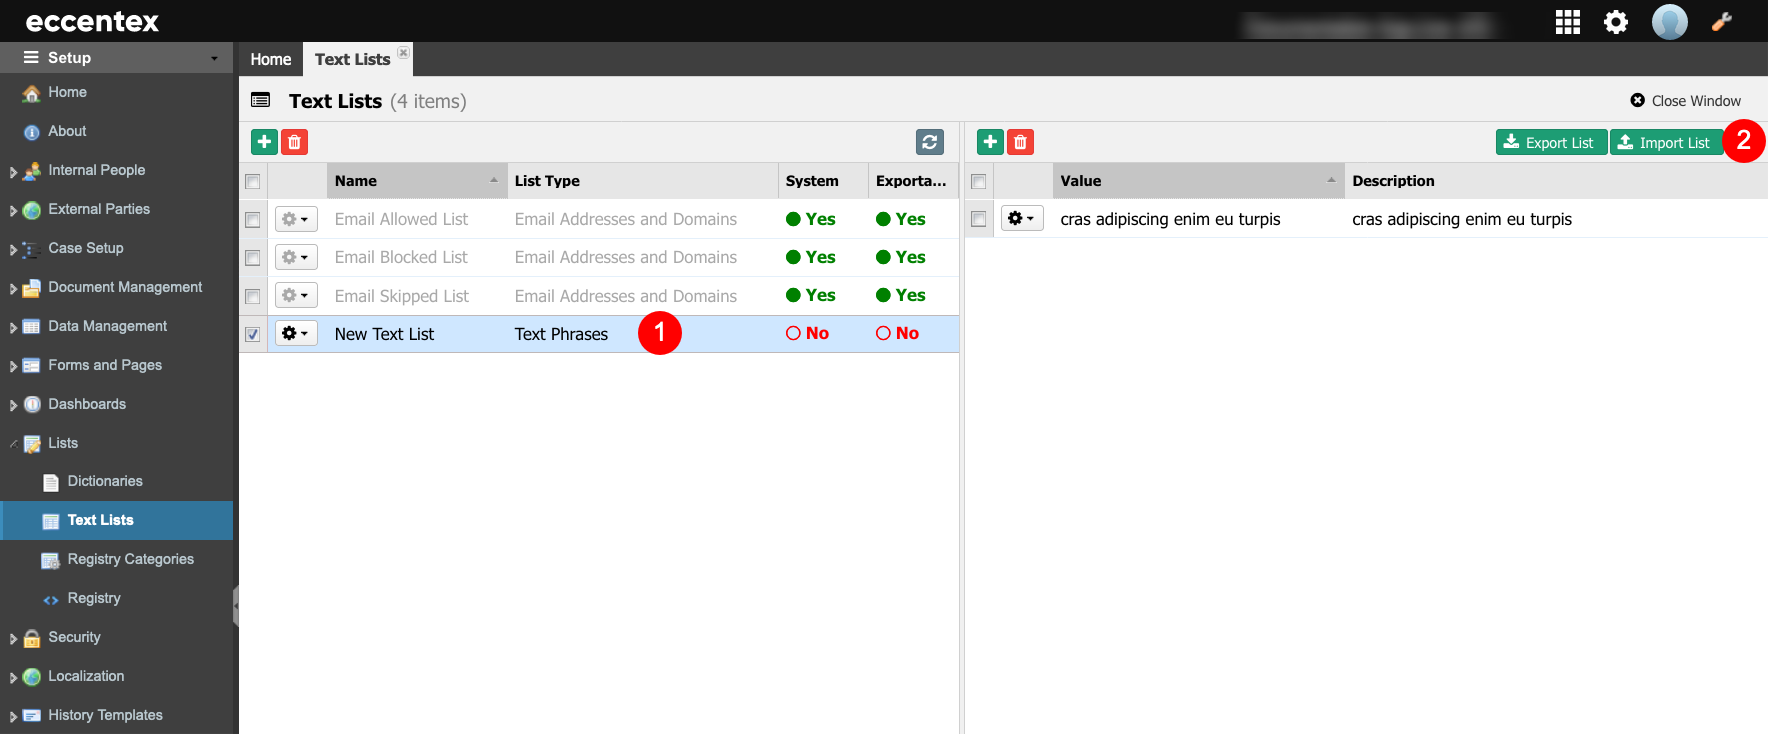
On thedestinationsolution, create the text list to be imported, or select an existing one where the values will be added.
Click theImport List button (2), select the file, and after a couple of seconds, the list content will be updated, showing the newly added values. In our example, we selected the listNew Text List.
This action can not be undone. Be careful when selecting the right category before starting to import the values.