
26. Update a Solution Configuration
Once the delivery project has two or more solution environments there is always a need to update the subordinate environment (Test, Production, etc.) with the configuration from the development environment. Again the recommendation is to do this on a regular basis, ideally after every development sprint.
Usually, this process will consist of the following steps:
Prepare the Update Package
- In the source environment, do an AppBase solution export file following the steps in 24. Backing Up DCM Solutions
- Download the file and save it as DCM_solution.ZIP in a safe place.
Export the solution runtime configuration with DEXP. Navigate to Data Export/Import (1) Menu section, on the Select Configuration select DCM Update Export (2).
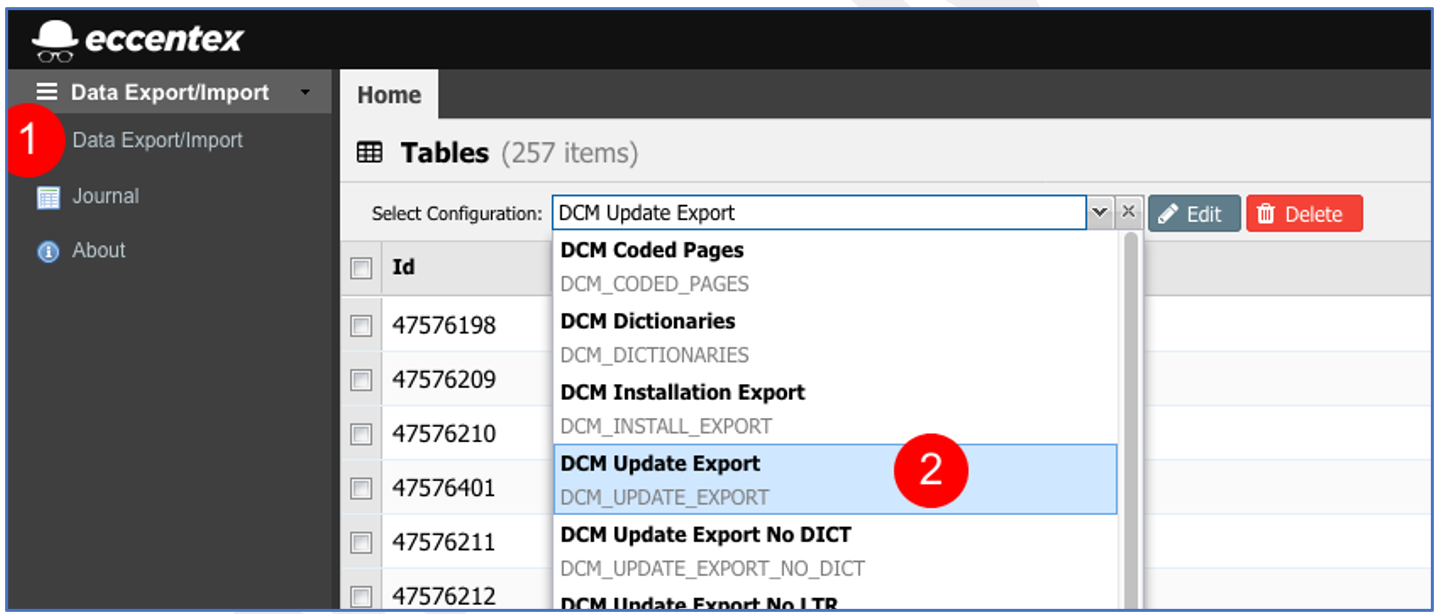
- Then click on the Export Selected button.
Prepare the configuration access subjects export file as in 24. Backing Up DCM Solutions - Exporting Additional Resources.
Additional resources that might be required depending on a solution (this is a less common situation).
Solution Update Instructions
Usually, the update instruction consists of several similar steps that are updated based on the context of solution changes between updates
- Backup the current configuration on the target environment as in 24. Backing Up DCM Solutions
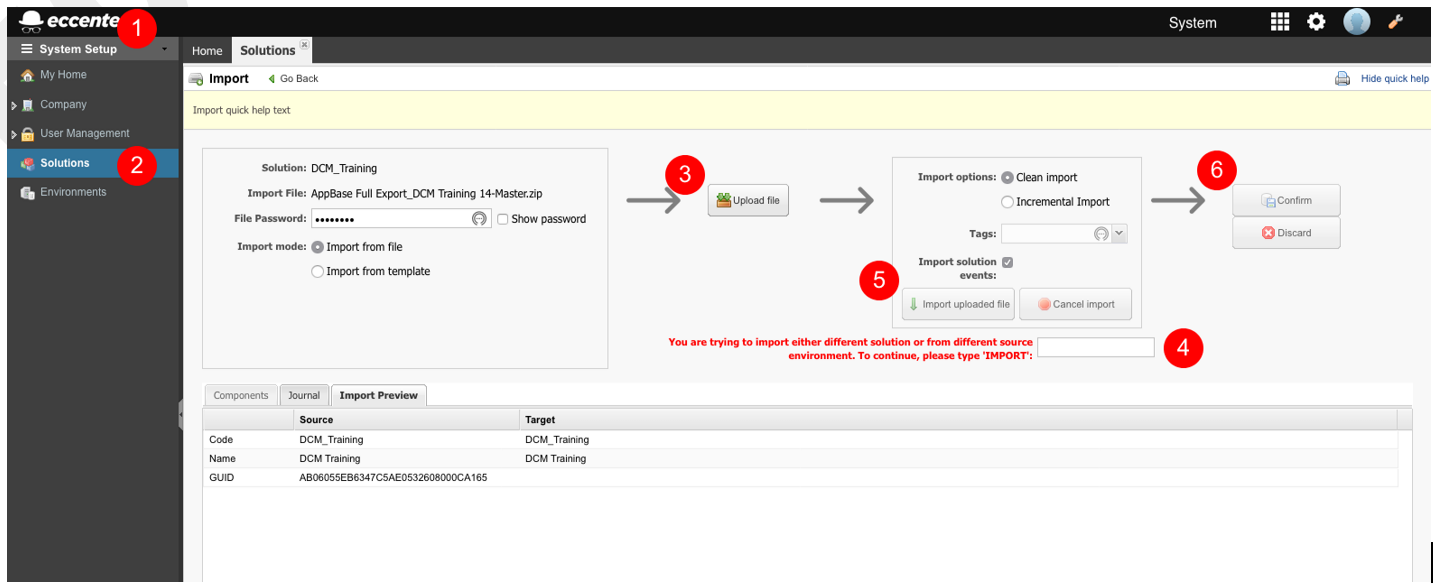
- In System Setup > Solutions, import the source AppBase solution (the DCM_solution.ZIP file saved in the previous chapter).
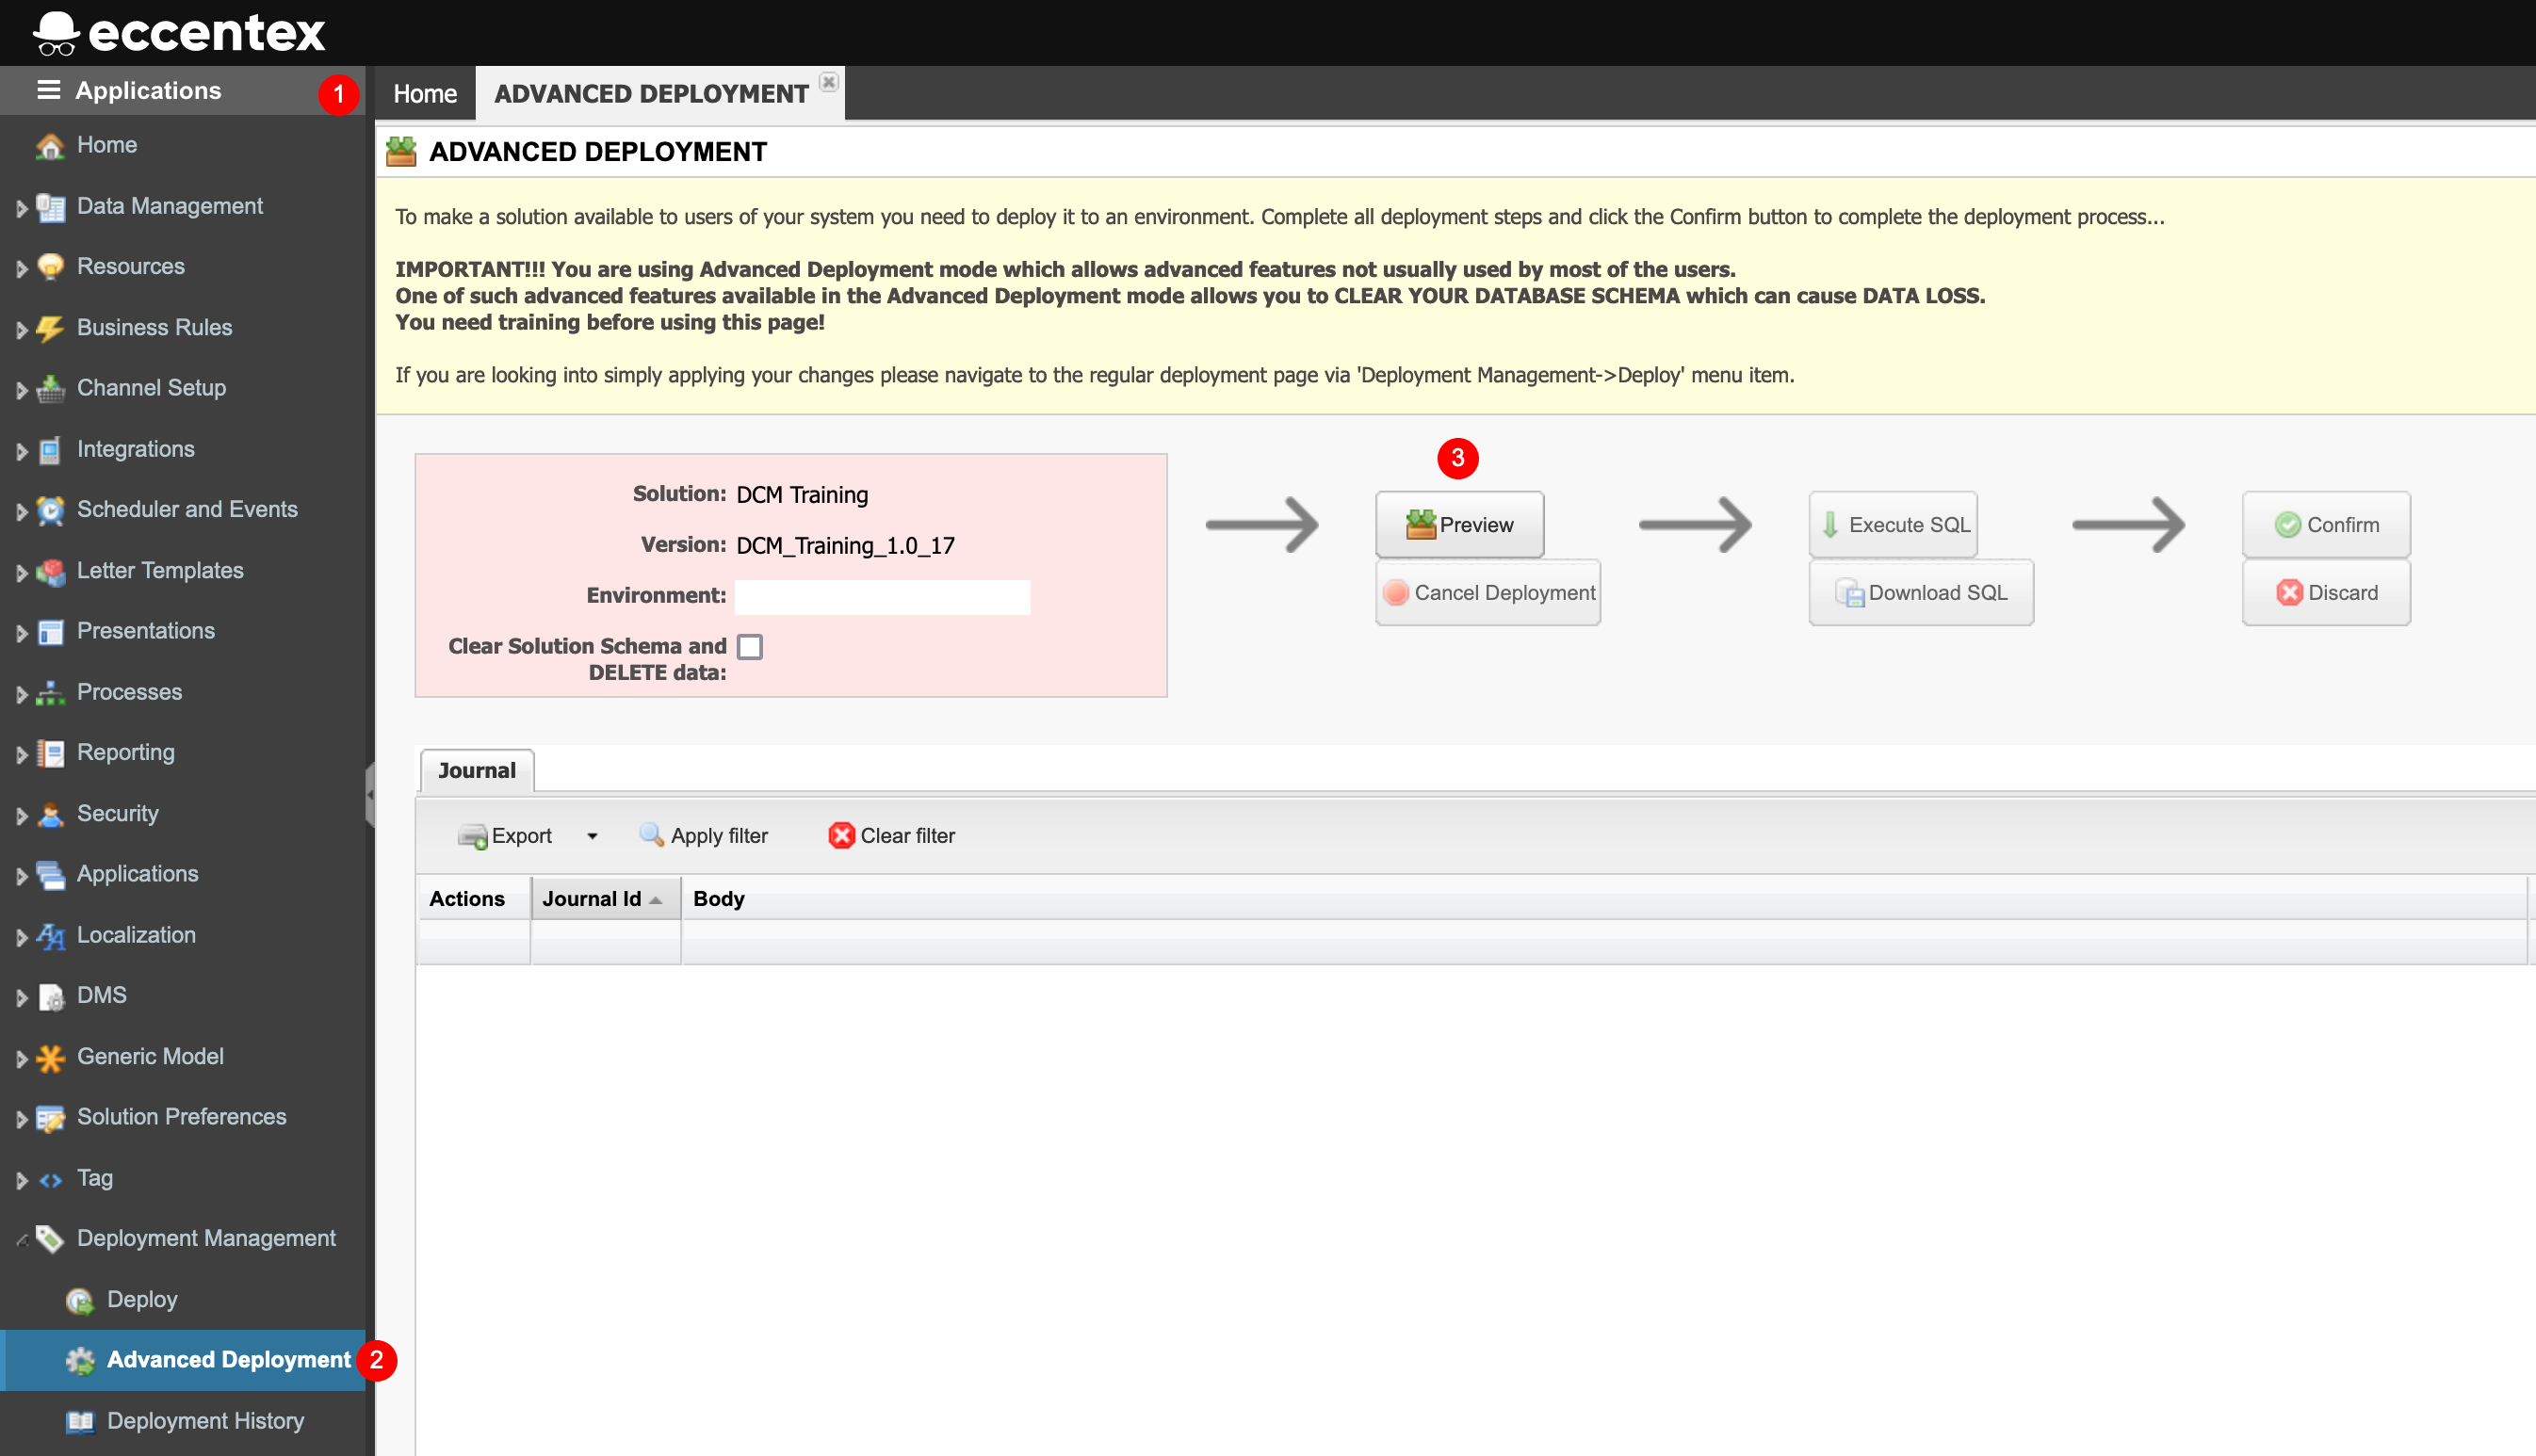
Navigate to Application Studio -> Deployment Management > Advanced Deployment, and run the deployment of the new imported AppBase solution.
- If there are no errors, go to the next step.
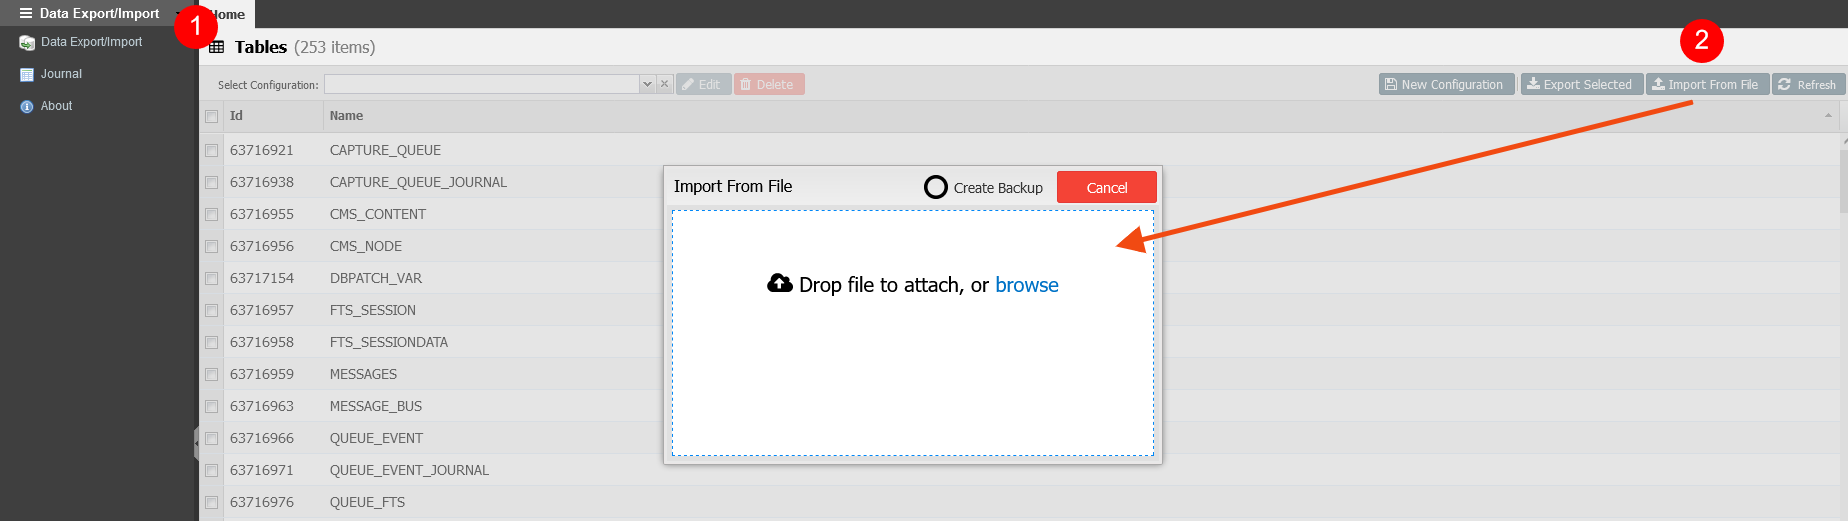
- From the Data Export/Import Menu section (1), click on the Import From File button (2).
- Unselect the ‘Create Backup’ option and browse for the file created in 24. Backing Up DCM Solutions step.
- Setting up users, configuring integrations, setting up correct environment variables, security objects (Business Roles, Teams, Skills, and Grouped Workbaskets)
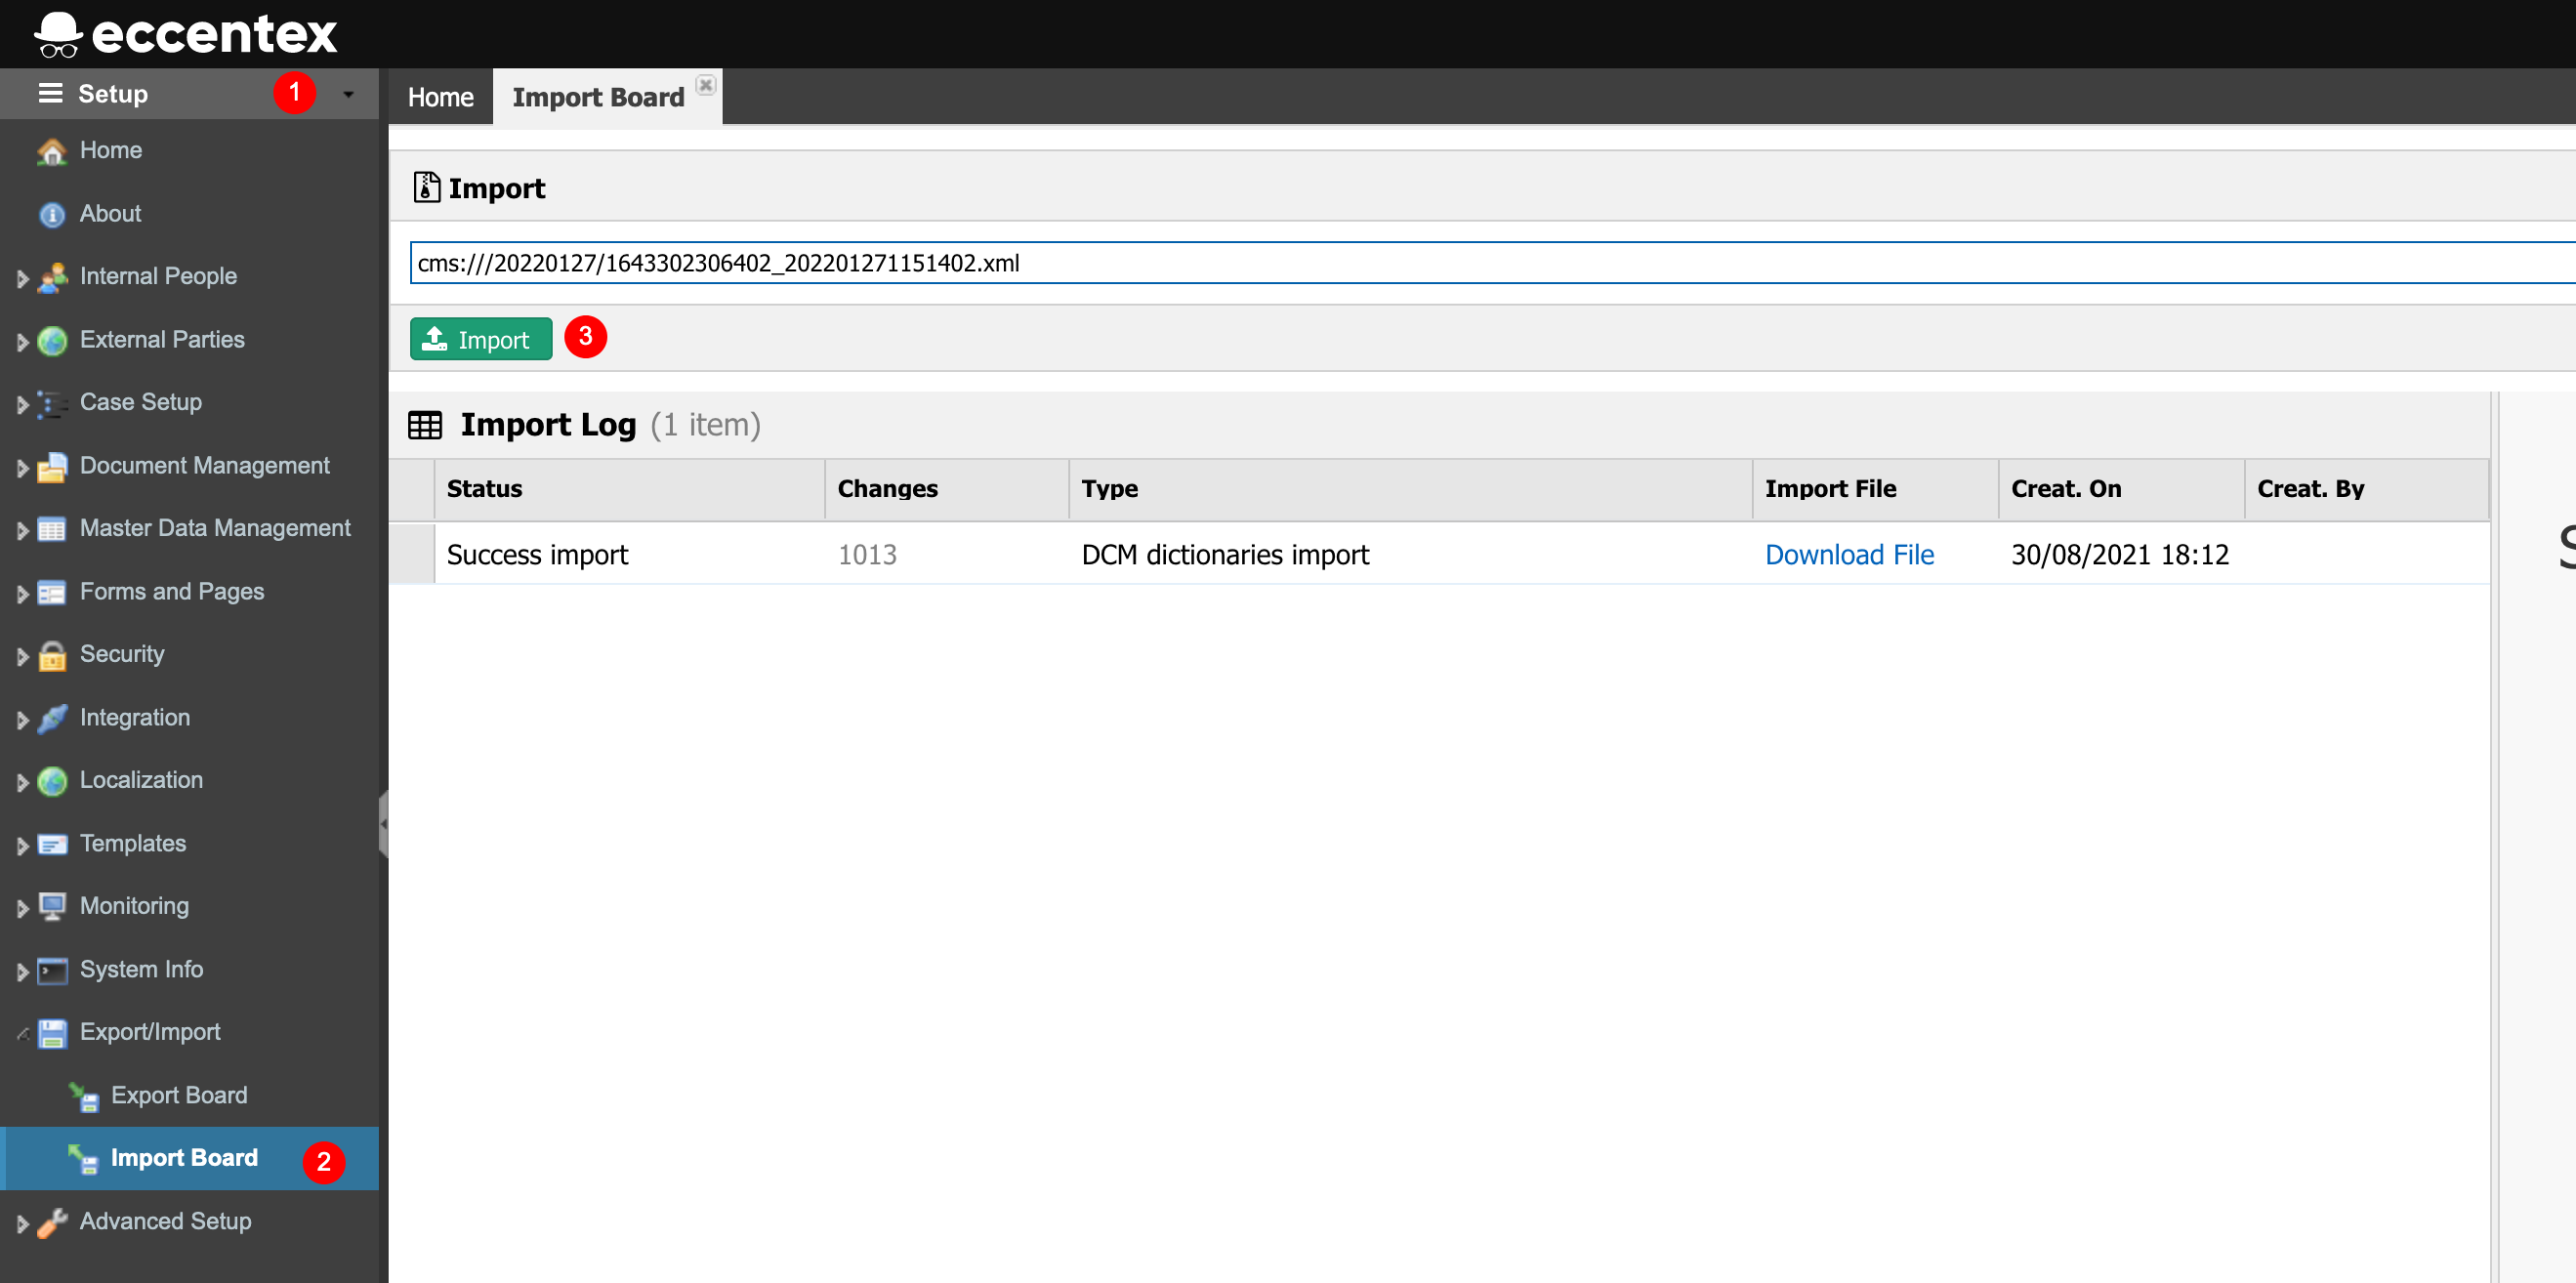
- Navigate to Setup > Export/Import > import Board (2)
- Click the magnifier glass icon and select the source export file obtained in the 24. Backing Up DCM Solutions chapter.
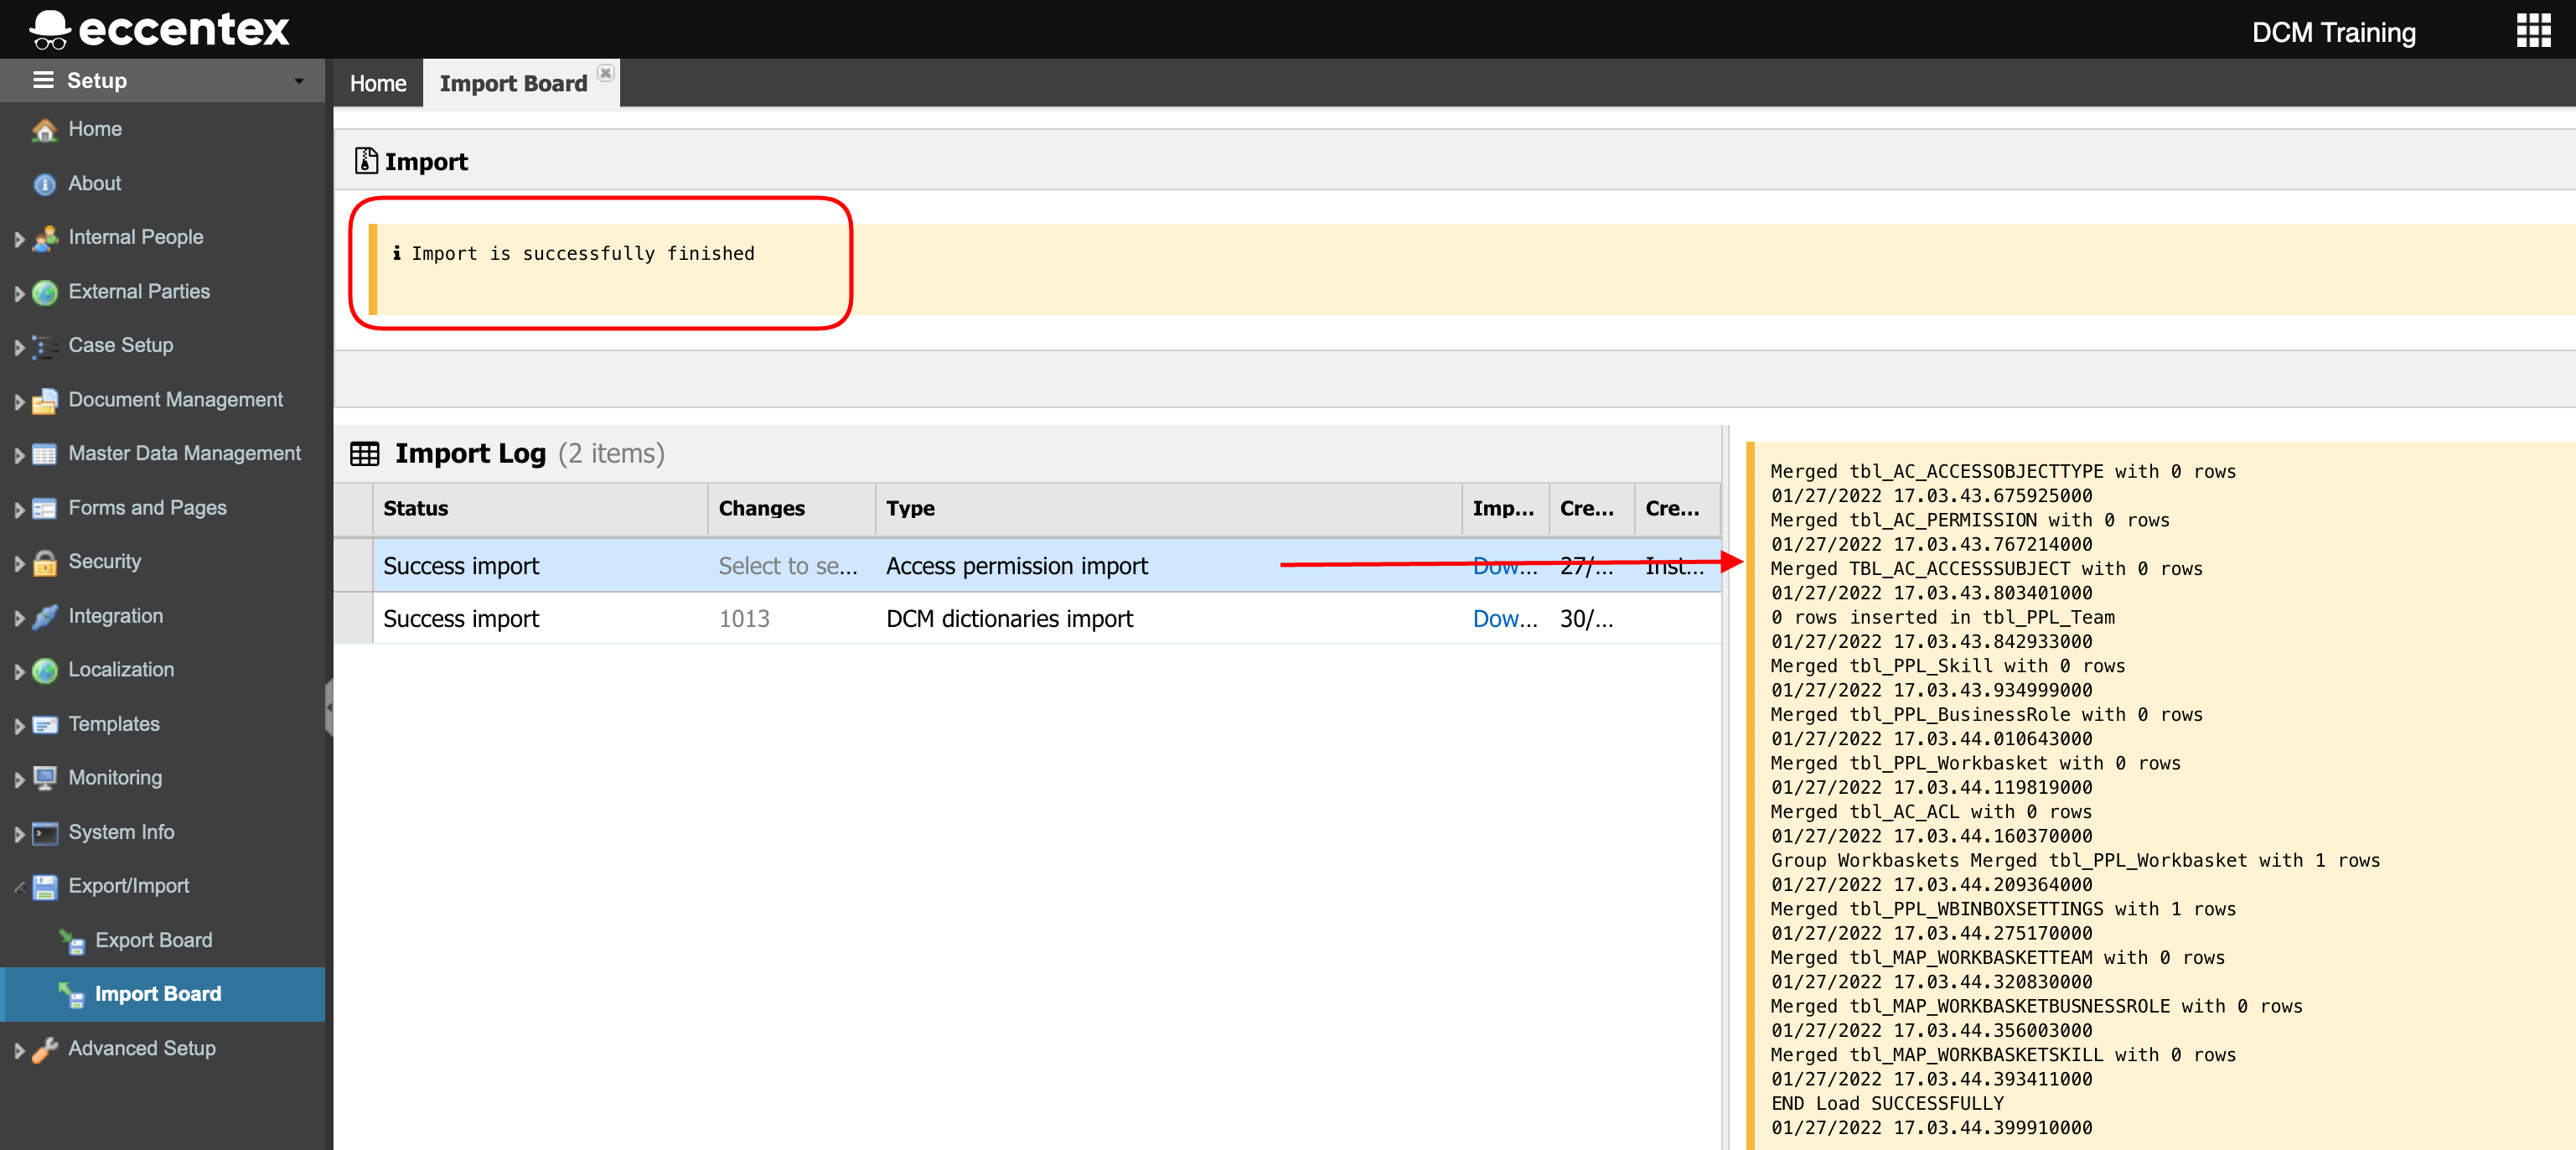
- Click the Import button (3) and wait for the import to finish.
- When the import finish you will see a new record under the Import Log view. Click the last import record and see the details on the right window.
- Optionally perform environment-related configurations like setting up users, configuring integrations, setting up correct environment variables, etc.
Next Steps
DONE!