As we have added fields to the Auto Loan Business Object, it is necessary to deploy our solution so our changes take effect on the Business Object Model.
Steps
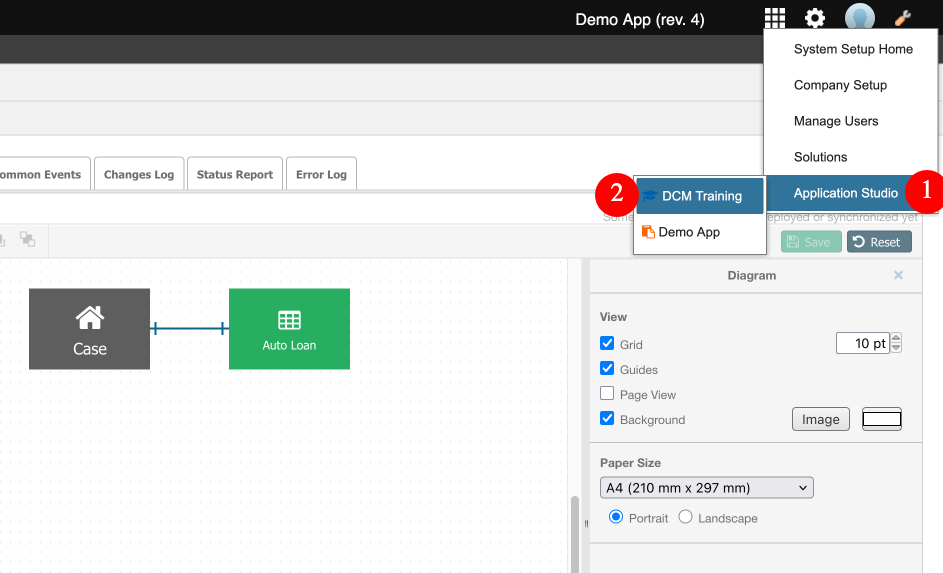
In the upper right corner, click on the gear icon, select Application Studio (1), and then select the DCM Training solution (2).
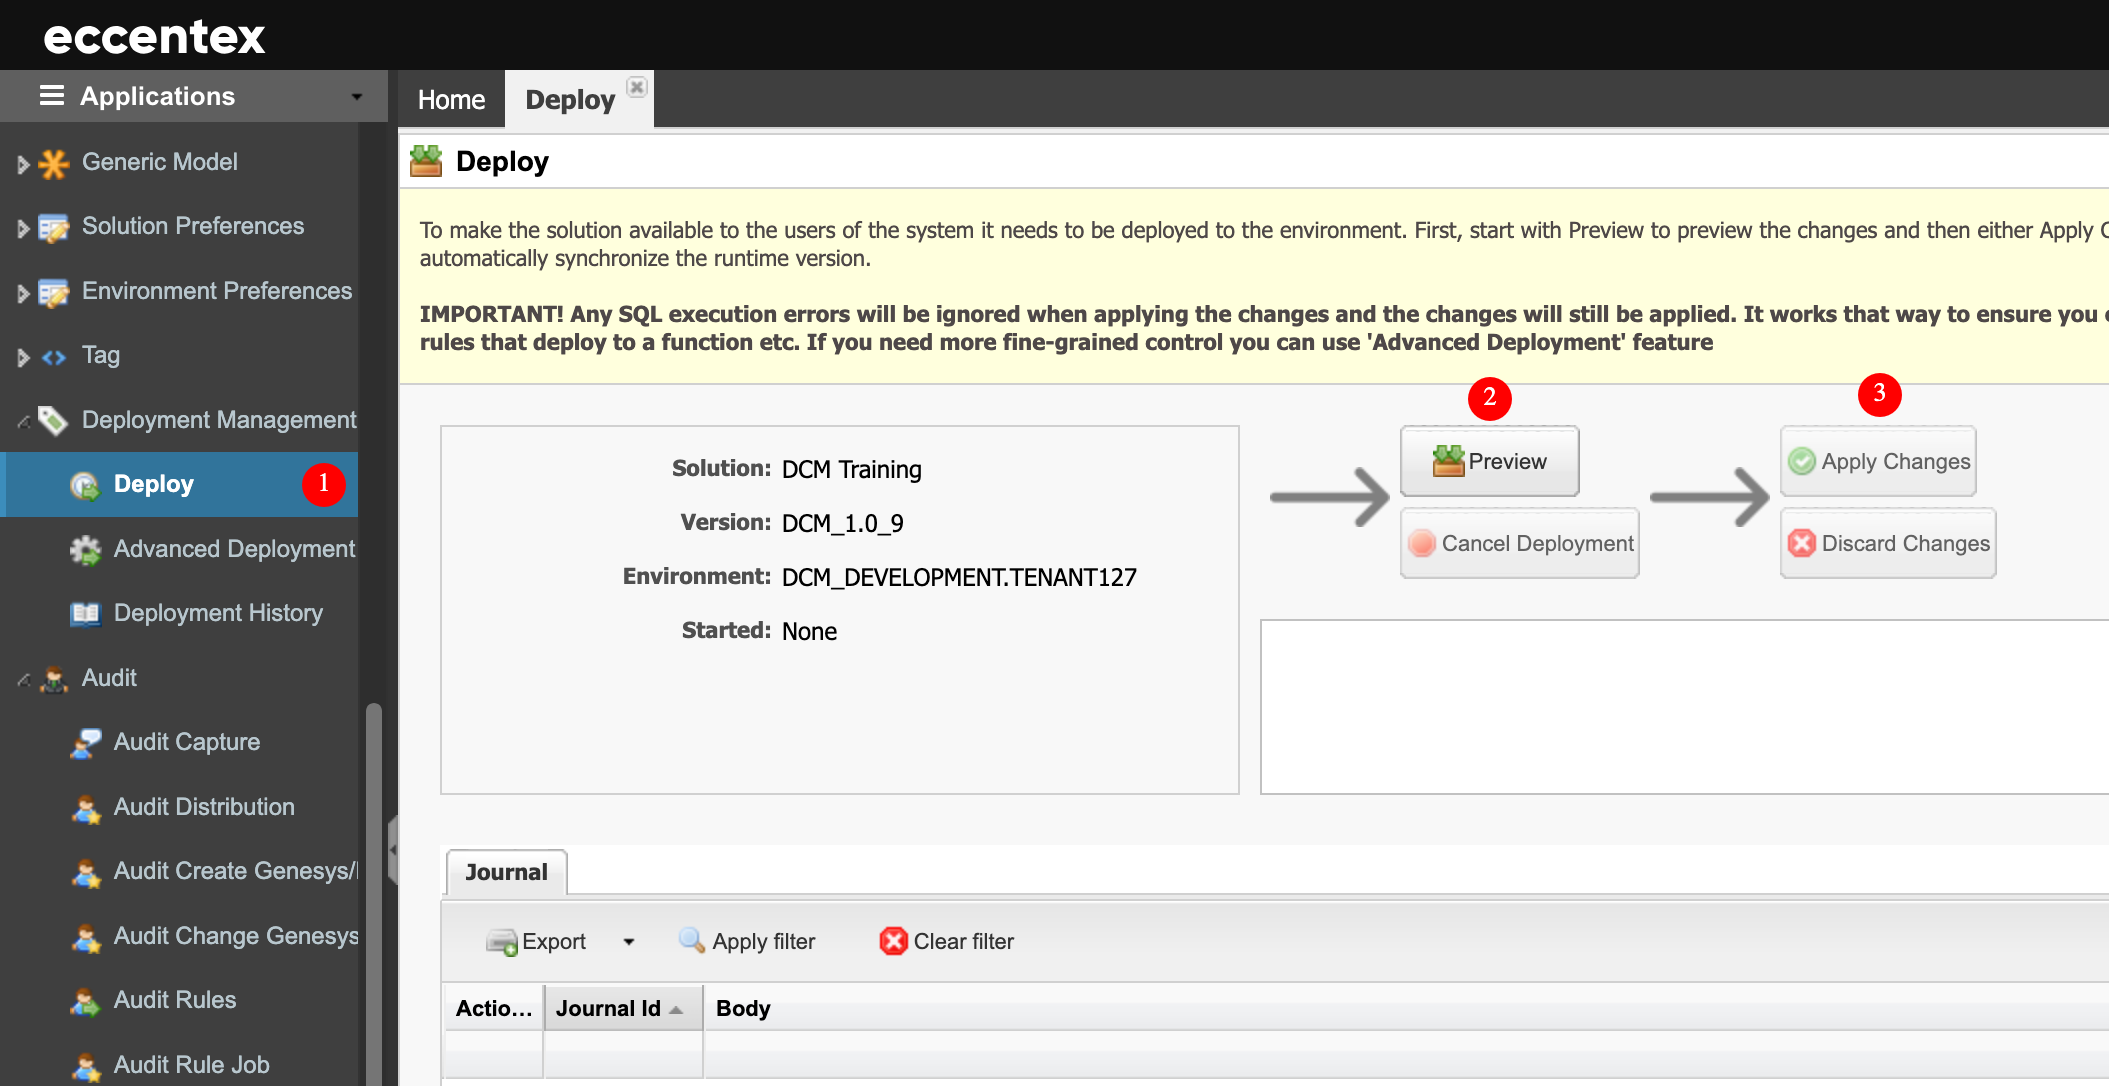
Navigate to Deployment Management → Deploy (1). Deploy is a process of two steps: Preview (2) and Apply Changes (3). You need to wait for every step to finish before you can move to the next step.
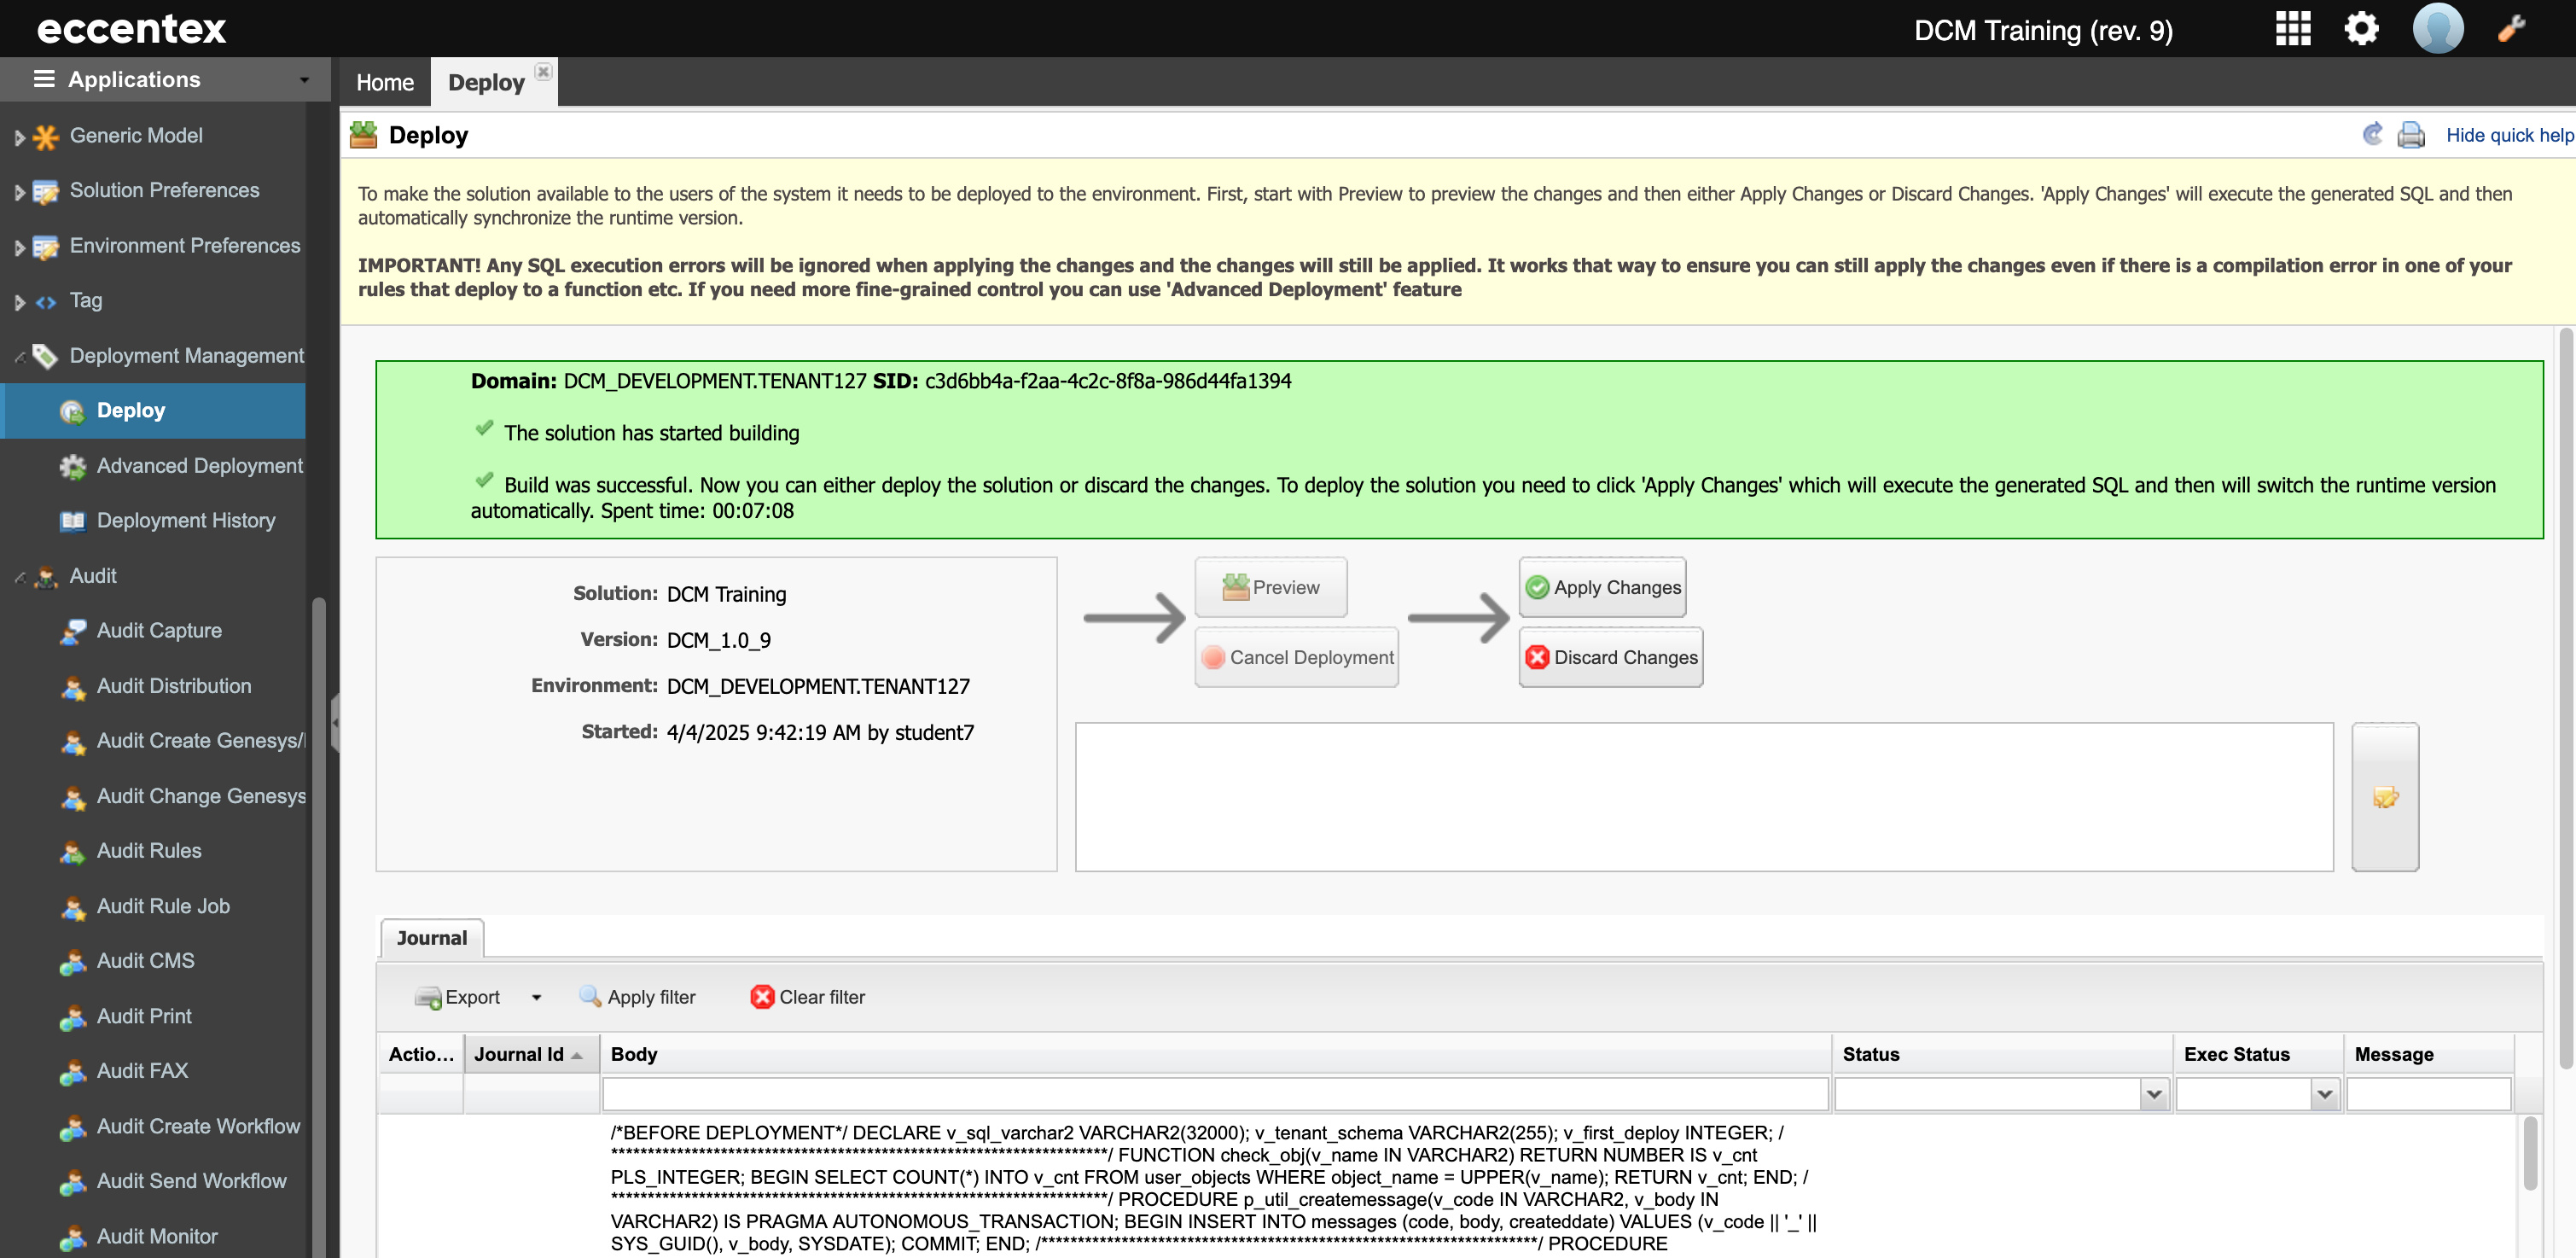
Start the process by clicking the Preview button and wait until you have a message like “Build was successful. Now you can either deploy the solution or discard the changes. To deploy the solution you need to click 'Apply Changes' which will execute the generated SQL and then will switch the runtime version automatically. Spent time: 00:09:08”. This first step could take between 3-8 minutes.
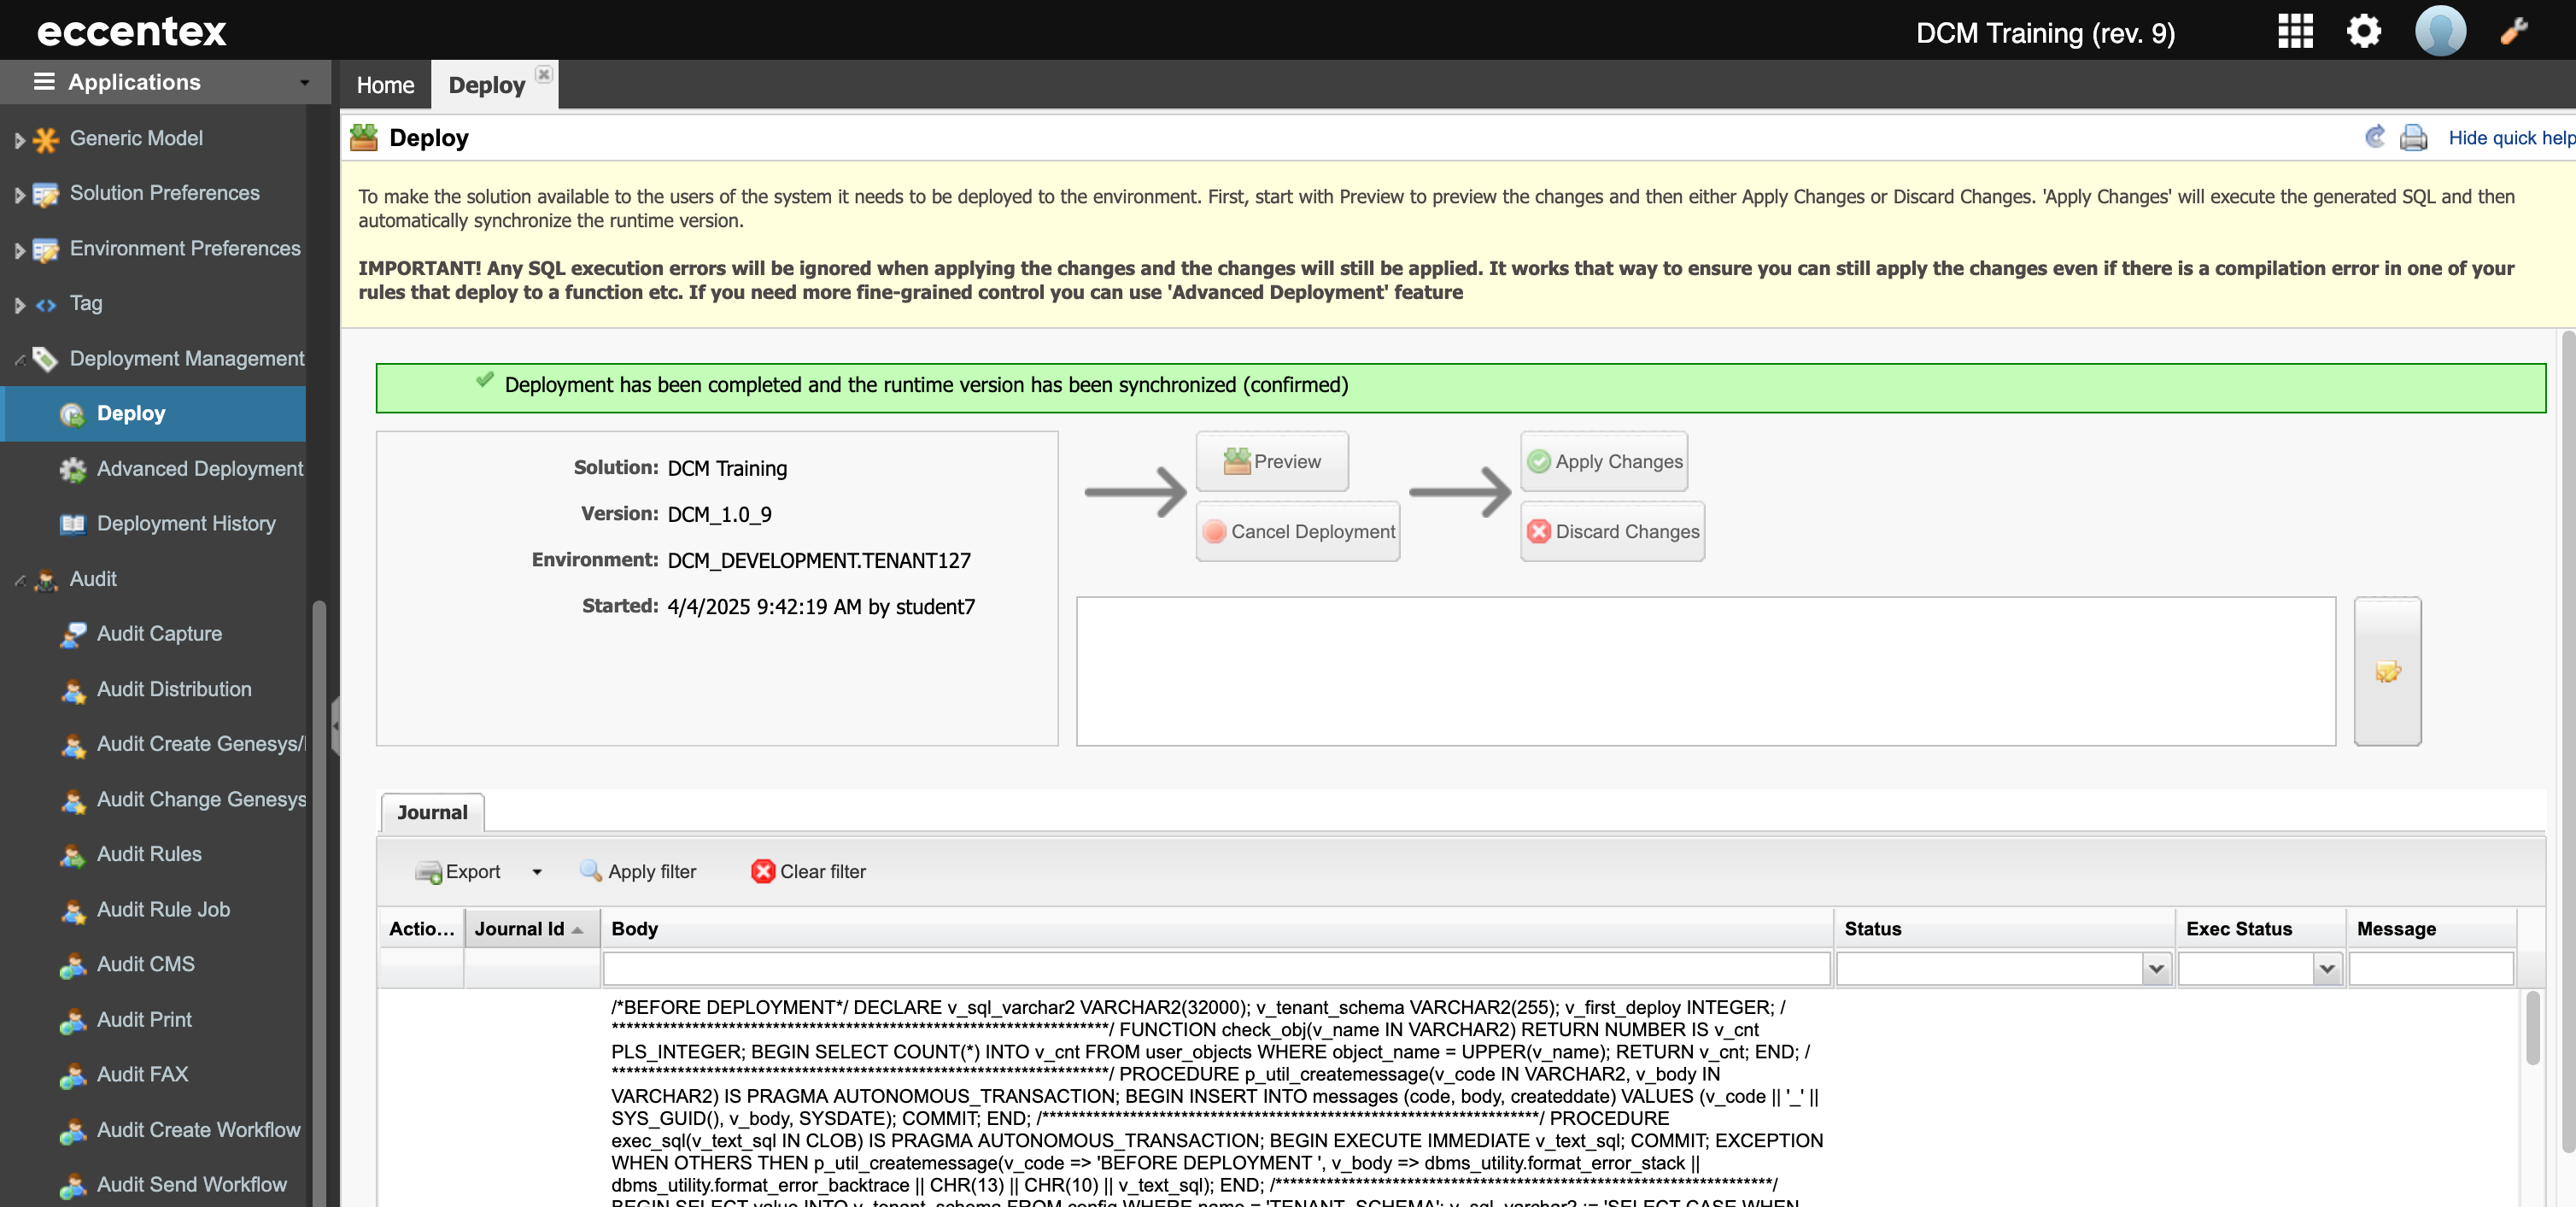
Click on the Apply Changes button to start the next step in the process. Wait until you have the message: Deployment has been completed and the runtime version has been synchronized (confirmed). This step is shorter, and it could take less than a minute. After the successful deployment of the Auto Loan model, we would like to check the status of the model.
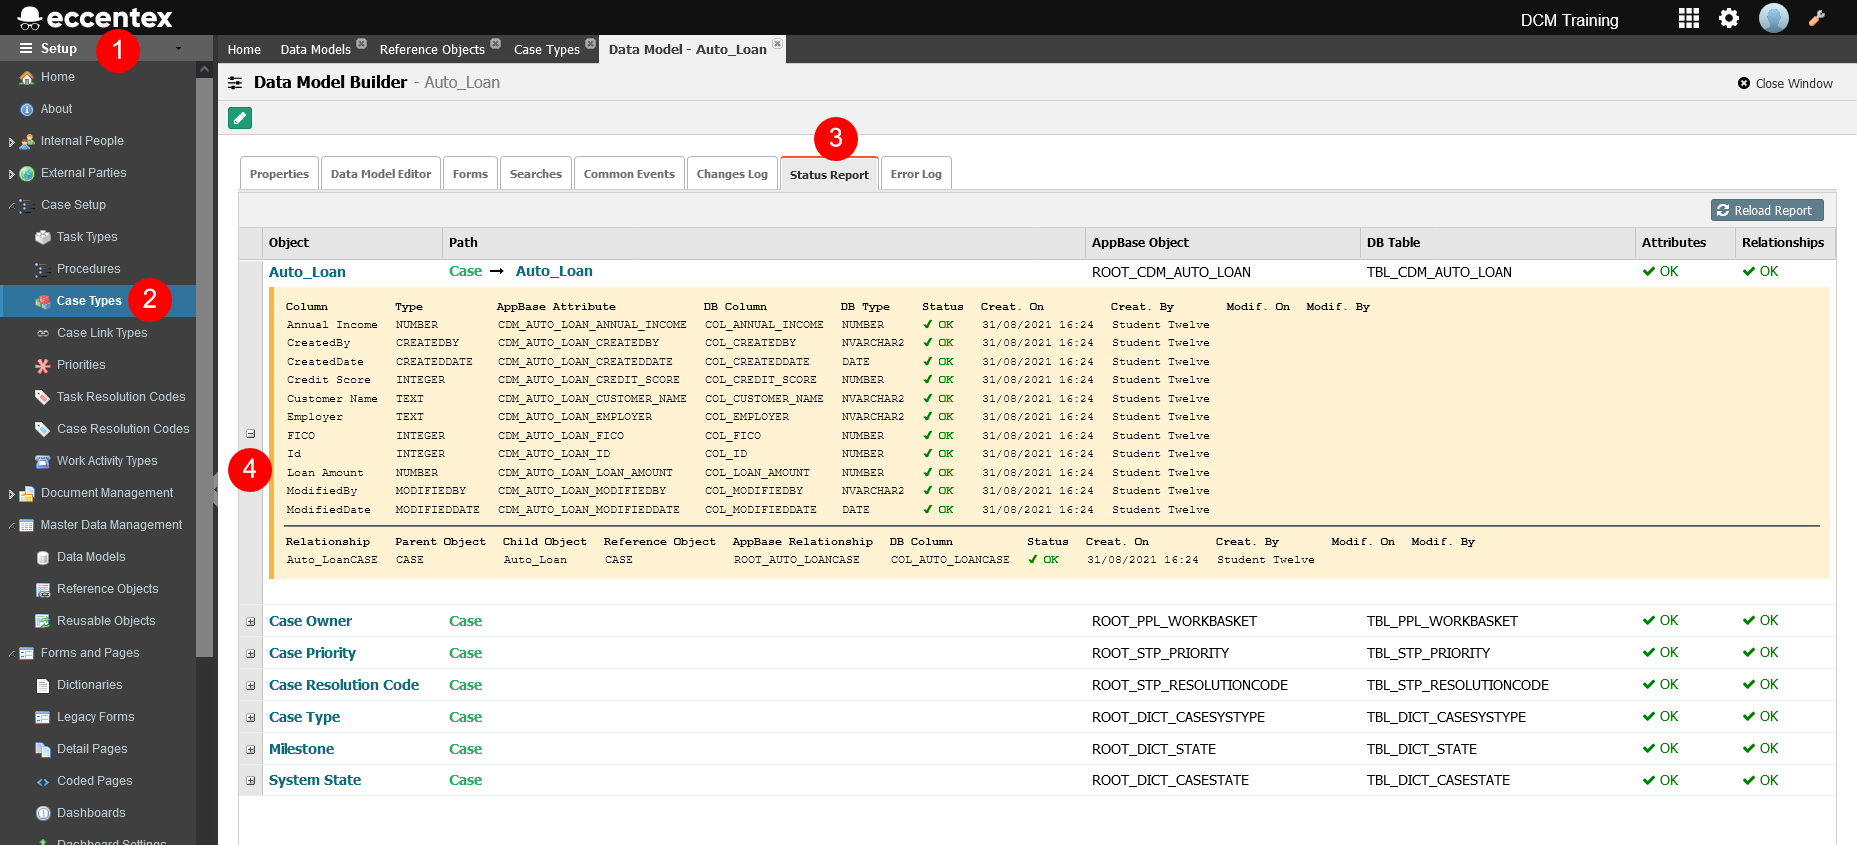
Go back to Setup (1), then go to Case Types (2), select the Auto Loan case type and open it.
Select the Status Report tab (3) and expand the Auto Loan object (4) to see the details and the status after the deployment. Here you can see how the Data Model was implemented at the database level (DB Table column) and also you can check if all the attributes of the model were deployed to the database (Status column). You can also see all the other objects (or tables) that the model has relationships with. For example, the Case Resolution Code attribute is from the TBL_STP_RESOLUTIONCODE. We will use this info later in our labs. Here you can see how the Data Model was implemented at the database level (DB Table column) and also you can check if all the attributes of the model were deployed to the database (Status column). You can also see all the other objects (or tables) that the model has relationships with. For example, the Case Resolution Code attribute is from the TBL_STP_RESOLUTIONCODE. We will use this info later in our labs.
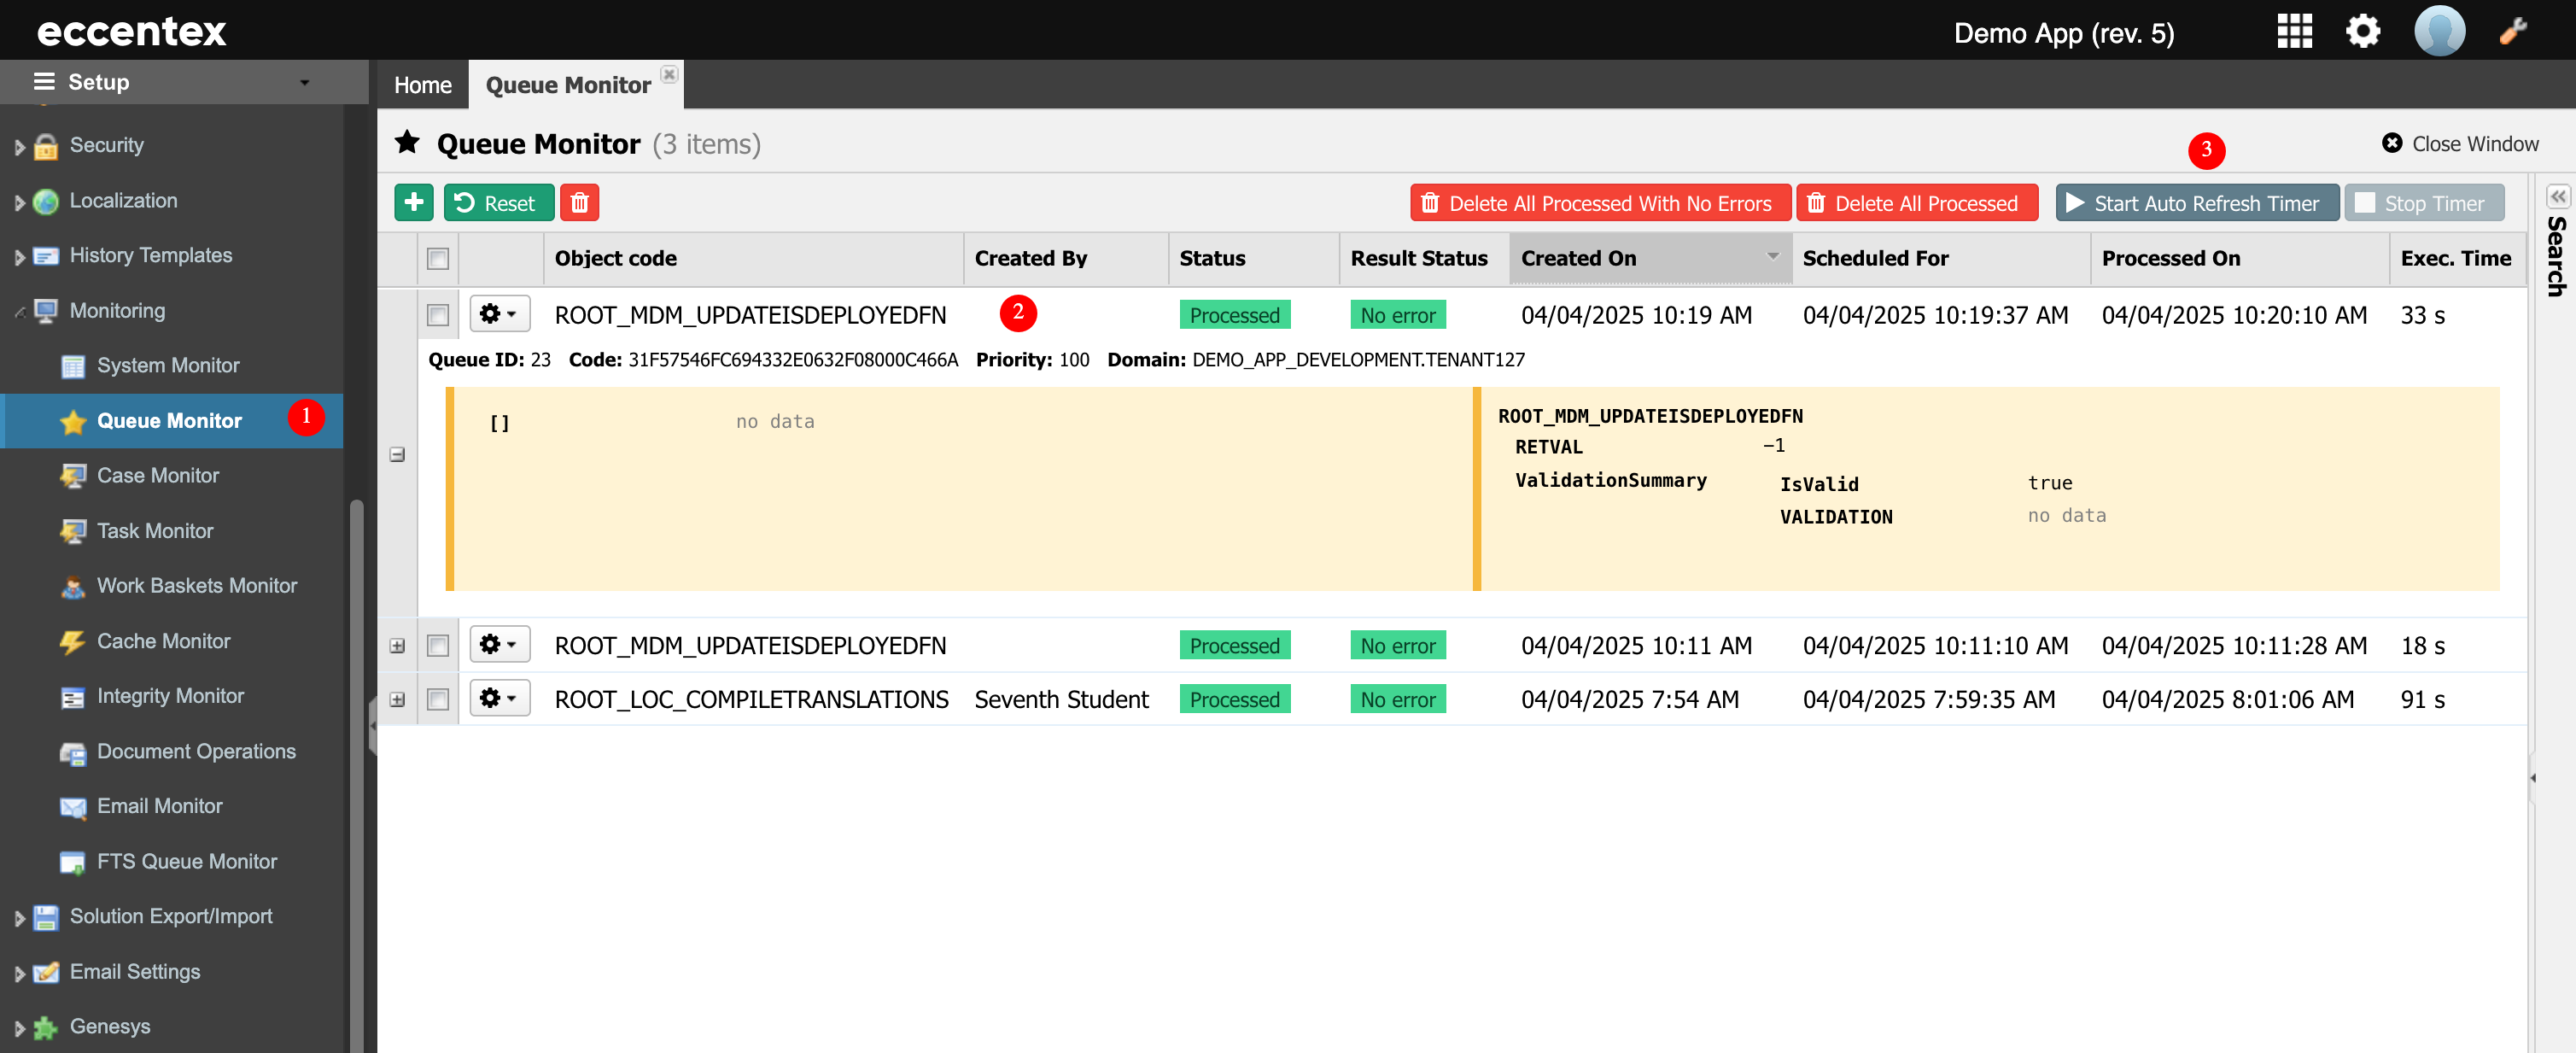
We can monitor the status of the compilation process under Monitoring → Queue Monitor (1).
There you will identify the ROOT_MDM_UPDATEISDEPLOYEDFN process (2) running with Status “Pending”. To refresh the status periodically, click the Start Auto Refresh Timer button (3).
When the process is finished, the Status will change to “Processed.” If the process finishes successfully, the Result Status will be “No error.”
Click the + button next to the Object code to see more details on the process. Here you could see the list and values of the parameters used to run the process. Also, you can see any output info from the execution of this process like Error Code and Message, if any, etc.
Now that our MDM model is successfully deployed and our changes to the MDM form are successfully compiled, we can test our new case type.