7. Adding Business Objects to the Master Data Model (MDM)
Basic Concepts on MDM
The data model editor enables the administrator to use the graphical design tool to quickly abstract a data model for the solution. For example, a case type of investigation might require supporting subcases to handle multiple related recommendations, issues, and so forth. Using the Data Model editor, you can use the available tools to create objects/tables and add the fields required.
Once the 'central' business object is created for the data model (AUTO_LOAN), the user can define or modify the various fields it will use. Each field can have its type (i.e., text, date, etc.) and will be available in the Form and Search form editors once created.
Data Attributes
Whenever a field is created using the Data Model editor design surface, this has the impact of adding that field to the underlying business object. For example, in adding a Data Model object called 'My Data Model', a table called 'My Data Model' is created. As each field is added using the steps below, the field will also be created against the business object at the database level.
As you can see in the previous chapter, when you create a new case type, the process also creates a Master Data Model containing one Business Object with the same name as the Case Type, in our example Auto Loan. We can add other Business Objects to the model, like a Bank Account, or add some Dictionaries like Employment Type (FT, PT, Self-Employed, etc.).
Adding a Business Object to MDM
- Navigate to Setup → Data Management → Data Models, select the AUTO_LOAN Data Model and open it with Control → Open.
- From the left panel, under the General palette, select New Business Object control (the dark blue) and while holding down the left mouse key, and drop it on the Auto Loan object.
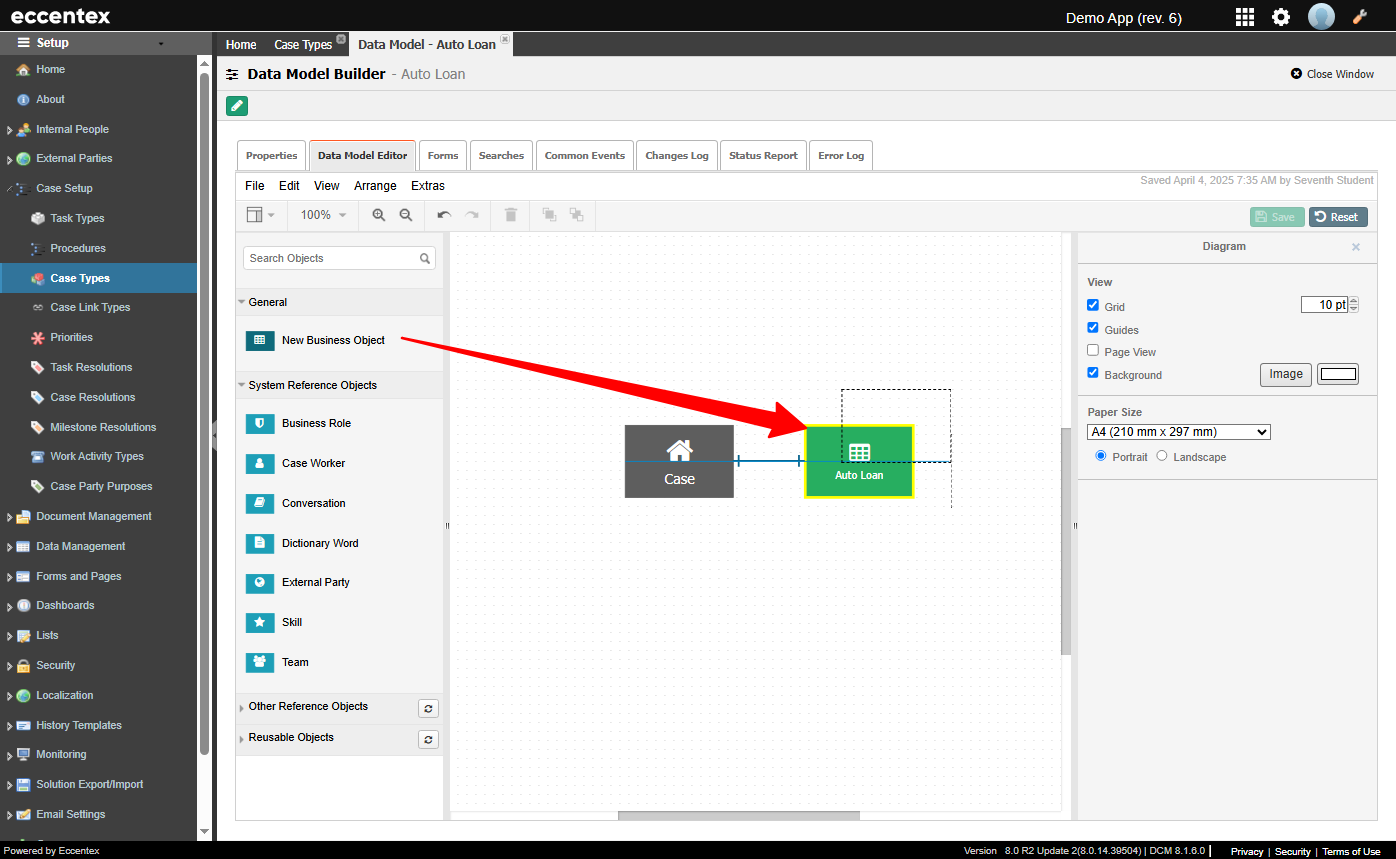
- In the right panel, insert Properties to the new BO. Name of the business object
Bank Account. The Permanent Code of the Business Object will be automatically updated based on the value entered for the Name property (for example CDM_BANK_ACCOUNT). You can override this value ensuring no use of white spaces or special characters (%, $, #, @, etc.).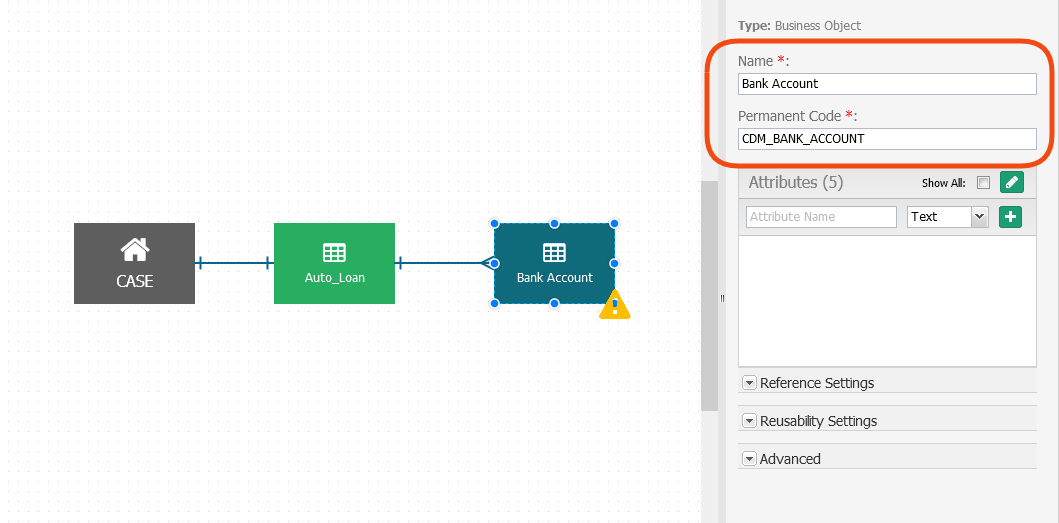
Add the following Attributes to the Bank Account Business Object:
- Bank Name (Text)
- Account Number (Number)
- Account Name (Text)
- Primary Account Holder (Text)
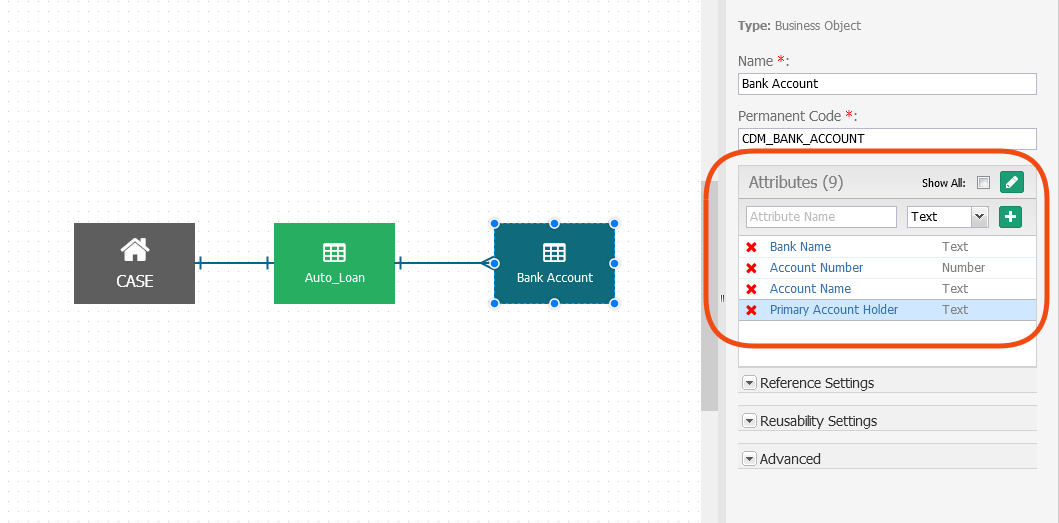
Check "Show All" to see the other five (5) attributes used internally by AppBase.
- Click Save to commit the new business object to the Data Model.
Go to the Status Report tab (1) and click on the Run Report. Check all the attributes entered in the previous step (3).
Notice that Data Model added a relationship attribute with the Auto Loan business object. This is labeled a Foreign Key in DB
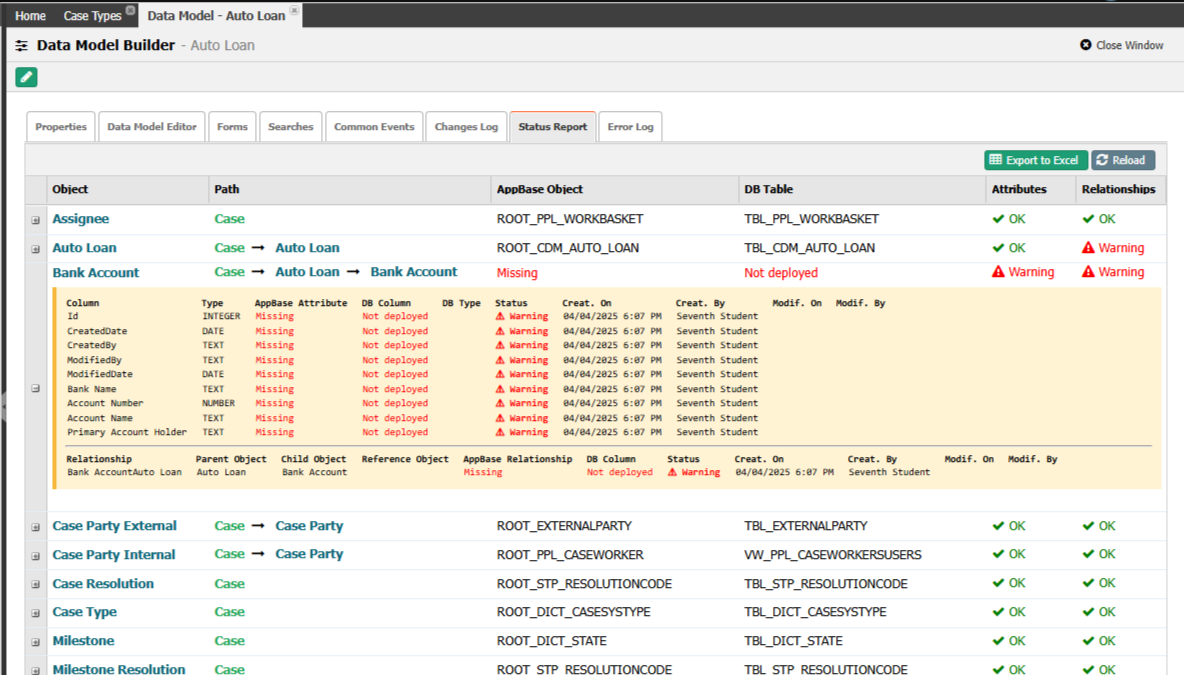
Notice that the Bank Account business object has warnings (2) for Relationships and Attributes. It is because the changes have not been deployed yet.
- Navigate to AppBase Studio and run a Deploy (follow the instructions in chapter 5. Deploying a Solution).
During this deployment, DCM will create the model's missing table(s) and relationship(s). - Navigate to Setup → Data Management → Data Models
- Open the AUTO_LOAN Data Model.
Select Status Report Tab and click the Run Report button.
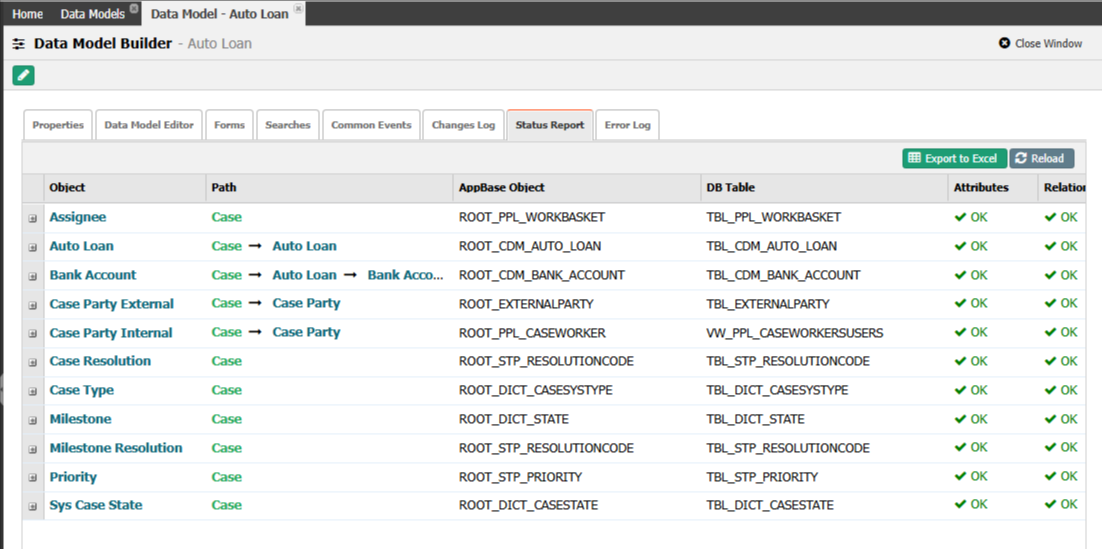
After a successful deployment, you must see all the Relationships in status OK. If not, try running an Advanced Deployment again and check that there are no errors in the process.
Check the name of the DB Table for Auto Loan (TBL_DCM_AUTO_LOAN).
- Expand the Auto Loan object to see the name of the DB Column of the Attributes in the database for the Business Object. For example, the Credit Score attribute is the COL_CREDIT_SCORE column name in the DB.
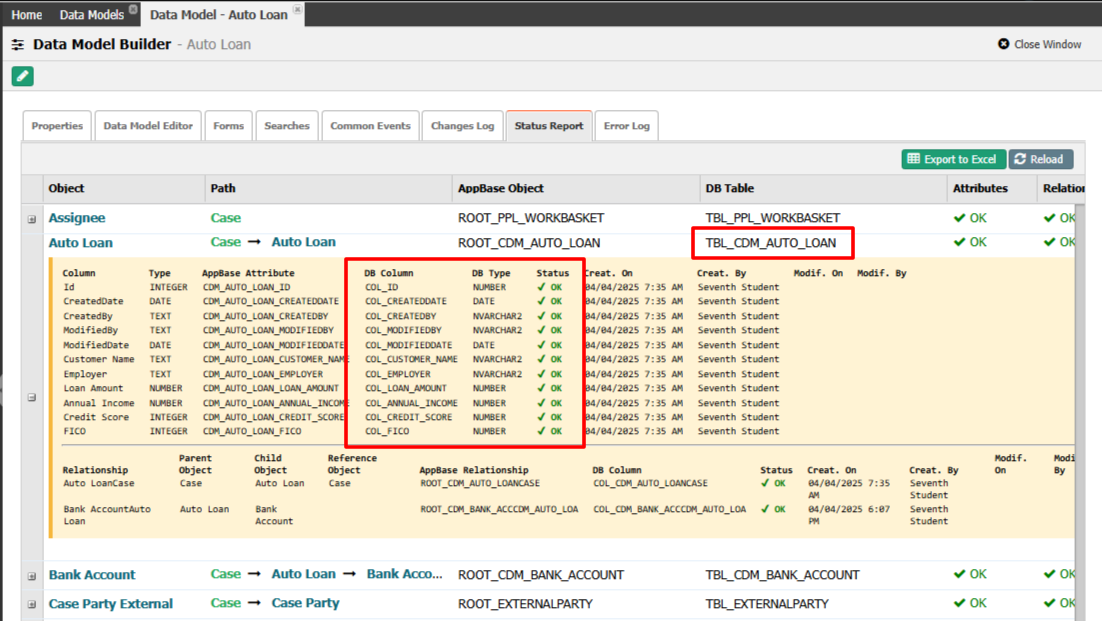
Exercise
Complete the following table with the rest of the Business Object and attributes created in your data model; we are going to use this information in the further lessons:
| Business Object | Table Name | Attribute | Column Name |
|---|---|---|---|
| Auto Loan | TBL_CDM_AUTO_LOAN | Customer Name | COL_CUSTOMER_NAME |
| " | " | Employer | |
| " | " | Loan Amount | |
| " | " | Annual Income | |
| " | " | Credit Score | COL_CREDIT_SCORE |
| Bank Account | TBL_CDM_BANK_ACCOUNT | Bank Name | |
| " | " | Account Number | |
| " | " | Account Name | COL_ACCOUNT_NAME |
| " | " | Primary Account Holder |
