
4. Editing the MDM Forms
The DCM offers an intuitive, drag and drops style form builder to develop pages that will hold custom fields. Currently, there are two types of Form Builder available:
- Form Builder - our first release of the Form Builder prepares single 'stand-alone' forms that can contain data fields (e., text, date, number, etc.) but where the definition and values are held in an XML format and disconnected from any underlying data tables.
- MDM Form Builder - Our latest generation of Form Builder allows for the abstraction of a multi-tier data model as well as forms and search pages to accompany each one. The MDM Form Builder is a tool to customize the forms used in DCM. It recognizes the Attributes inserted in the previous steps and automatically creates them as fields in the form.
Steps
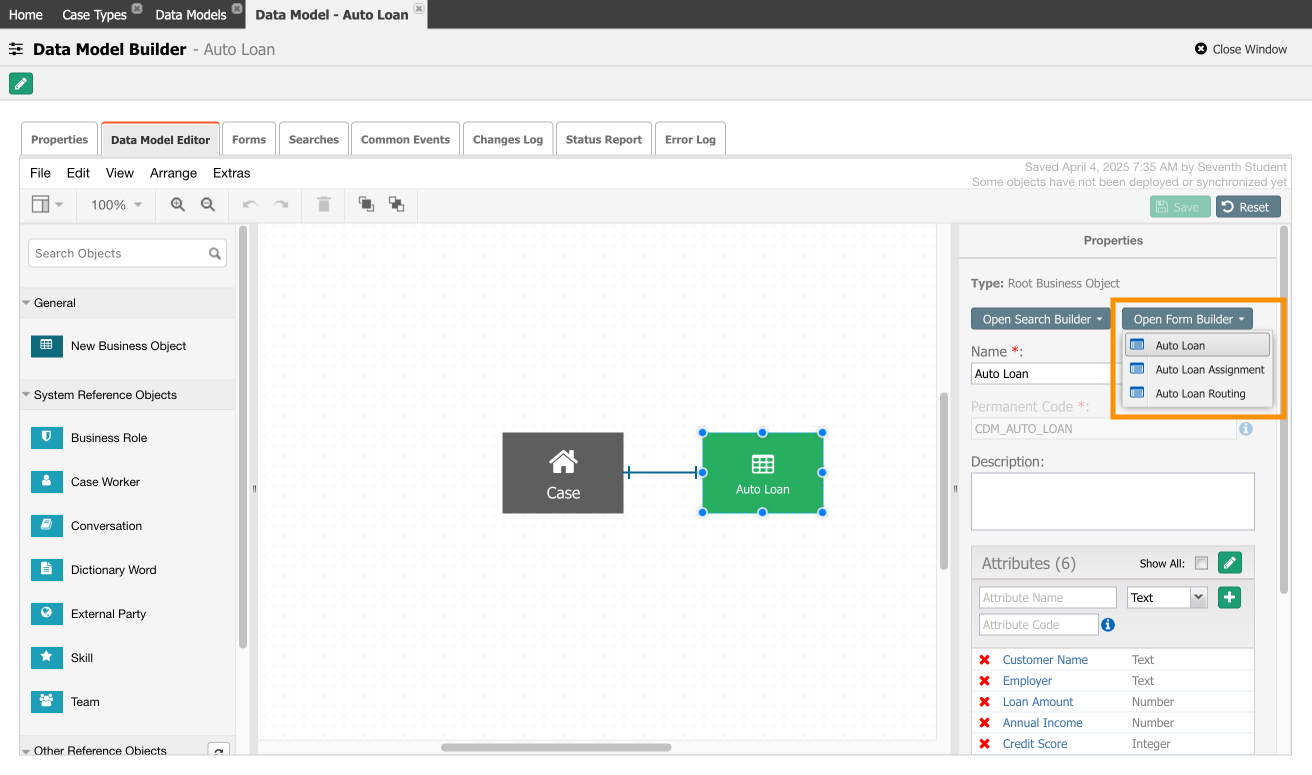
- Keep working on the Data Model Editor tab, click the Auto Loan object, then click the Open Form Builder button and select Auto Loan, it will open the Form Builder Editor in a new window.
- Click on Auto Loan info (1) label. Change the Title to ‘
Auto Loan Application’ (2), in Title Align, select ‘Center’, and in the Theme properties select ‘Red’.
Your form will look like the following: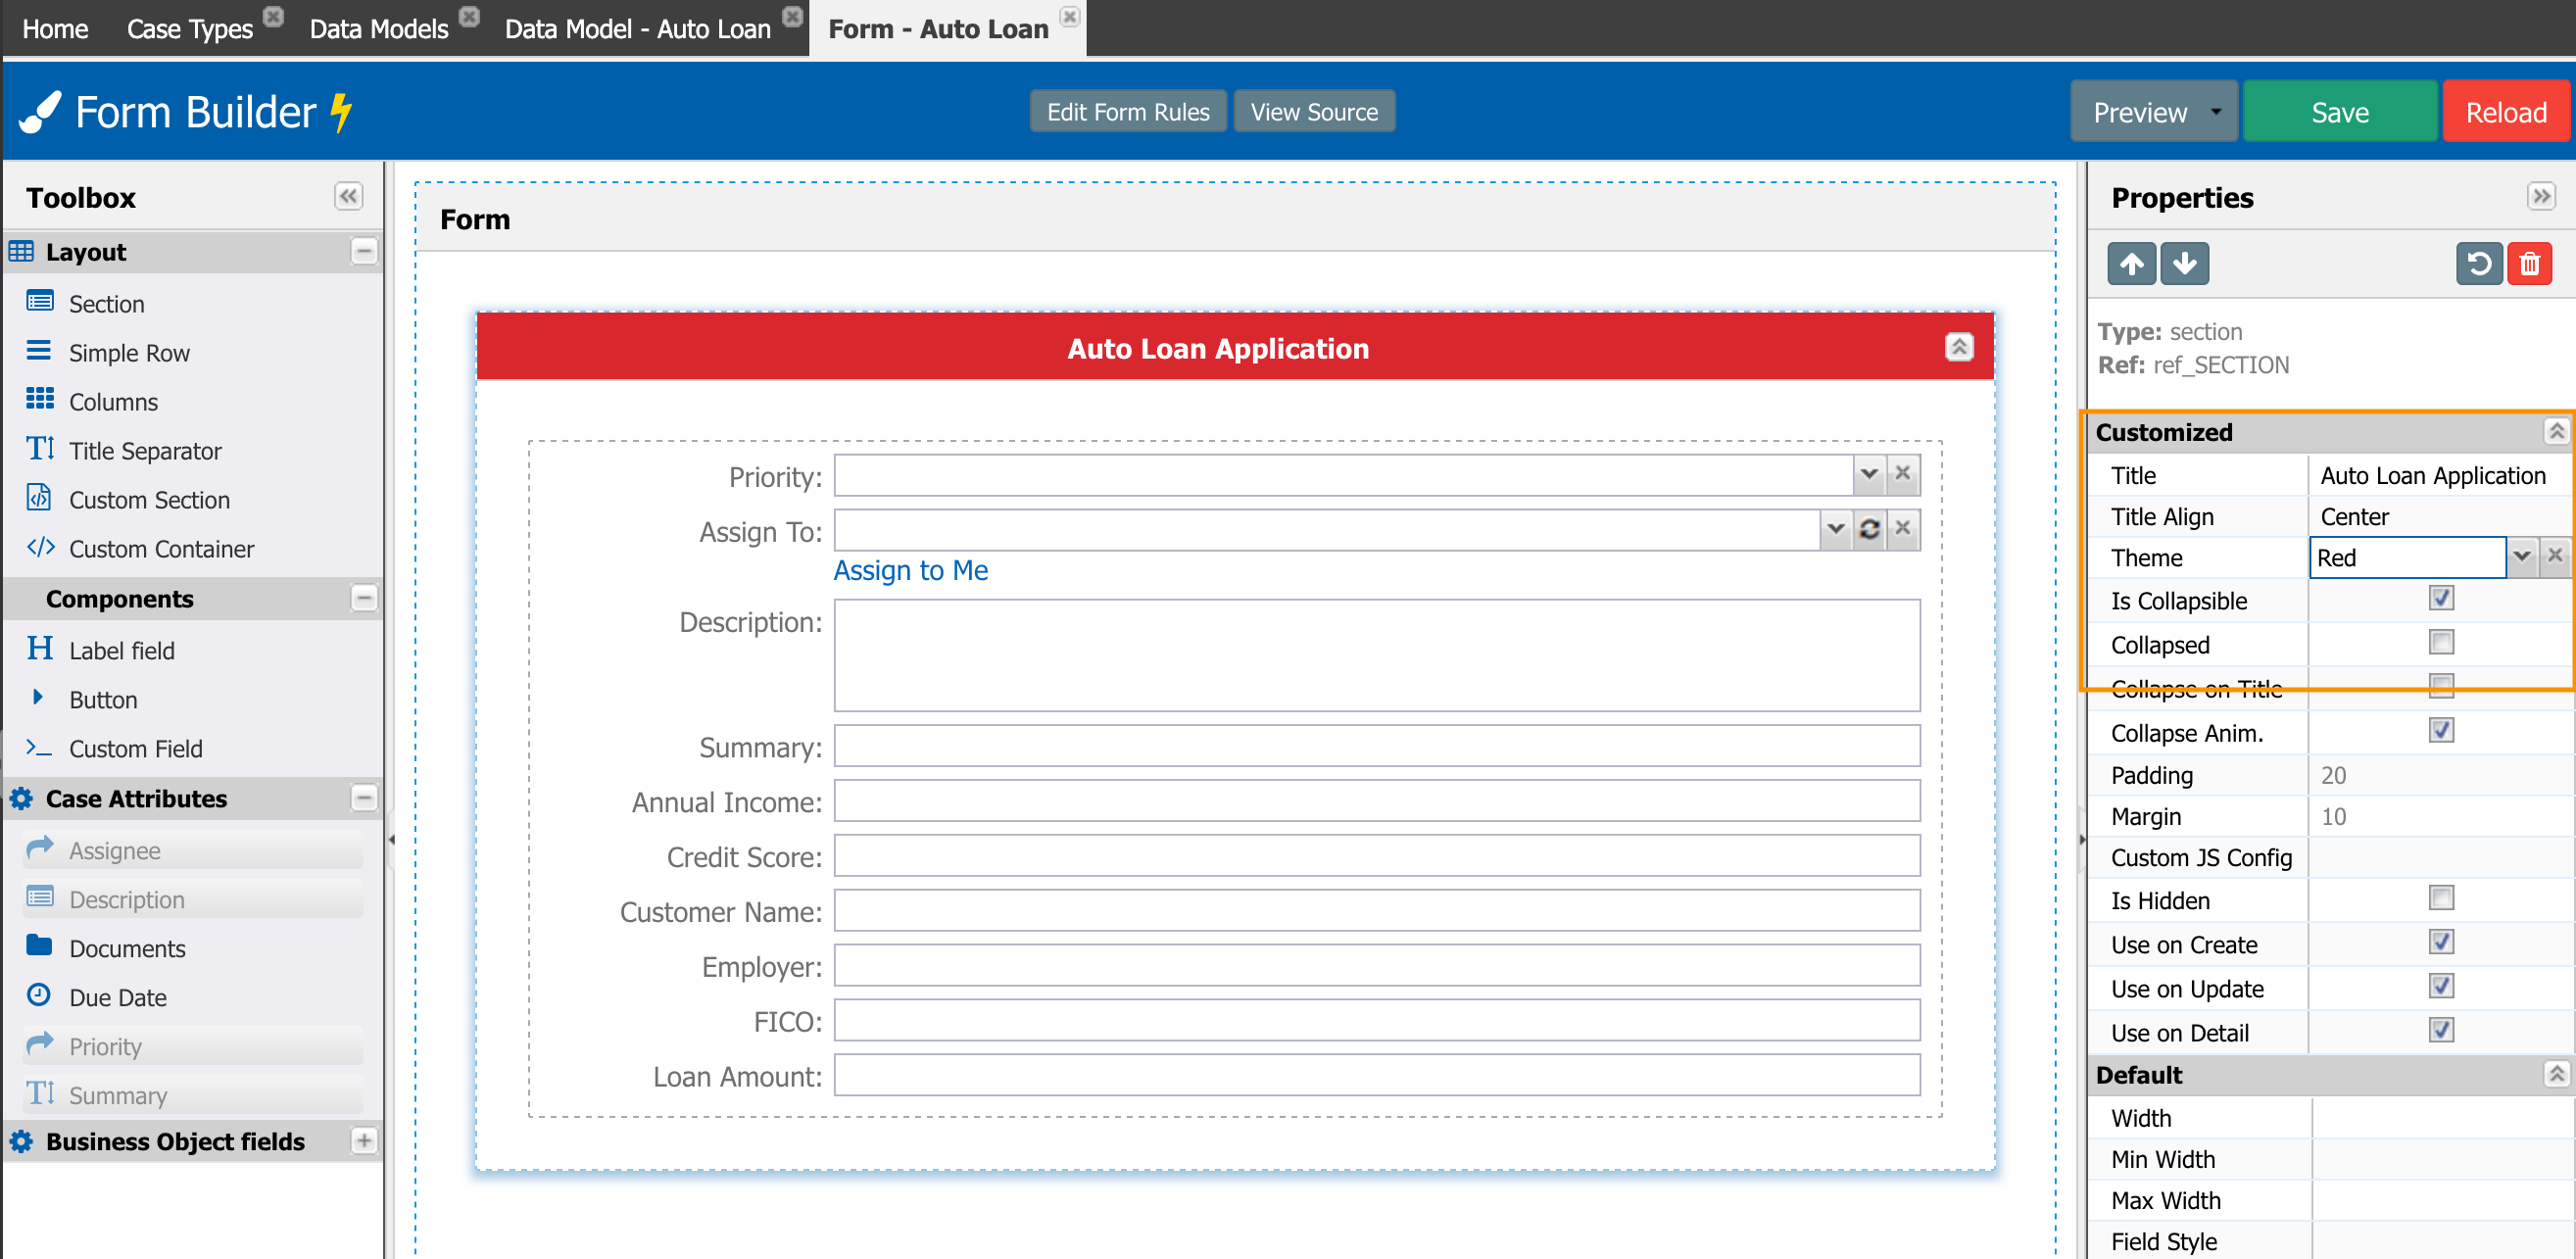
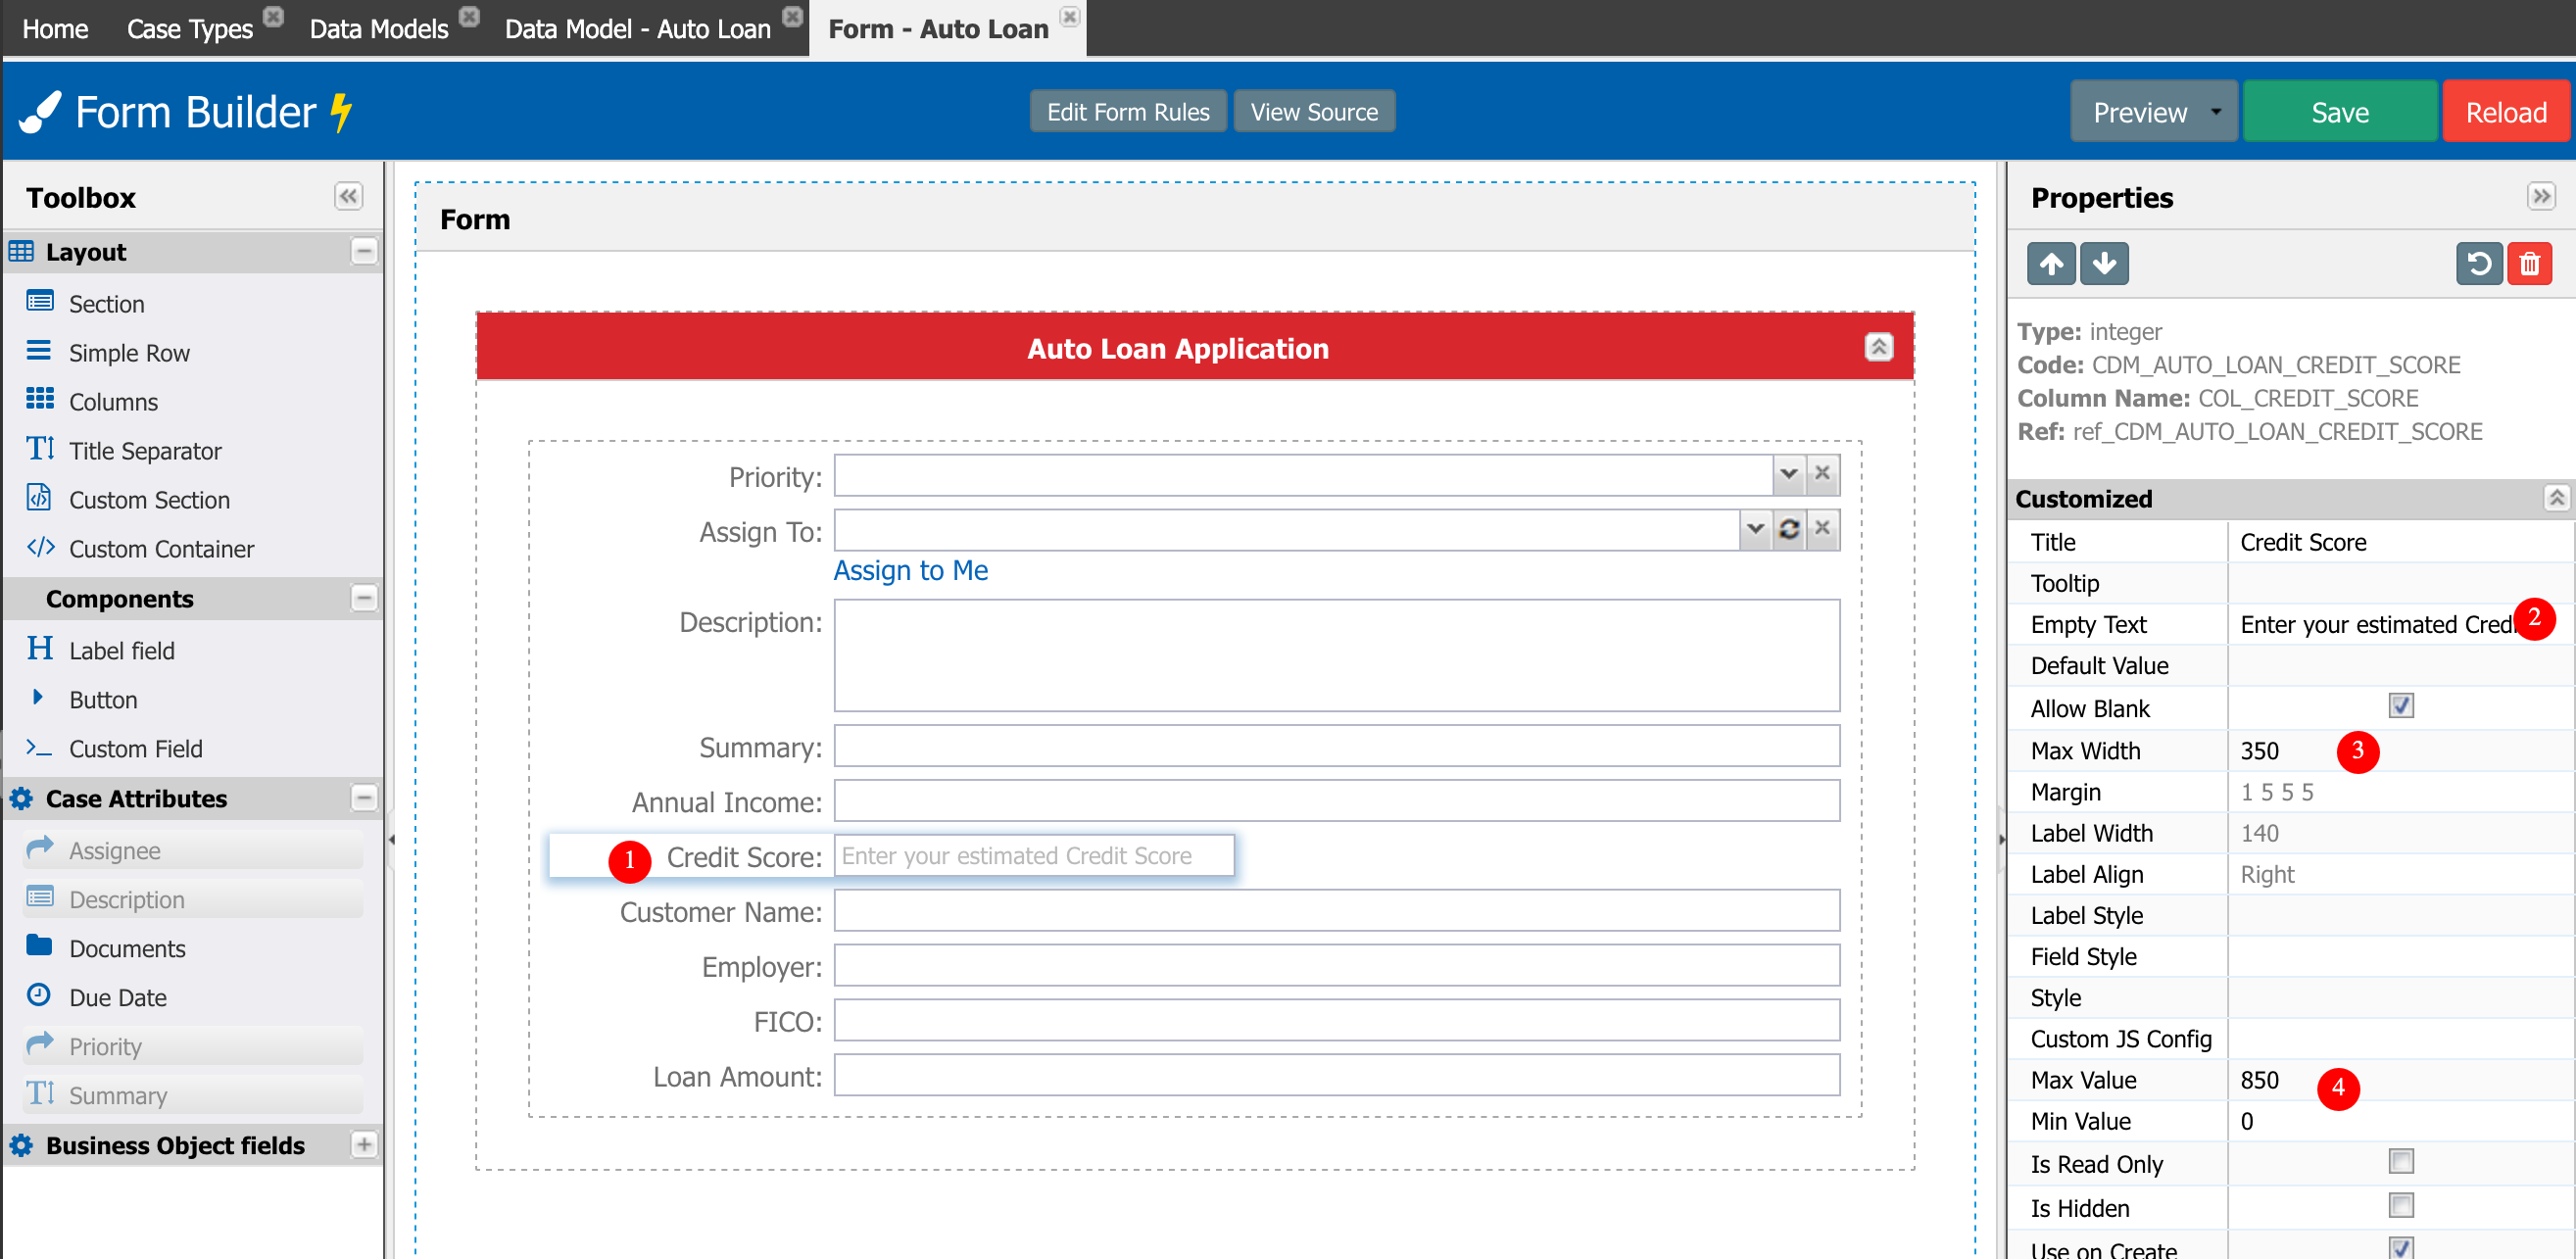
- Click on the Credit Score field (1). Type ‘
Enter your estimated Credit Score’ for Tooltip (2). - Set the Max Width to 250 px (3).
- Set the range of valid values for this field to Min Value = 0 and Max Value = 850 (4).
- Save your changes.
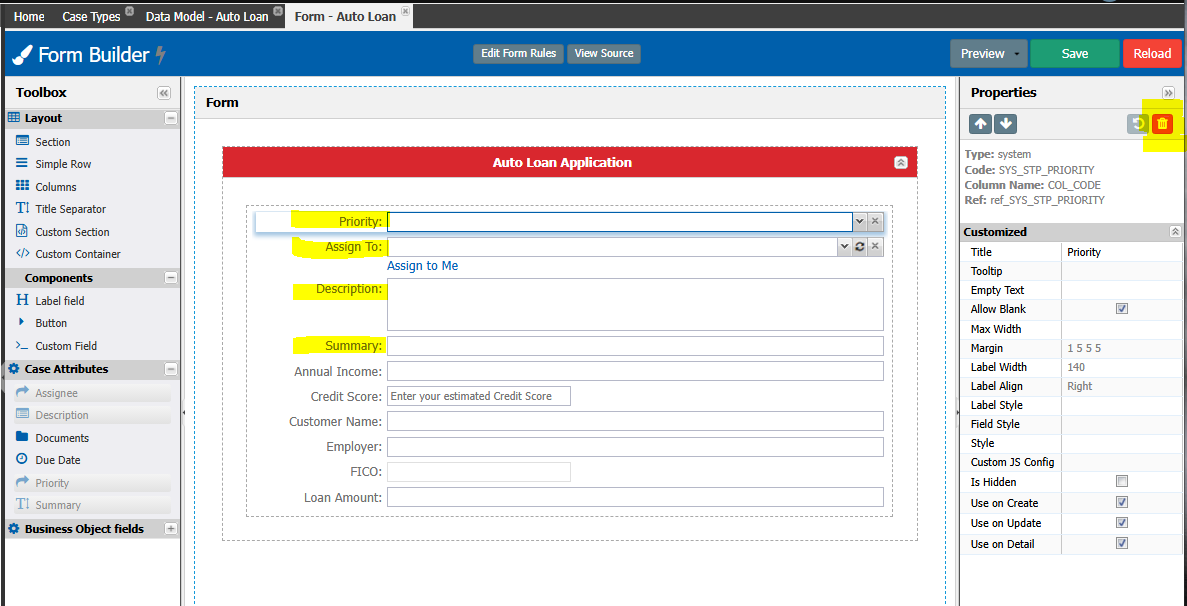
- Click on the FICO field (1) and set the Max Width to 250 px (2).
- Check ‘Is Read Only’ (3) (We are going to populate this field using a function).
- Uncheck the fields ‘Use on Create’ and ‘Use on Update’ (4).
These changes mean that the field will NOT be shown during the Creation or Update of the case and will only be visible when opening the case for View.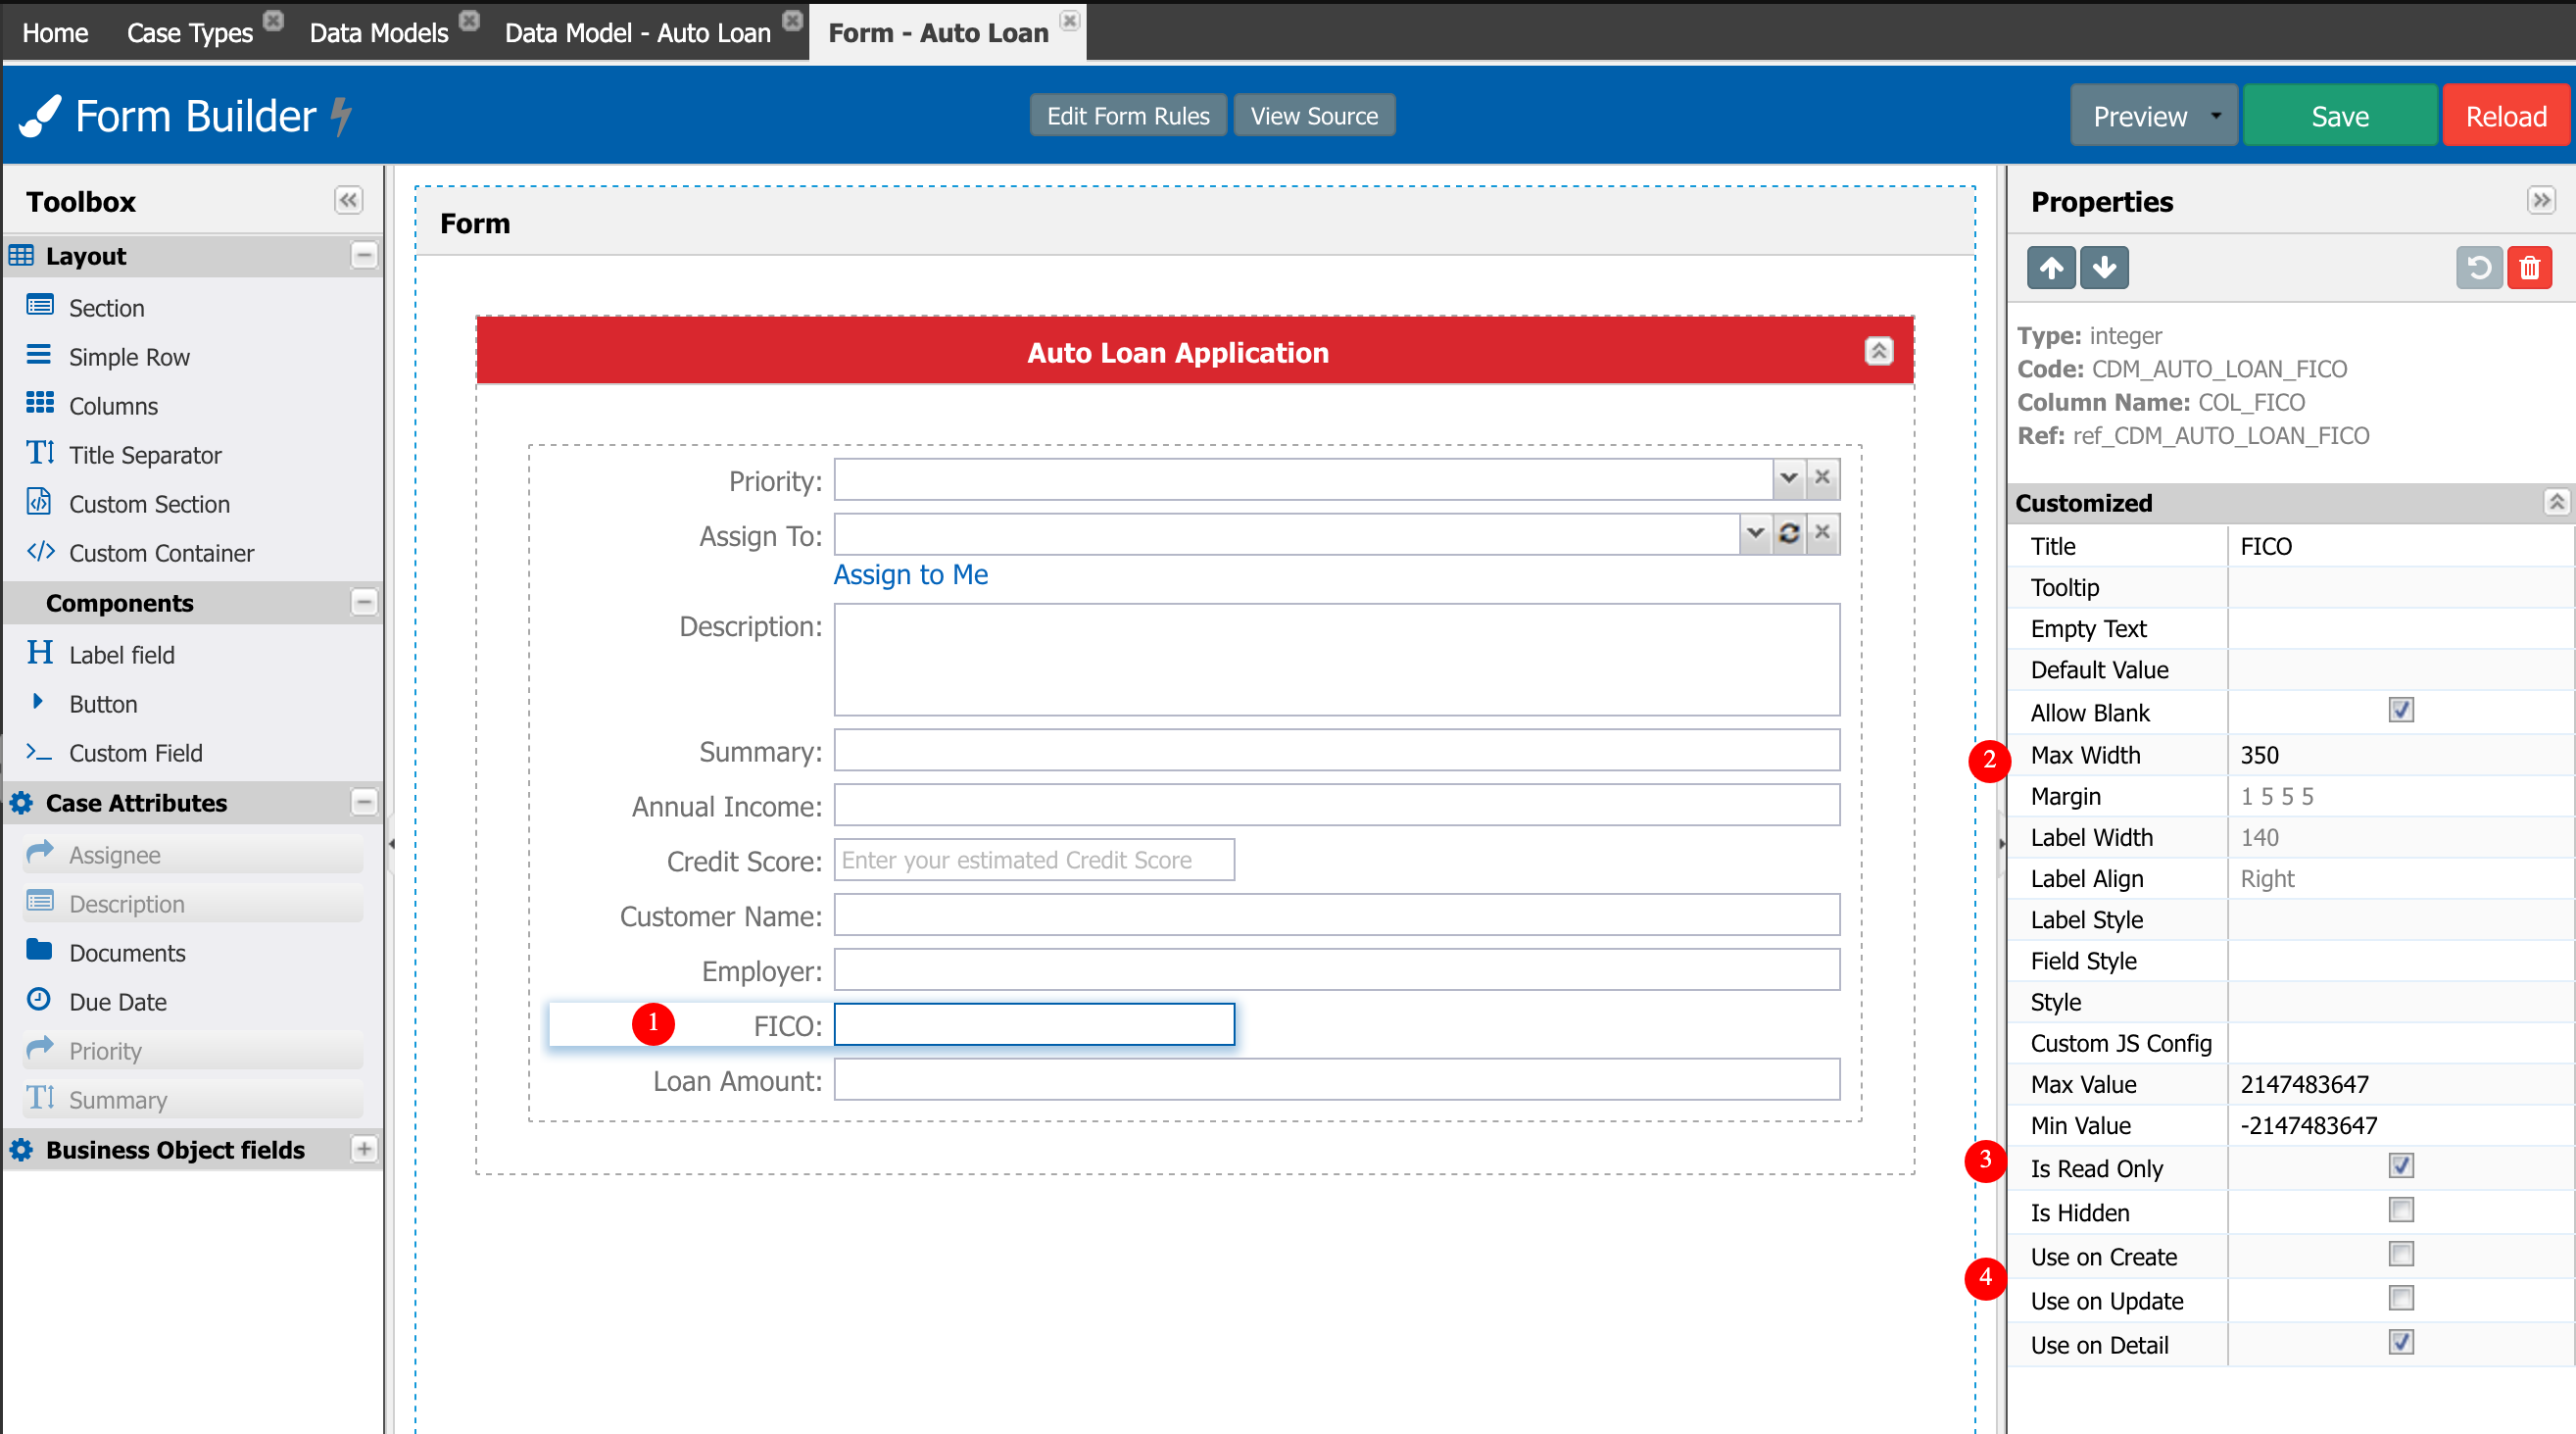
- Save the changes.
- Click the Preview button and check what the form will look like.
- Validate that when Display Context is set to Create or Update the FICO field is not shown, and it is only visible when selecting Detail.
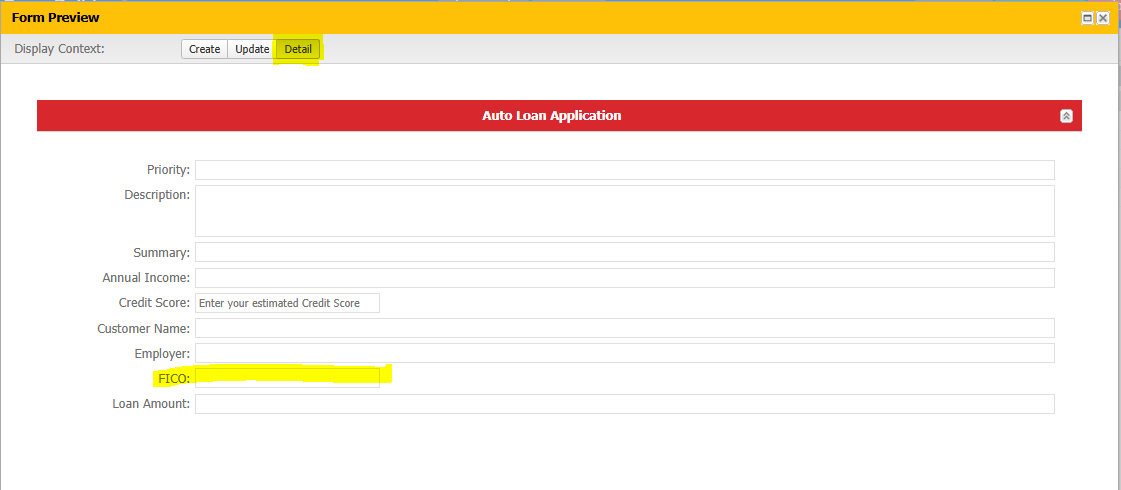
- Close the Preview.
- Now we need to remove the case object fields that we are not going to use in our practices. Select each field highlighted and remove it from the form (delete).
- Also, lets reorder the fields just dragging and dropping them in the new desire location.
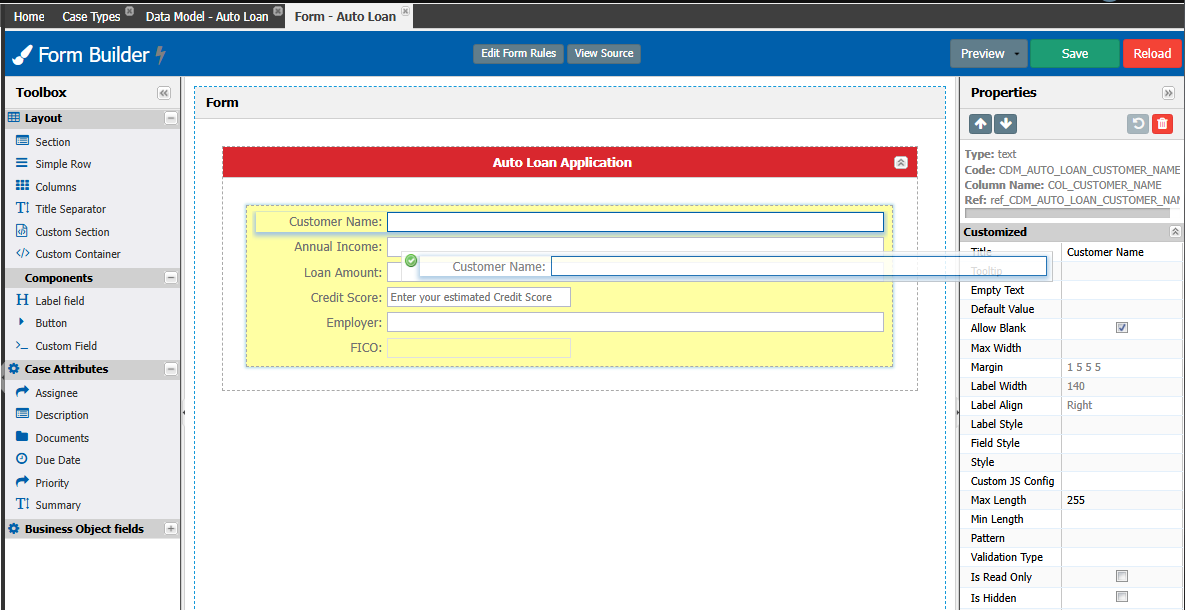
- After removing the case object fields and relocate the fields, the form should look like the following image.

- Save and close the Form Builder.
- After all these changes in the Data Model will to deploy them.