Business Roles
Agents can be organized into different Business Roles to help ensure the proper agent is assigned to every type of issue. Every user can have many Business Roles assigned to them.
Add New Business Roles
- On the top right, navigate to → <<your solution>>
- On the left, navigate to → Setup
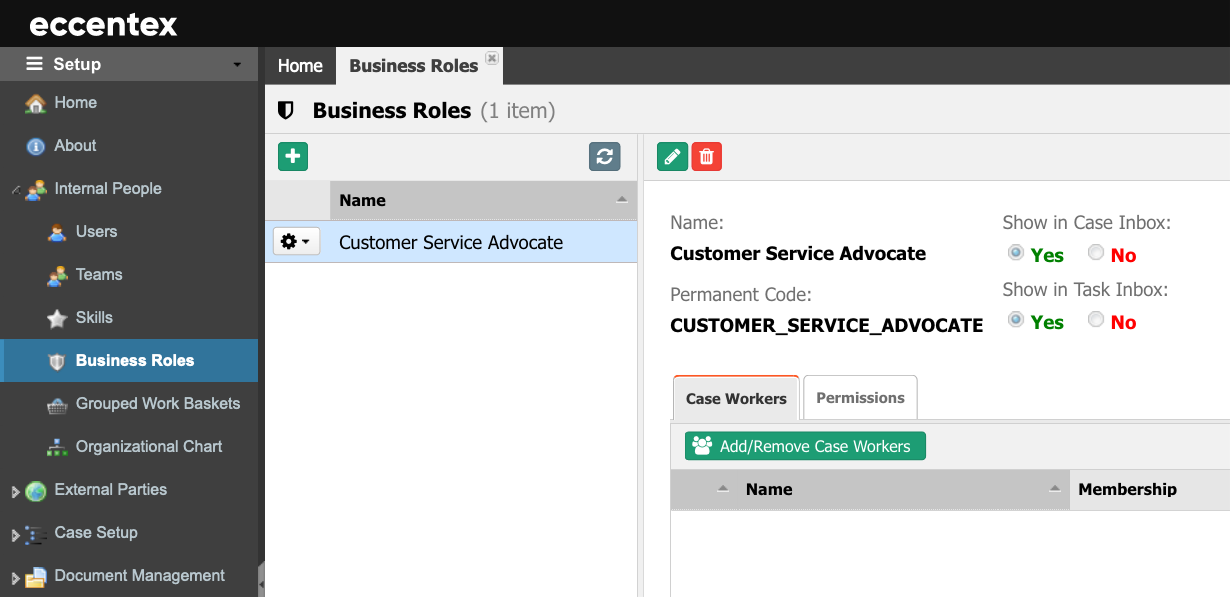
- Navigate to Internal People → Business Roles

- Click on the plus button to add a new Business Role.
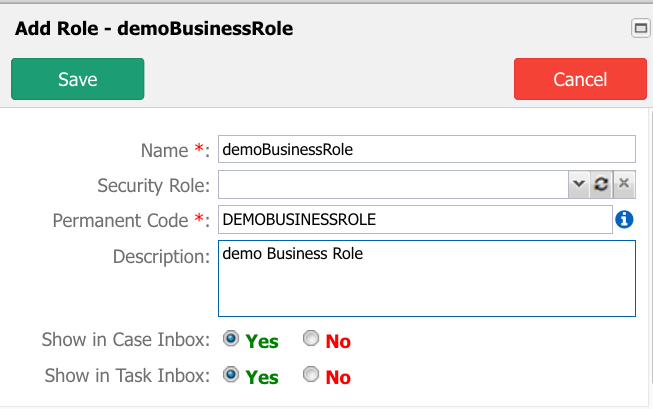
- Assign a Name to the Business Role.
- Additionally, add a Description.
- Select if this new Business Role will be used in the Case and/or Task inboxes.

- Click Save to add the new Business Role.
Modify Permissions
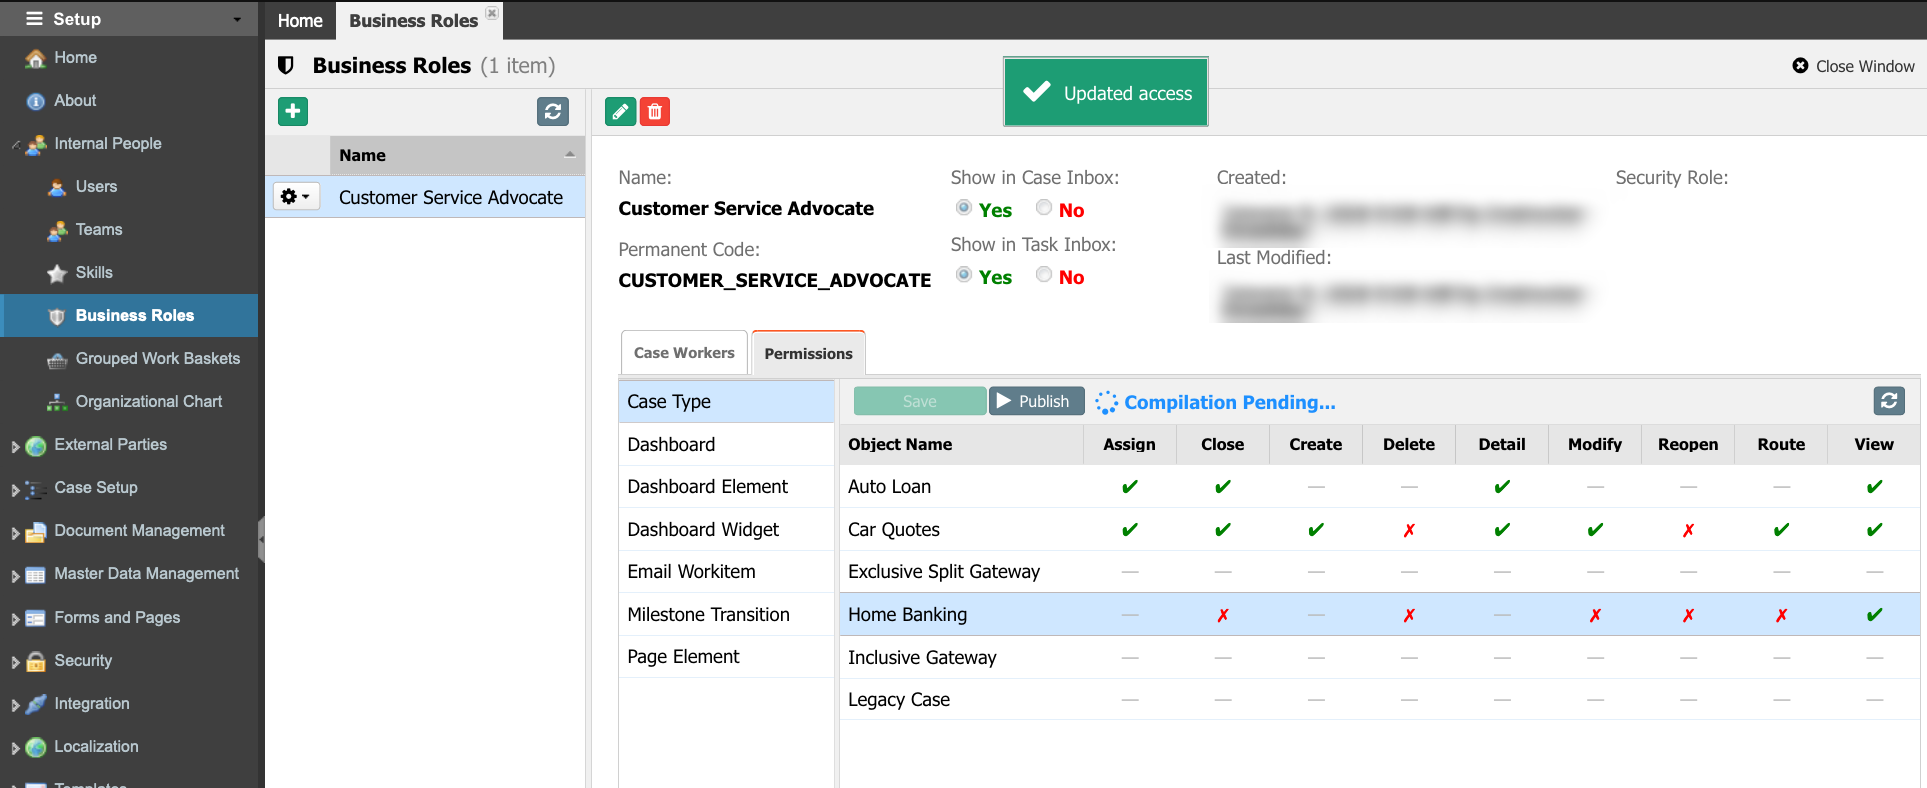
- Select the Permissions tab to customize the access for this Business Role.
- Select the Object Name, click the cell under the action column on the left panel to modify the permissions. Click once to set it as Allowed (check mark), the next click to set it as Denied (cross mark), and the next click to set the action to the default Empty value.
- When finishing setting the permissions, click the Publish button to commit the changes.

- Click the Save button to save the changes.
Manage Members
- To add members to the group, select the Case Workers tab.
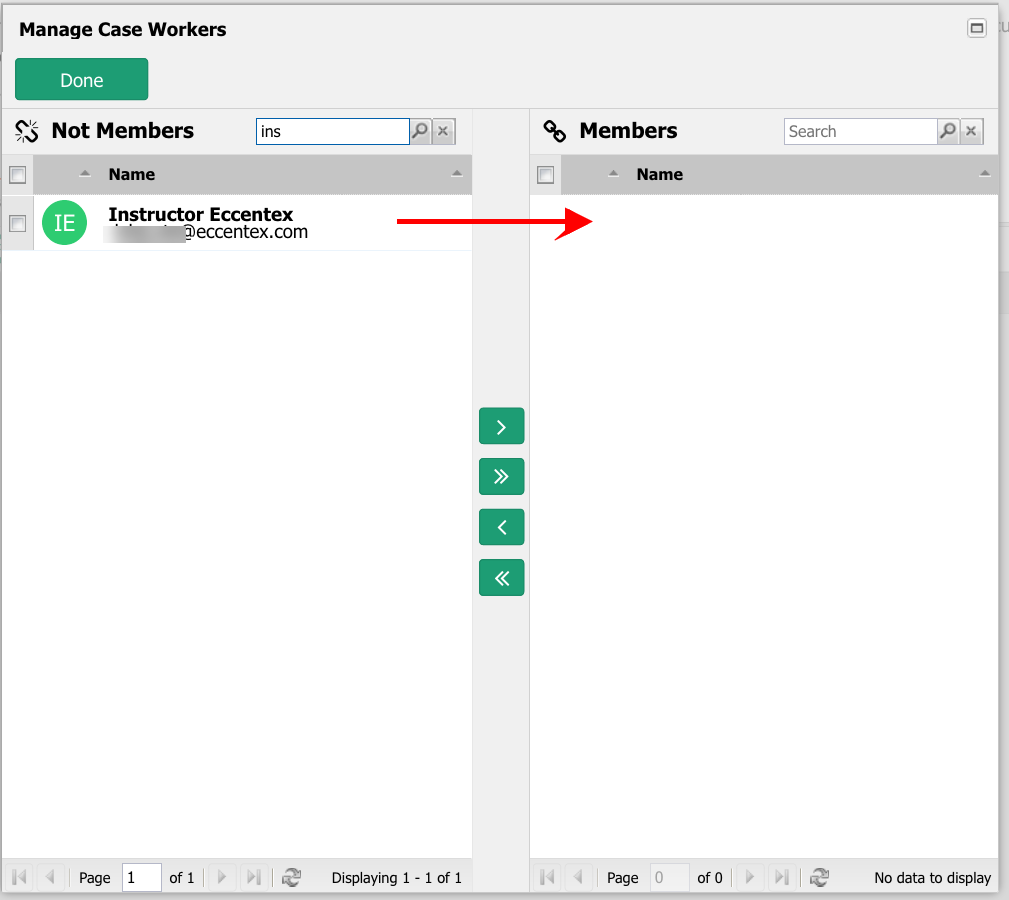
- Click the Add/Remove Case Workers button to manage the users.
- Use the buttons in the middle to add or remove users to the Business Role.

- Click the Done button when finishing.


