
Create an Attribute Types
AppBase allows you to create custom attribute types in addition to the standard types provided. This is useful for creating fields that display a dropdown list of distinct values retrieved from a business object. To do this, you can create a new attribute type called Lookup. This type will call a rule that contains an SQL statement that returns the list of values. The new attribute can then be added to pages, displaying the list of values whenever clicked on.
Text Type
Text type attributes facilitate the setting of patterns, lengths, whitespace, and default values. The steps below describe how to create a Text attribute.
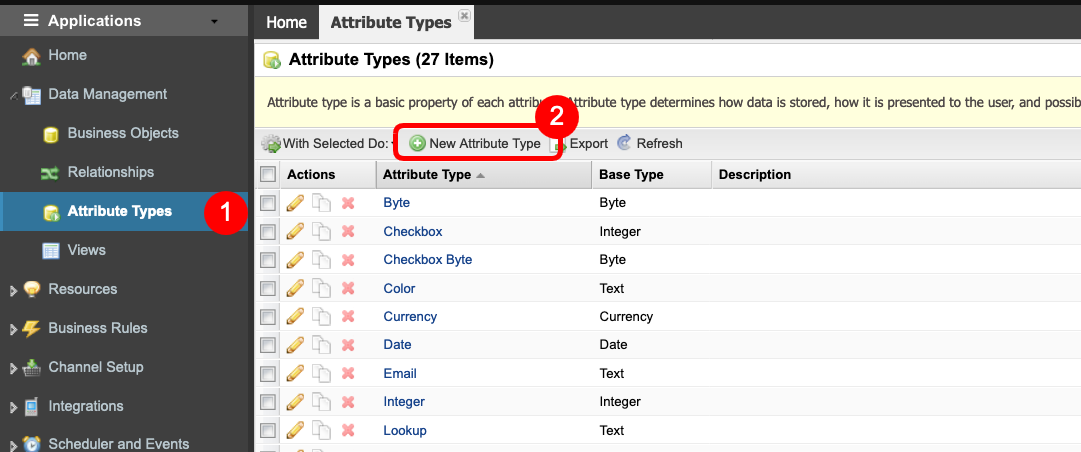
- Navigate to Data Management > Attribute Types (1)
- Click the New Attribute Type button (2).
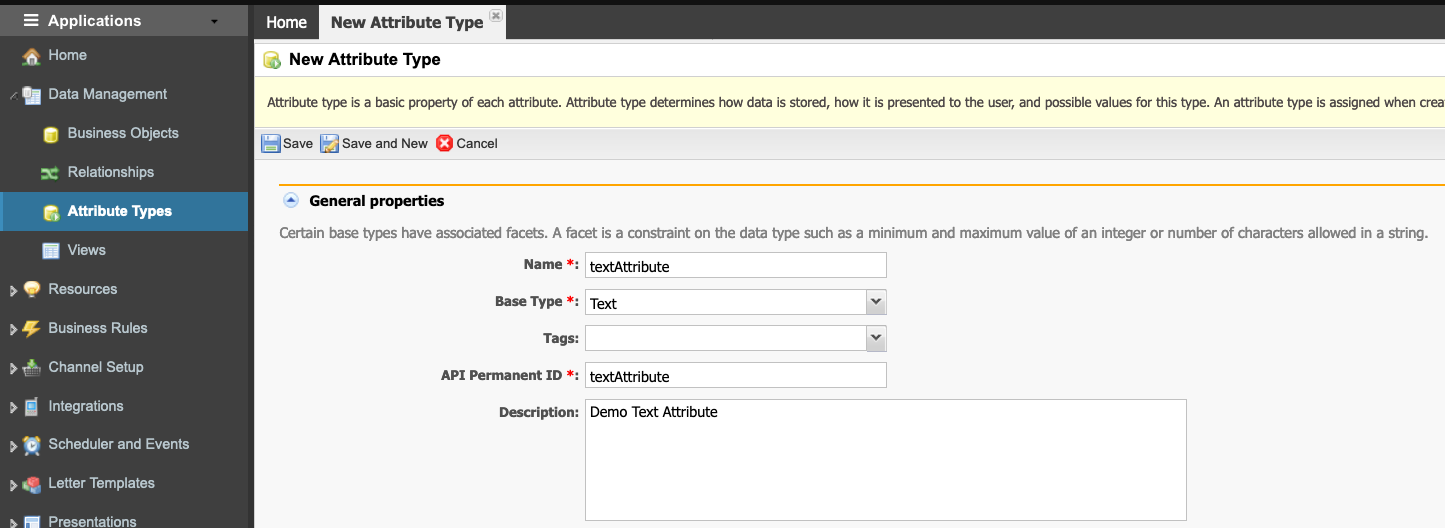
- In the New Attribute Type tab, fill in the mandatory fields in the General properties section.
- Enter the Name of the new attribute.
- Select Text from the Base Type drop-down list.
- Select any Tags to be applied to the attribute record.
- You can leave the API Permanent ID field as populated when the name is created or overridden as required (ensuring to leave out any white spaces or special characters).
- Enter a Description of the attribute so that future users can understand what the type was created for.
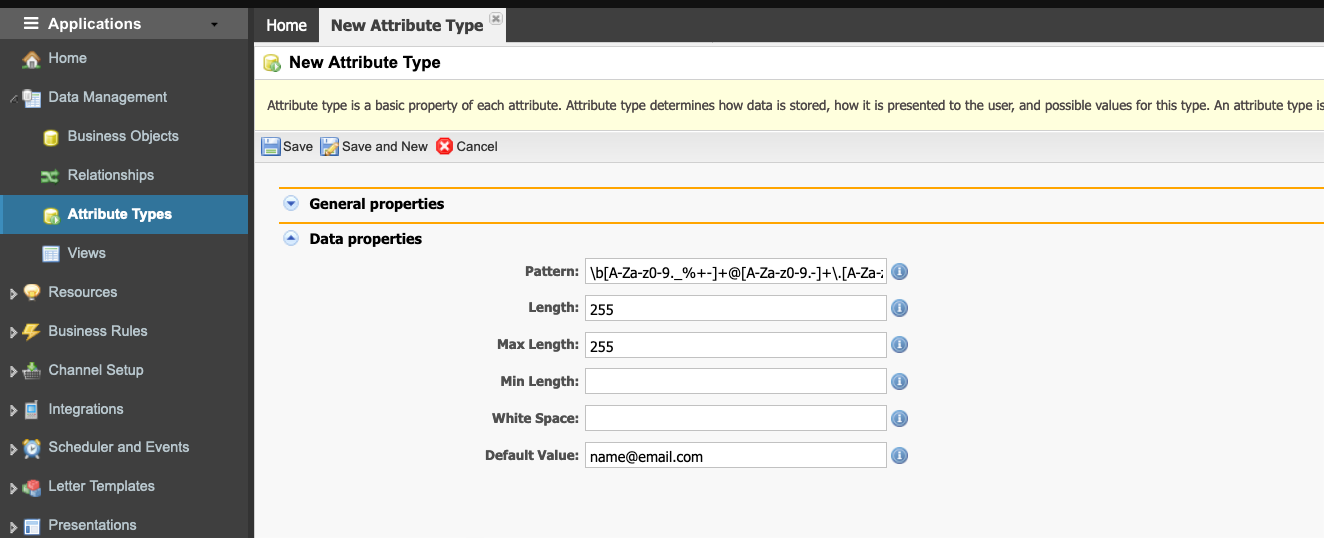
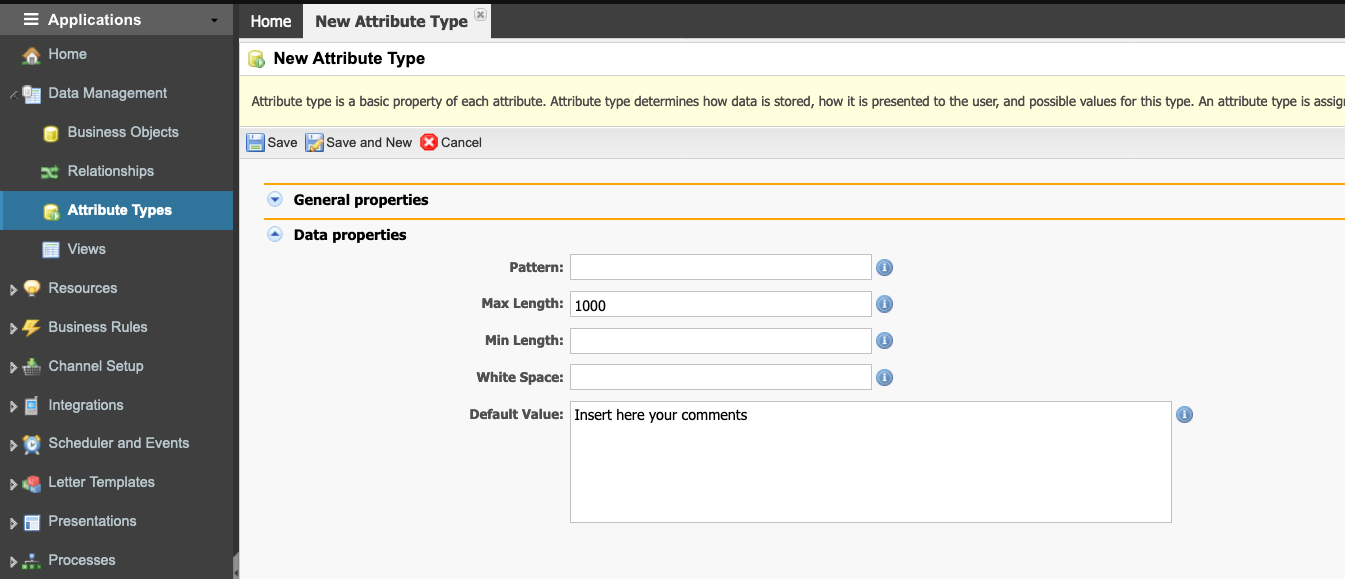
- In the Data properties section defined the characteristics of this type of attribute.
- The Pattern field allows you to enter a regular expression (regex). In our example, we are inserting the regex expression for email addresses (
\b[A-Za-z0-9._%+-]+@[A-Za-z0-9.-]+\.[A-Za-z]{2,}\b) - Enter the Length.
- Enter a Max Length value to define if the number of characters has a limited number of characters that can be entered.
- If there needs to be a minimum number of characters entered for this field, define a Min Length.
- To ensure any leading or trailing white spaces are removed, use the White Space field.
- Finally, if there is a Default Value to be shown whenever this field appears, you can define it accordingly.
- Click Save when done, or Save and New if you wish to save the attribute record and then immediately open a new screen to create another attribute. Otherwise, click Cancel to exit without saving.
Byte Type
Byte-type attributes facilitate the setting of data properties such as a default value and scale. The steps below describe how to create an attribute type for:
- Byte
- Checkbox Byte
- Yes/No Byte
- Navigate to Data Management > Attribute Types (1)
- Click the New Attribute Type button (2).
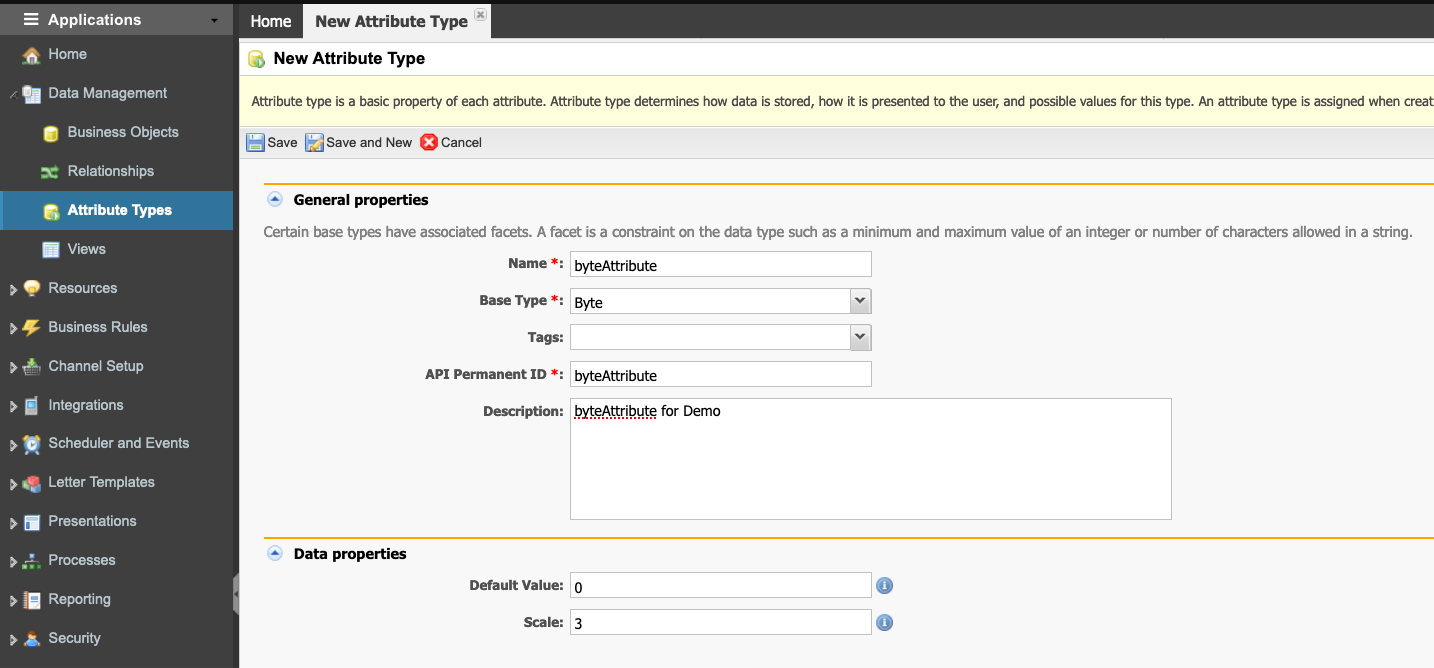
- In the New Attribute Type tab, fill in the mandatory fields in the General properties section.
- Enter the Name of the new attribute.
- Select Byte from the Base Type drop-down list.
- Select any Tags to be applied to the attribute record.
- You can leave the API Permanent ID field as populated when the name is created or overridden as required (ensuring to leave out any white spaces or special characters).
- Enter a Description of the attribute so that future users can understand what the type was created for.
- The Data properties section will enable you to define certain characteristics of this type of attribute.
- The Default Value field allows for the setting of a default value whenever the field appears.
- As the field type is a byte, you can define how many bytes can be captured using the Scale field.
- Click Save when done, or Save and New if you wish to save the attribute record and then immediately open a new screen to create another attribute. Otherwise, click Cancel to exit without saving.
Numeric Type
Numeric type attributes facilitate the setting of data properties such as a default value, max or min value, precision and scale. The steps below describe how to create an attribute type for:
- Checkbox
- Integer
- Number
- Yes/No
- Navigate to Data Management > Attribute Types (1)
- Click the New Attribute Type button (2).
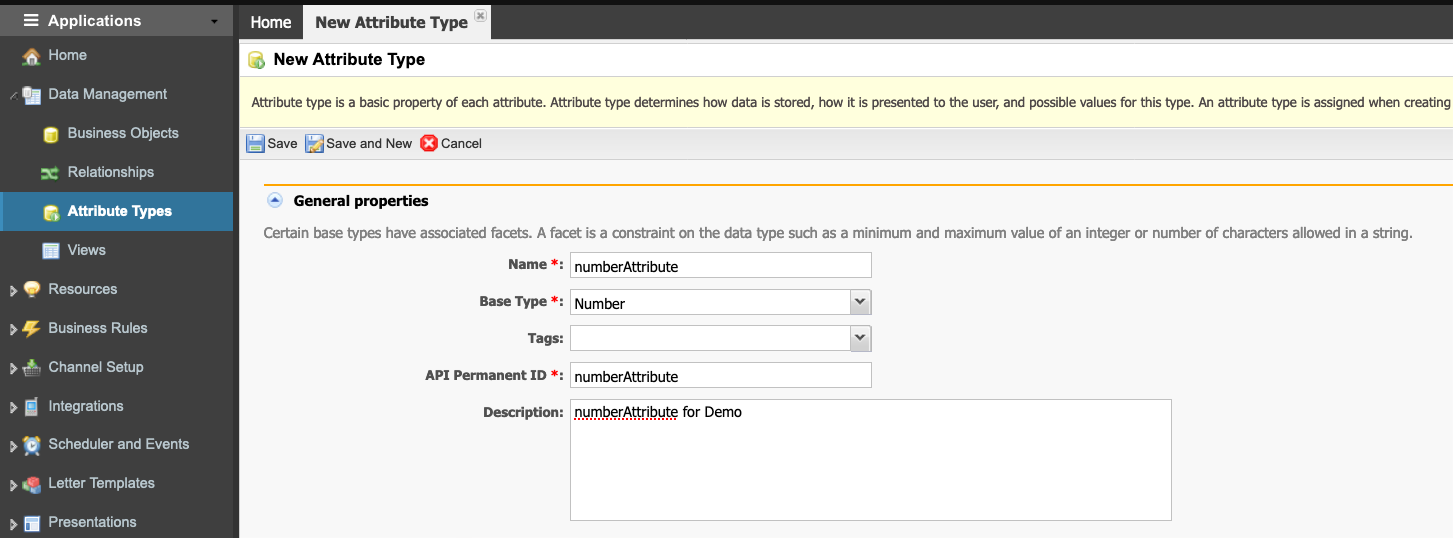
- In the New Attribute Type tab, fill in the mandatory fields in the General properties section.
- Enter the Name of the new attribute.
- Select Number from the Base Type drop-down list.
- Select any Tags to be applied to the attribute record.
- You can leave the API Permanent ID field as populated when the name is created or overridden as required (ensuring to leave out any white spaces or special characters).
- Enter a Description of the attribute so that future users can understand what the type was created for.
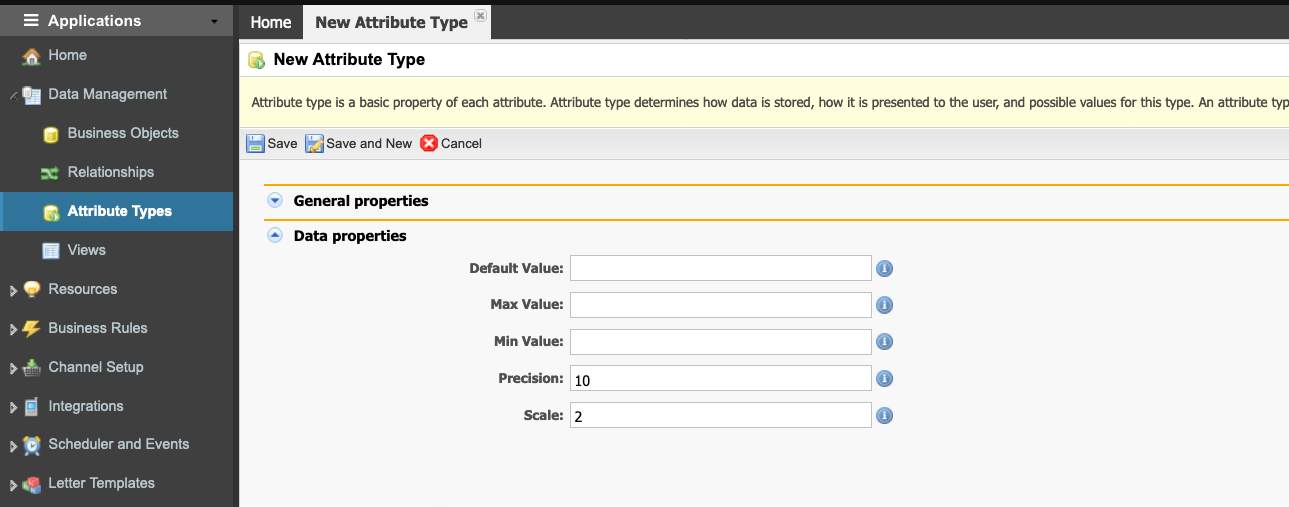
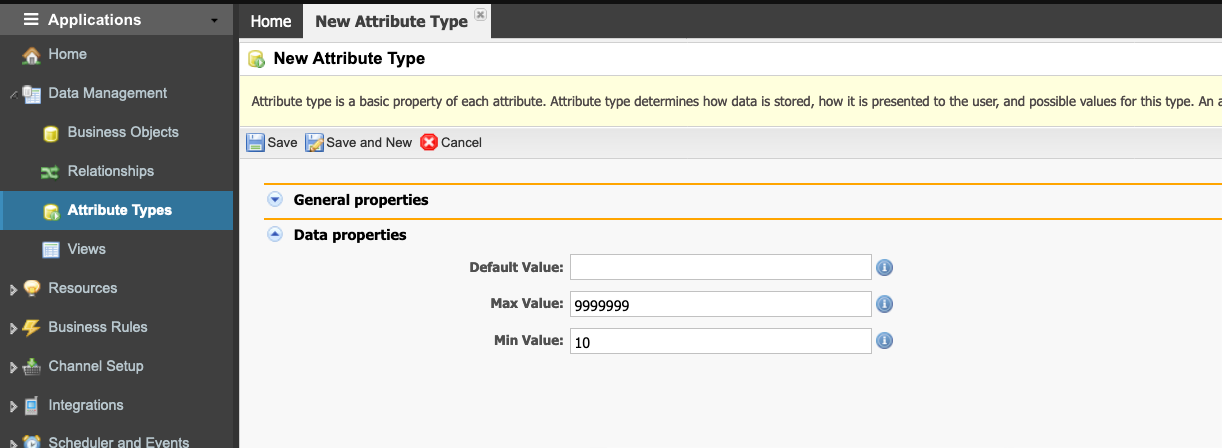
- In the Data properties section sets the characteristics of this type of attribute.
- The Default Value field is to set a default value whenever the field appears.
- Enter a Max Value value to define the maximum value that can ever be used on this attribute.
- If there needs to be a minimum amount that can be used, define a Min Value.
- Enter the Precision value of the field, which helps define how many decimal points will be used.
- The Scale will define the fixed intervals at which values can be used.
- Finally, if there is a Default Value to be shown whenever this field appears, you can define it accordingly.
- Click Save when done, or Save and New if you wish to save the attribute record and then immediately open a new screen to create another attribute. Otherwise, click Cancel to exit without saving.
Date/Time Type
Date or Time type attributes facilitate the setting of data properties such as a default value. The steps below describe how to create an attribute type for:
- Date
- Time
- TimestampWithTimezone
- Navigate to Data Management > Attribute Types (1)
- Click the New Attribute Type button (2).
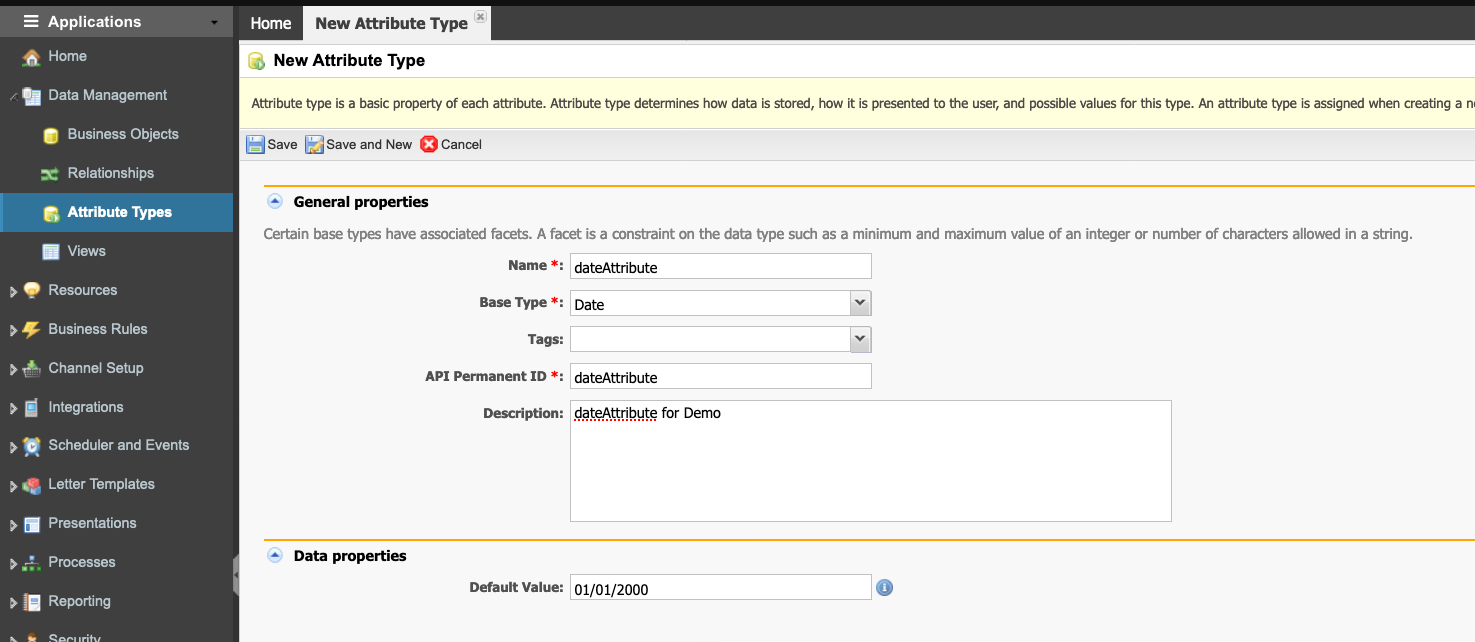
- In the New Attribute Type tab, fill in the mandatory fields in the General properties section.
- Enter the Name of the new attribute.
- Select Date from the Base Type drop-down list.
- Select any Tags to be applied to the attribute record.
- You can leave the API Permanent ID field as populated when the name is created or overridden as required (ensuring to leave out any white spaces or special characters).
- Enter a Description of the attribute so that future users can understand what the type was created for.
- In the Data properties section sets the characteristics of this type of attribute.
- The Default Value field allows for the setting of a default value whenever the field appears.
- Click Save when done, or Save and New if you wish to save the attribute record and then immediately open a new screen to create another attribute. Otherwise, click Cancel to exit without saving.
Large Text Type
An attribute type that uses a large text field can facilitate the setting of data properties such as a default value. The steps below describe how to create an attribute type for:
- Text Area
- XML Type
- Navigate to Data Management > Attribute Types (1)
- Click the New Attribute Type button (2).
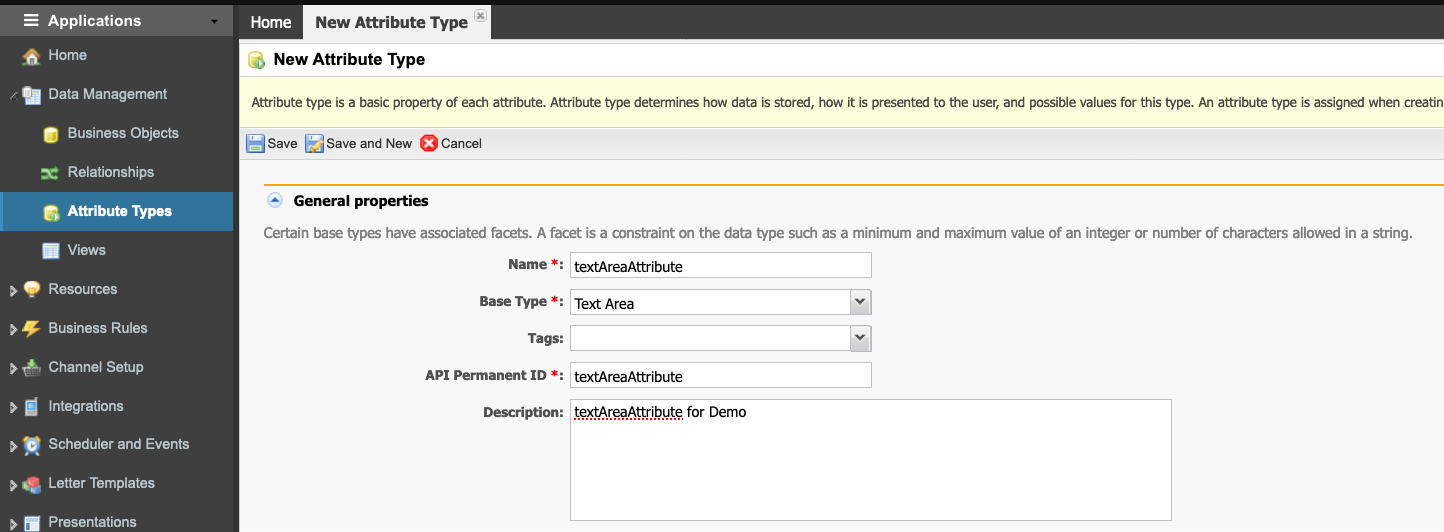
- In the New Attribute Type tab, fill in the mandatory fields in the General properties section.
- Enter the Name of the new attribute.
- Select Text Area from the Base Type drop-down list.
- Select any Tags to be applied to the attribute record.
- You can leave the API Permanent ID field as populated when the name is created or overridden as required (ensuring to leave out any white spaces or special characters).
- Enter a Description of the attribute so that future users can understand what the type was created for.
- In the Data properties section sets the characteristics of this type of attribute.
- The Pattern field allows you to enter a regular expression (regex).
- Enter a Max Length value to define if the number of characters has a limited number of characters that can be entered.
- If there needs to be a minimum number of characters entered for this field, define a Min Length.
- To ensure any leading or trailing white spaces are removed, use the White Space field.
- Finally, if there is a Default Value to be shown whenever this field appears, you can define it accordingly.
- Click Save when done, or Save and New if you wish to save the attribute record and then immediately open a new screen to create another attribute. Otherwise, click Cancel to exit without saving.
Currency Type
- Navigate to Data Management > Attribute Types (1)
- Click the New Attribute Type button (2).
- In the New Attribute Type tab, fill in the mandatory fields in the General properties section.
- Enter the Name of the new attribute.
- Select Currency from the Base Type drop-down list.
- Select any Tags to be applied to the attribute record.
- You can leave the API Permanent ID field as populated when the name is created or overridden as required (ensuring to leave out any white spaces or special characters).
- Enter a Description of the attribute so that future users can understand what the type was created for.

- In the Data properties section sets the characteristics of this type of attribute.
- The Default Value field is to set a default value whenever the field appears.
- Enter a Max Value value to define the maximum value that can ever be used on this attribute.
- If there needs to be a minimum amount that can be used, define a Min Value.
- Click Save when done, or Save and New if you wish to save the attribute record and then immediately open a new screen to create another attribute. Otherwise, click Cancel to exit without saving.
Picture Type
An attribute type that uses a picture type can facilitate the setting of data properties such as a default value. That is, this attribute will reference the same picture file whenever used.
- Navigate to Data Management > Attribute Types (1)
- Click the New Attribute Type button (2).
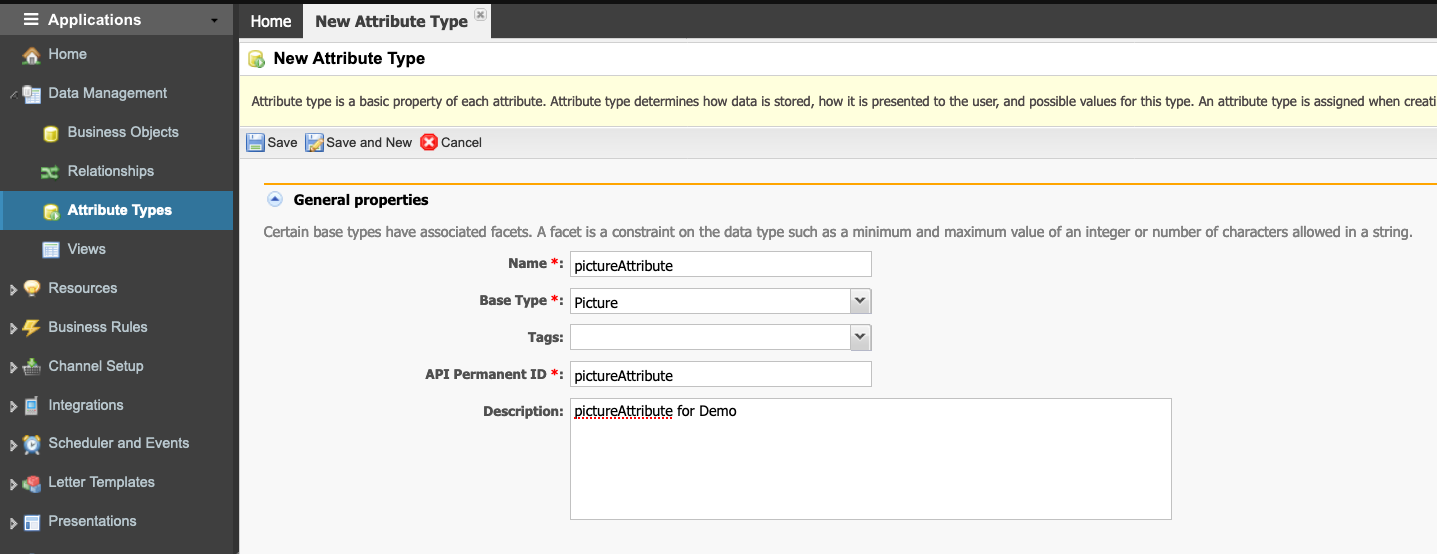
- In the New Attribute Type tab, fill in the mandatory fields in the General properties section.
- Enter the Name of the new attribute.
- Select Date from the Base Type drop-down list.
- Select any Tags to be applied to the attribute record.
- You can leave the API Permanent ID field as populated when the name is created or overridden as required (ensuring to leave out any white spaces or special characters).
- Enter a Description of the attribute so that future users can understand what the type was created for.
- Click Save when done, or Save and New if you wish to save the attribute record and then immediately open a new screen to create another attribute. Otherwise, click Cancel to exit without saving.
Lookup Type
- Navigate to Data Management > Attribute Types
- Clone the Lookup Attribute Type.
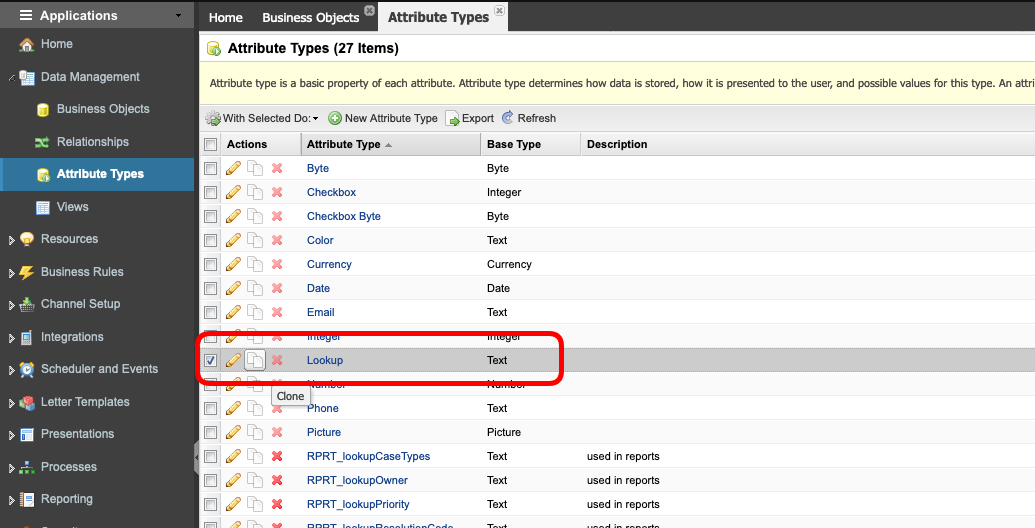
- In the popup window, enter the New Name for the cloned attribute. In our example, RPRT_lookupPriorities.
- Click the Clone button.
- To edit the new cloned attribute, click on the Pencil button.
- In the new tab window. Edit the Lookup Data section.
- Select the Rule from the dropdown list. In our example, the RPRT_lookupPriority rule. This rule doesn't need to specify any parameter.
- Select the Lookup Value and the Lookup Text. These options are retrieved from the rule.
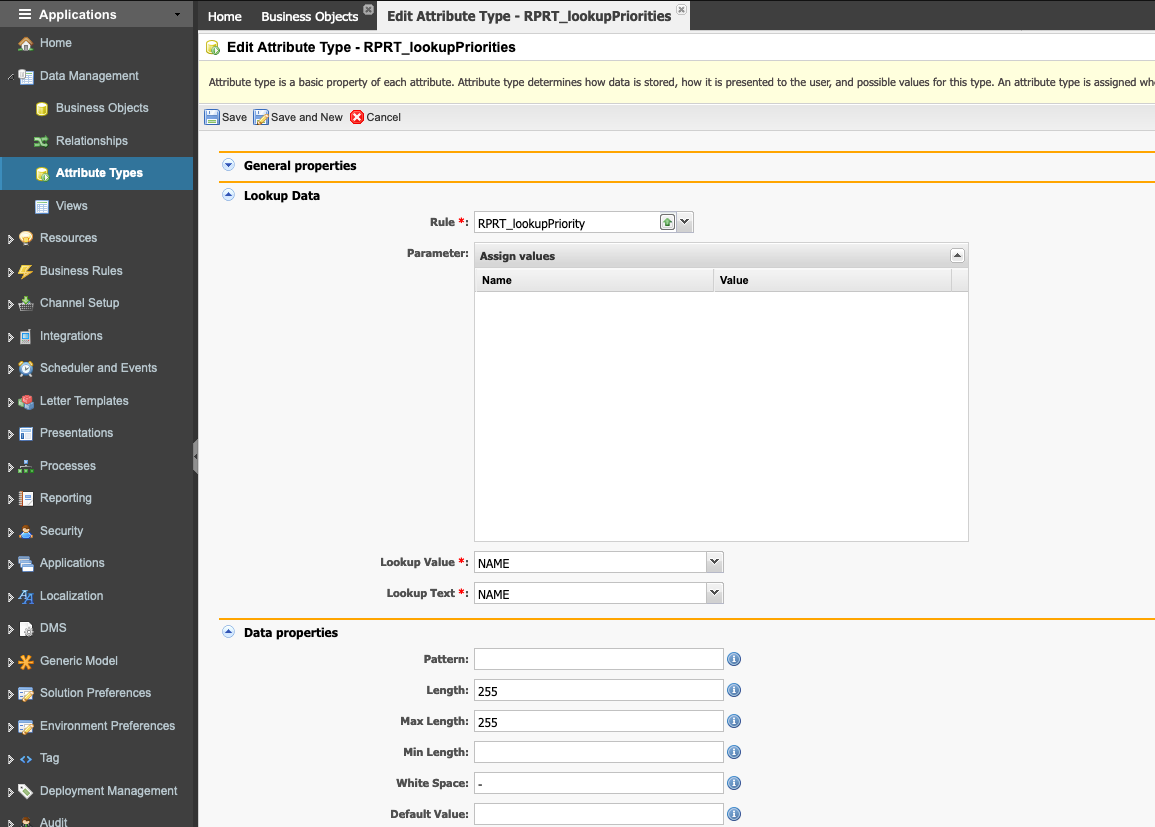
- Configure any additional settings, if needed, under the Data properties section.
- Save the attribute.