In Eccentex AppBase, dictionaries are typically used to represent objects or records in a database. Each key in the dictionary corresponds to a field or attribute of the object, and the value associated with that key represents the value of that field for a particular instance of the object. By using dictionaries to represent objects, we can easily manipulate and store data in a structured way within Eccentex AppBase.
In addition to the large range of standard fields that the DCM provides for Case, Task, and Party Types, there is also the ability to add new fields of many types. These ‘Custom Fields’ allow a DCM solution to be customized for the unique requirements of each business. For fields that behave as drop-down lists, the Dictionary feature lets you quickly define the various lists of values that a caseworker can use for drop-down field selection.
To add a custom field (or Word) to the DCM solution, a category for that field/word must be created first.
Add a Category
On the top right, navigate to → <<your solution>>
On the left, navigate to → Setup
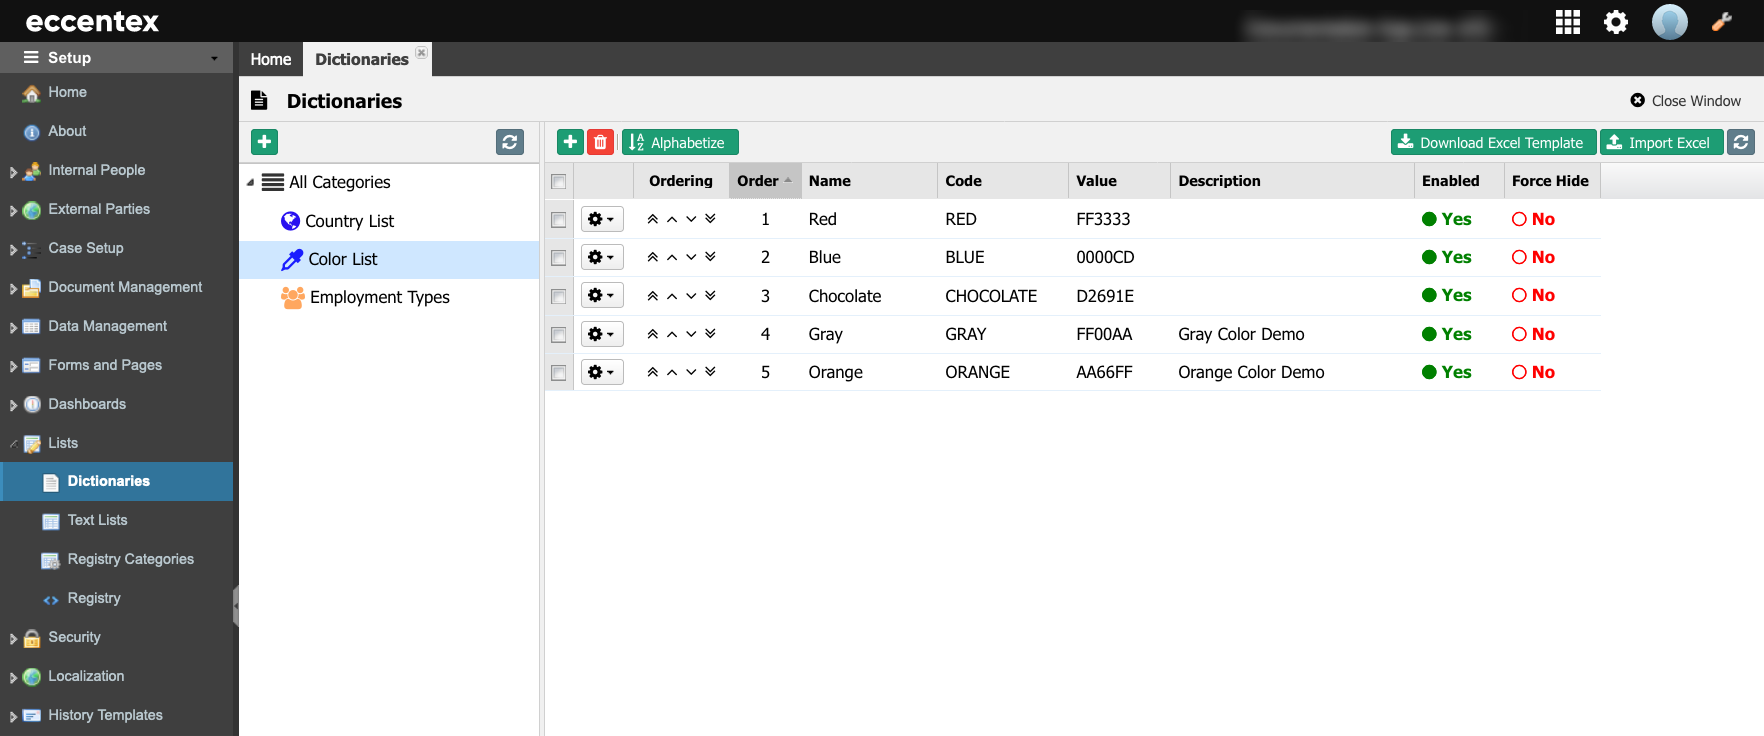
Navigate to Lists →Dictionaries(1).
Click on the green plus button ()to add aNew Category(2)
Select the parent category from theBelongs todropdown list. In our example, the root category,All Categories.
Insert theNamefor the Category. In our example, ‘Employment Types’.
ThePermanent Code field will be auto-populated using the Name field, subtracting dash (-) and any spaces or special characters; it also changes to uppercase.
You can override Code Value (ensuring no spaces or special characters are used). The code Value cannot be changed after saving.
Select anIconto represent the Category. In our example, ‘group users.'
Optionally, modify the Color.
Insert a briefDescription.
Save it.
Add a Word
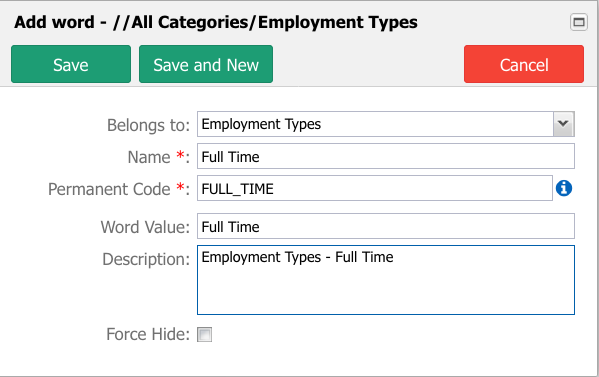
Select a category to add Words.
Select the parent category from theBelongs todropdown list. In our example, the root category,Employment Types.
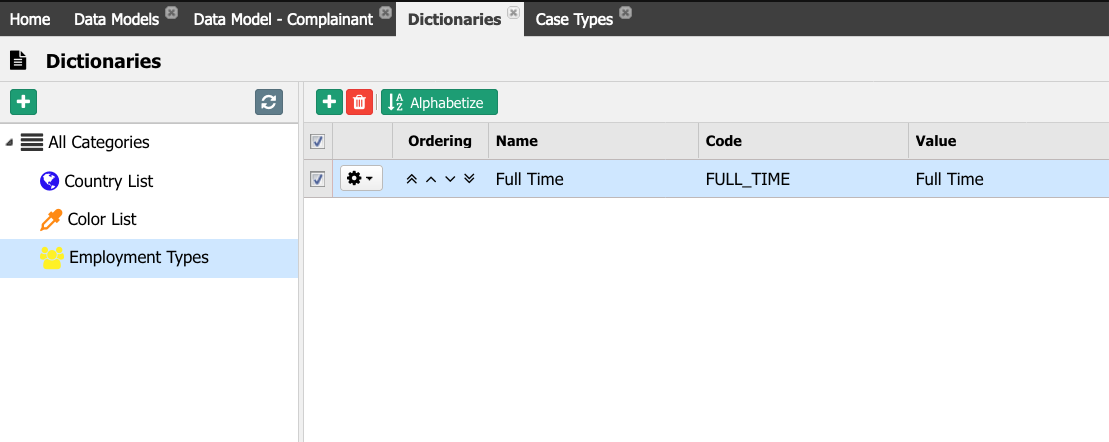
Insert theNamefor the Word. In our example, Full Time.
ThePermanent Code field will be auto-populated using the Name field, subtracting dash (-) and any spaces or special characters; it also changes to uppercase.
You can override Code Value (ensuring no spaces or special characters are used). The code Value cannot be changed after saving.
Optionally, enter theWord Value for the entry. In our example,Full Time. This can be different from the Name.
Insert a briefDescription.
Savethe new Word or Save and New to create a new word without closing the popup window.
Migrating Dictionaries
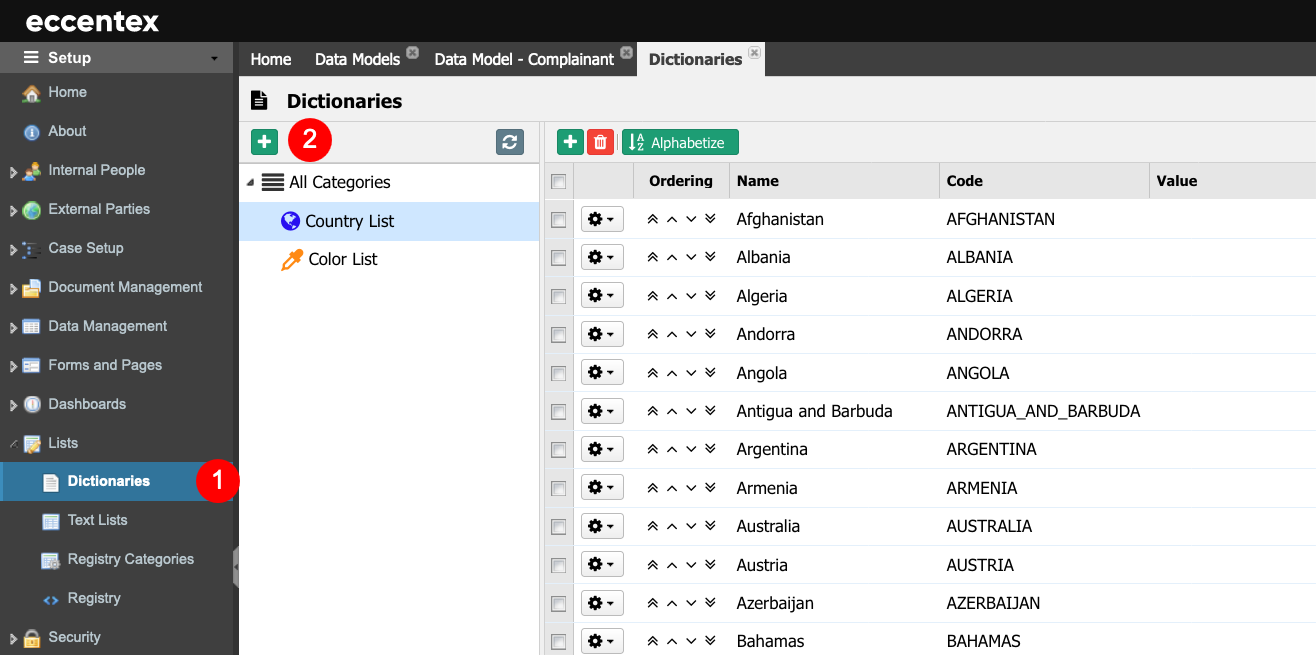
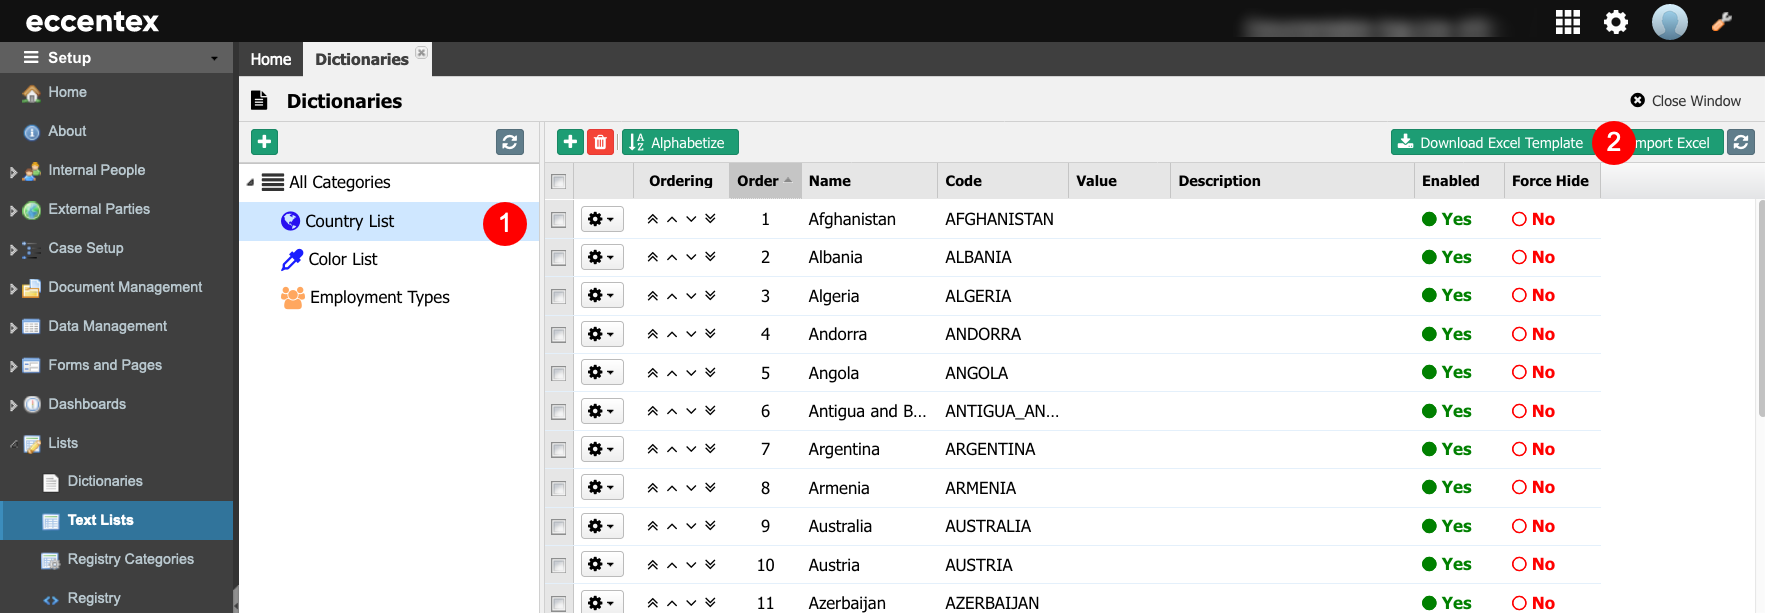
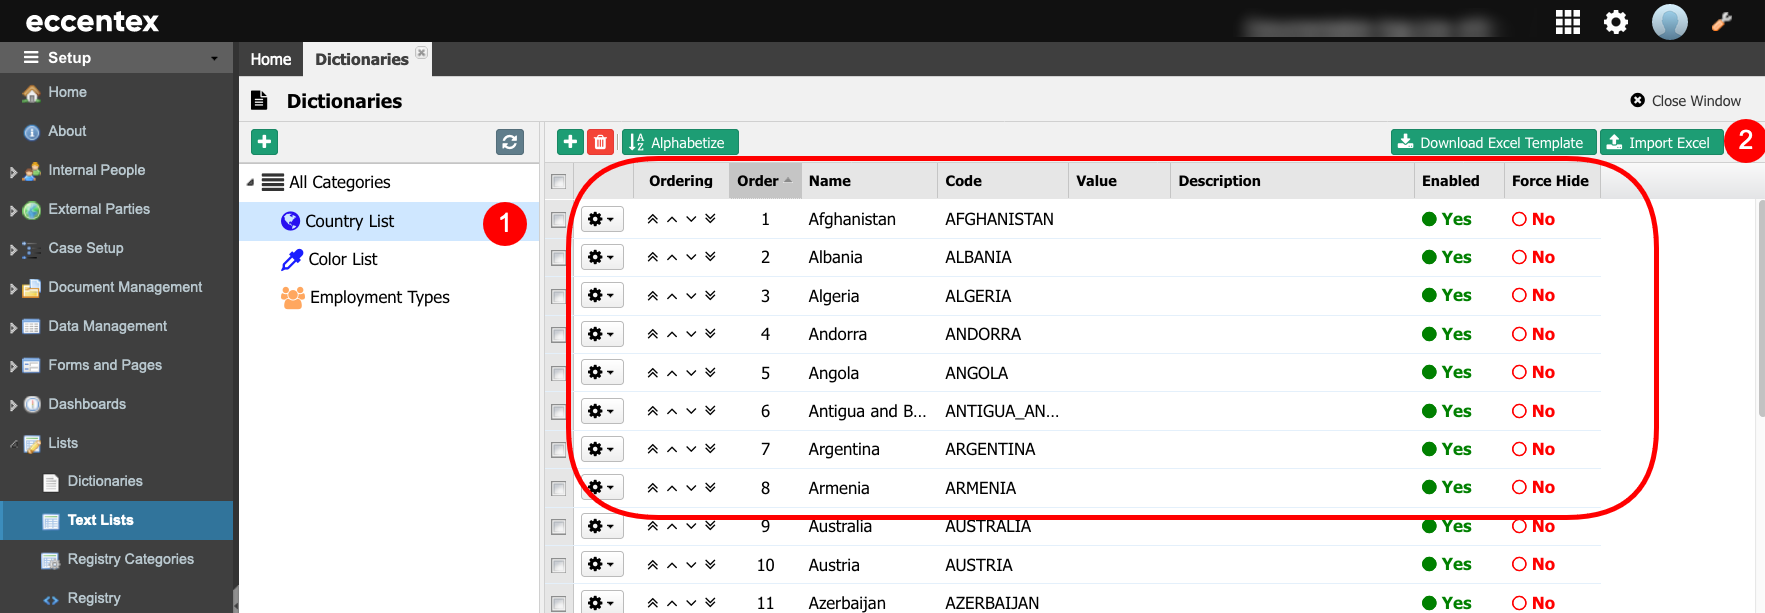
On the source solution, select the Category (1) to be exported, then click theDownload Excel Templatebutton (2).
The MS Excel file will be downloaded to the local disc using a name pattern likeDICTIONARY_CATEGORY.xlsx. In this example, the file name will be Dictionary_COUNTRY_LIST.xlsx.
On the destination solution, create the category to be imported, or select an existing one where the values will be added.
Click theImport Excel button (2), select the file, and after a couple of seconds, the category content will be updated, showing the newly added values. In our example, we selected the categoryCountry_List.
This action can not be undone. Be careful when selecting the right category before starting to import the values.
Limitations
Export works for the category that is selected in the source solution. So, you can only migrate one data category at a time from the source to the destination solution.
Import doesn't delete or update any records in a target solution.
Import doesn't create the category. You must manually add the category to the destination solution before running the import.