Eccentex AppBase provides the capability to create a Generic MDM (Master Data Management) Detail Page, which is a customizable user interface component used to display and manage detailed information about a specific master data record.
Here's an overview of creating a Generic MDM Detail Page in Eccentex AppBase:
Data Model Configuration: Before creating the Detail Page, you must define the MDM records' data model. This involves creating the necessary business objects, attributes, relationships, and validations that represent your master data structure.
Page Designer: AppBase offers a visual Page Designer tool that allows you to design and customize the user interface. To create a Generic MDM Detail Page, you can start by selecting or creating a new page layout specifically tailored for the MDM records.
Data Binding: Once you have the page layout, you need to bind the layout components to the corresponding attributes of the MDM record. This involves mapping the attributes defined in your data model to the appropriate input fields, labels, or display elements on the Detail Page.
Display Controls: AppBase provides a variety of display controls that you can use to present the MDM record information in a user-friendly manner. These controls include text fields, dropdown lists, checkboxes, and date pickers. You can choose the appropriate controls based on each attribute's data type and purpose.
Relationships and Related Data: If your MDM records have relationships with other business objects, you can incorporate related data into the Detail Page. This can include displaying associated records, allowing navigation to related records, or providing summary information about the related data.
Actions and Workflows: AppBase allows you to define actions or workflows that can be triggered from the Detail Page. These actions can include editing the record, deleting it, initiating specific processes, or invoking custom business logic. You can configure buttons or links on the page to initiate these actions.
Security and Permissions: It is important to consider security and permissions when creating a Generic MDM Detail Page. AppBase provides granular access control mechanisms, allowing you to define who can view, edit, or perform specific actions on the MDM records.
Testing and Deployment: Once you have designed and configured the Generic MDM Detail Page, you can preview and test its functionality within the AppBase environment. Once you are satisfied with the results, you can deploy the page to make it available for end-users to interact with and manage the detailed information of the MDM records.
Creating a Generic MDM Detail Page in Eccentex AppBase provides a flexible and customizable solution for presenting and managing master data. It allows you to tailor the user interface to your organization's specific needs and provides a seamless experience for users working with detailed MDM records.
Steps
On the top right, navigate to → <<your solution>>
On the left, navigate to → Setup
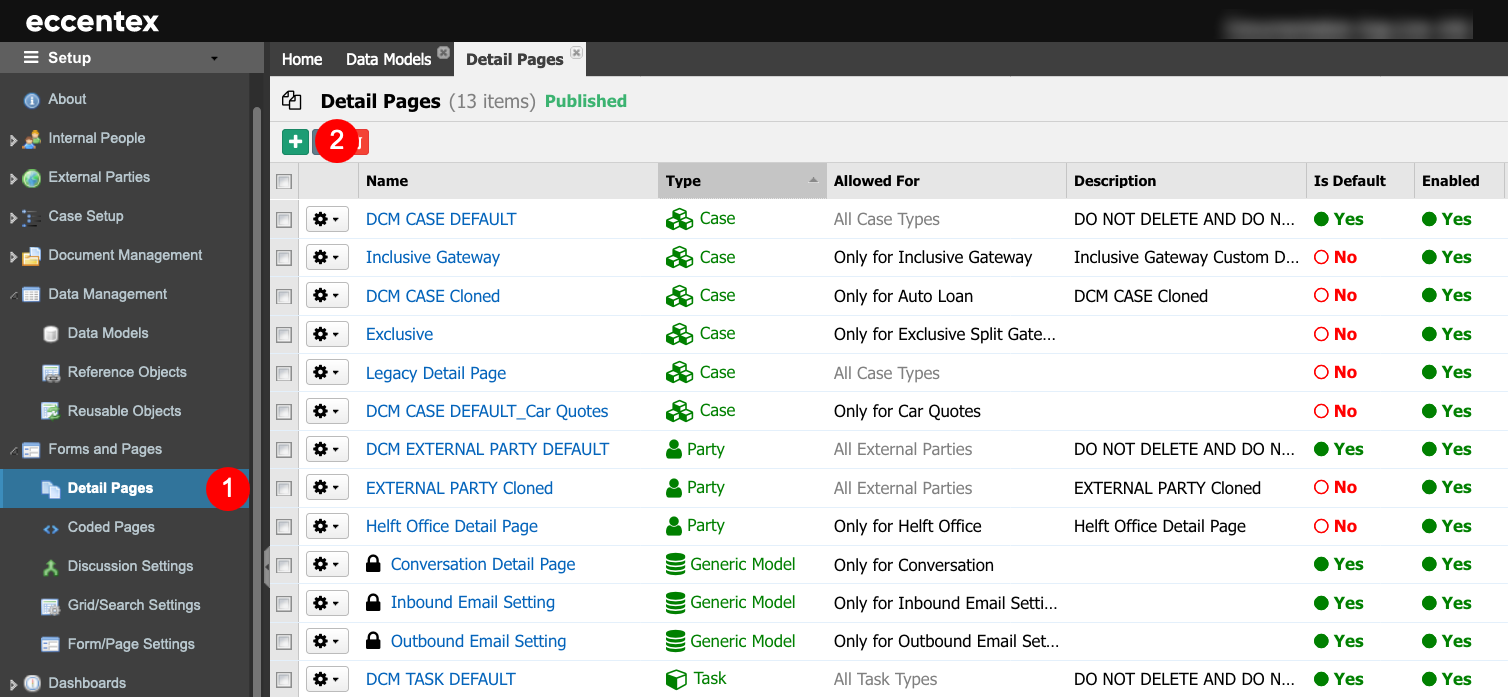
Navigate toForms and Pages → Detail Pages (1).
Click on the New Page button (2).
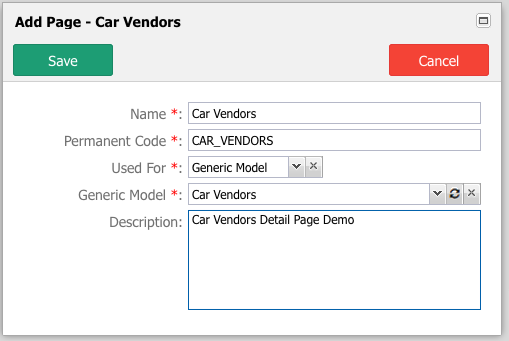
In the pop-up window, insert a Name for the detail page.
ThePermanent Code field will be auto-populated using the Name field, subtracting dash (-) and any spaces or special characters; it also changes to uppercase.
You can override Code Value (ensuring no spaces or special characters are used). The code Value cannot be changed after saving.
Select Generic Model for the Used For.
Select the Generic Model. In our example, Car Vendors.
Insert a briefDescription.
Save the new Detail Page.
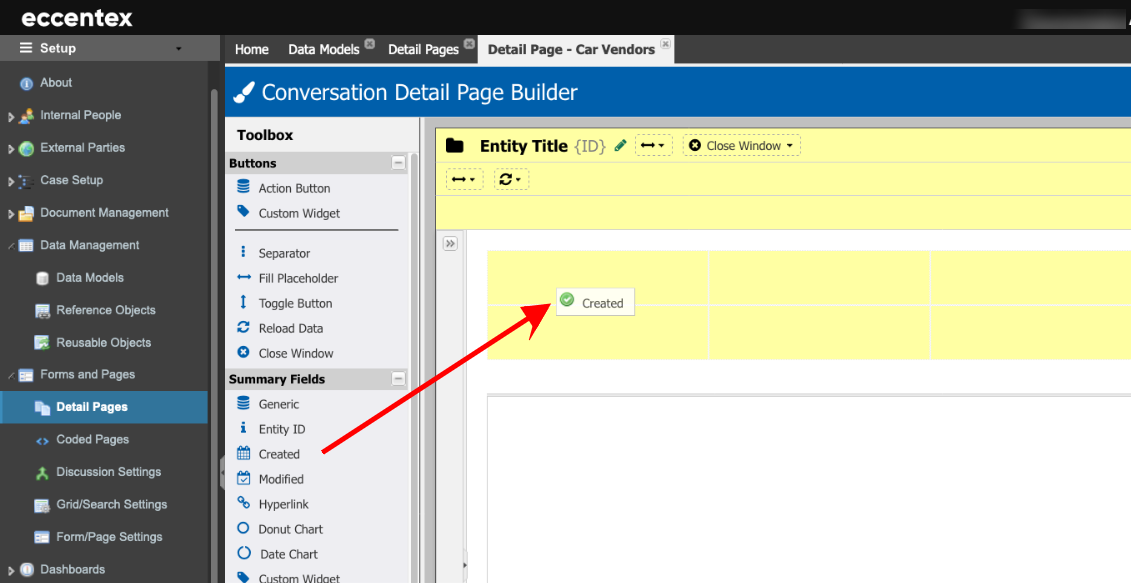
After saving, the new detail page is opened in the Detaill Page Builder. Here is were you can customize the page. In our example, we added from the Summary Fields section, the Created field to the Summary section.
Save the page when done, and close the Page Builder.
Click the Publish layout cache (play button to clean the cache and make the changes on the detail pages(s) available.
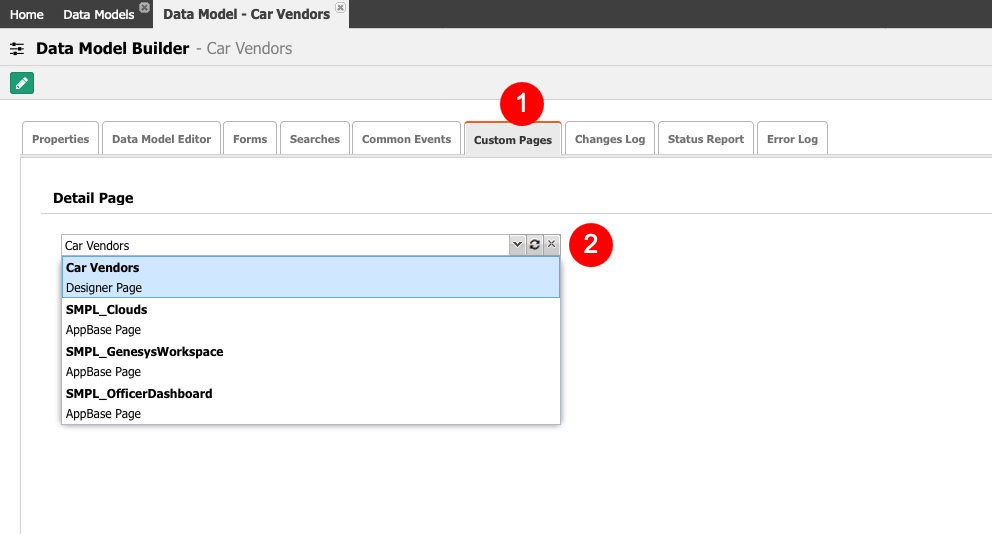
Return to the Data Model and add the new detail page as default.
Navigate to the Custom Pages tab (1), select the new Detail Page from the dropdown list. In our example, the Car Vendors.