How To Add a Custom Rule in MDM Forms
The MDM (Master Data Management) Form Builder is a powerful tool that empowers users to enhance the functionality of their data entry forms by incorporating Custom Rules into various fields. These Custom Rules enable the automation of specific Actions, which are triggered whenever there is a modification or change in the data within those fields.
For instance, consider a scenario where a user is working with a data entry form that includes a dropdown list. With the implementation of a Custom Rule, the behavior of this form can be dynamically altered based on the selection made from the dropdown list.
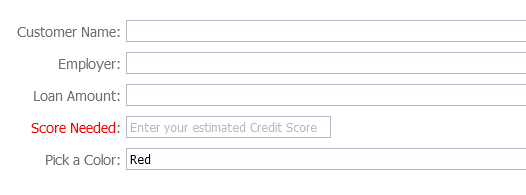
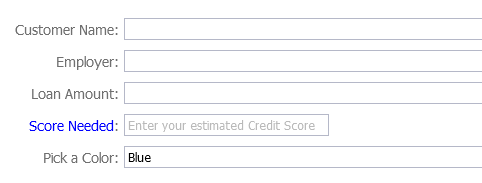
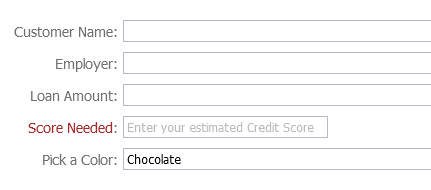
One practical application of this capability involves modifying the appearance of a Label associated with the dropdown list. The Custom Rule facilitates the adjustment of the Label's color to reflect the option chosen in the dropdown list. This visual cue provides immediate feedback to the user and enhances the overall user experience by making the form more intuitive and engaging.
The MDM Form Builder enables users to incorporate a Dictionary specifically designated for colors to achieve this. This Dictionary serves as a repository for a range of color values that correspond to different selections within the Auto Loan Case Type dropdown list. When a user selects an option from the dropdown list, the Custom Rule retrieves the appropriate color value from the Dictionary and applies it to the Label associated with the dropdown. As a result, the Label's color dynamically changes, creating a visual association between the chosen option and its representation on the form.
The inclusion of a Dictionary for colors within the Auto Loan Case Type dropdown exemplifies how this tool can be harnessed to enhance form functionality and user experience.
Steps
- Navigate to Setup → Forms and Pages.
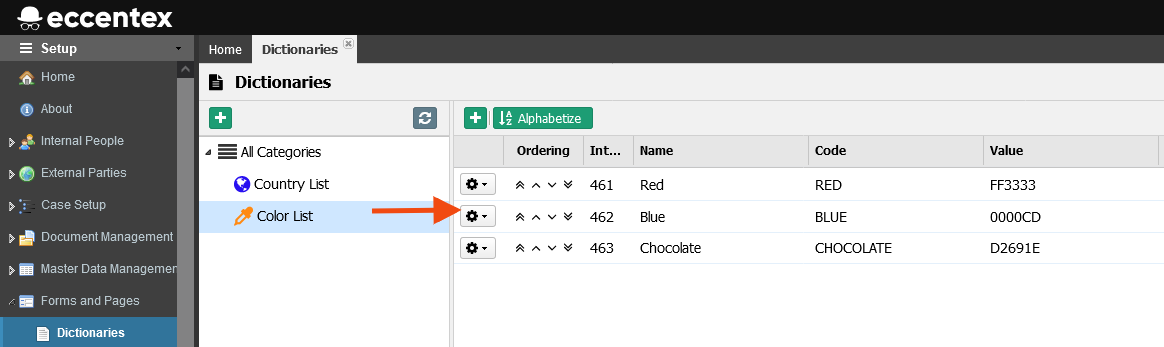
- Select the Dictionaries menu. Here you will find a list of the Dictionaries available under the section All Categories.
- In the following image, we are showing the Color List dictionary and the values set for it that we all use later in the example.
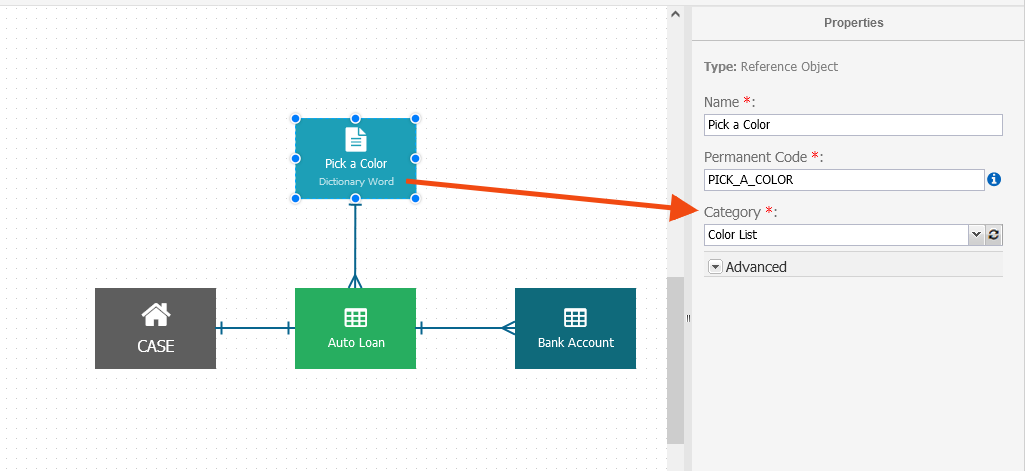
- Add a dictionary object to the Auto Loan data model. Assign the "Pick a Color" for Name and select the Color List from the Category dropdown list.
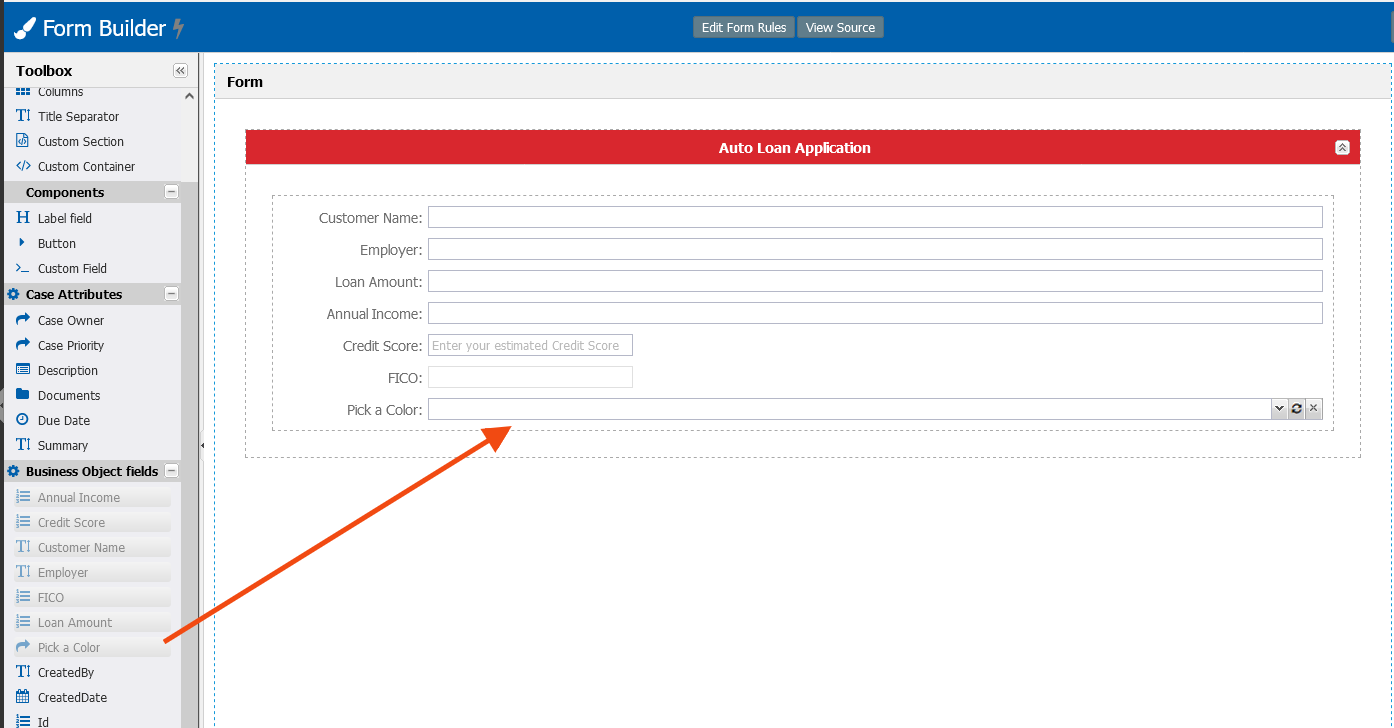
- Open the Form Builder and manually add the new field to the form. Select the Pick a Color from the Business Object Fields.
- Take note of the Code associated with this field (PICK_A_COLOR_ID), as we'll use it in the code of the custom rule.

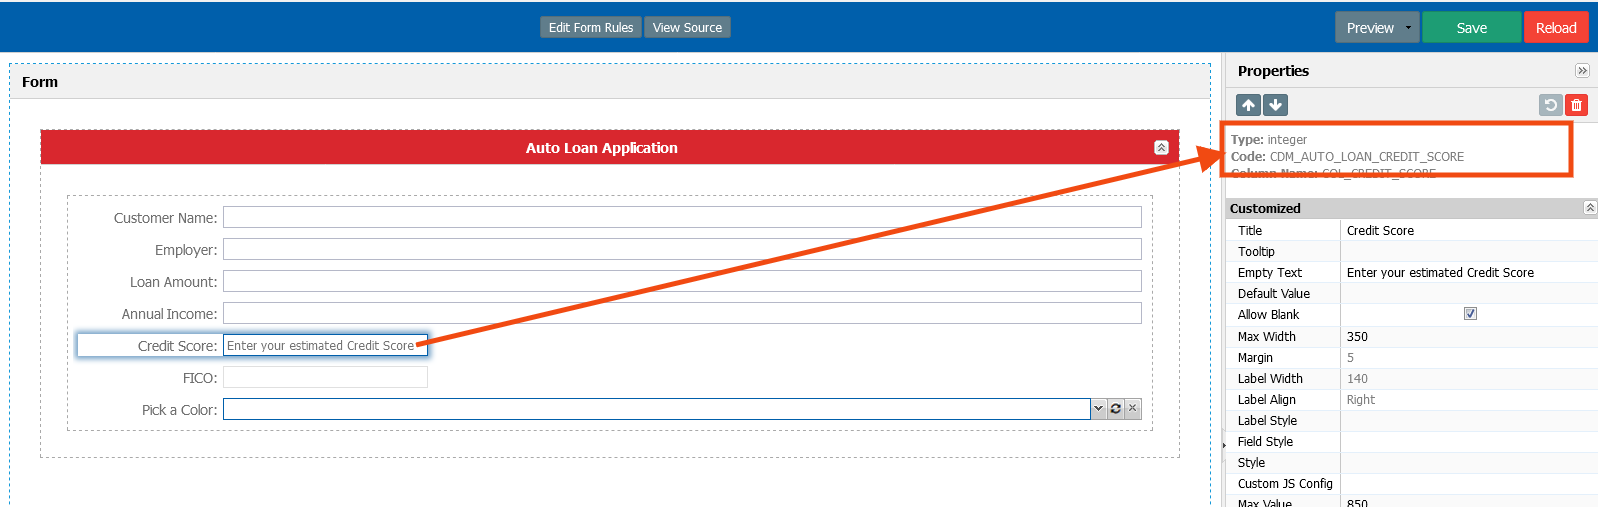
- The other Code we will need if the one from the Credit Score (CDM_AUTO_LOAN_CREDIT_SCORE), which the rule will change the color.
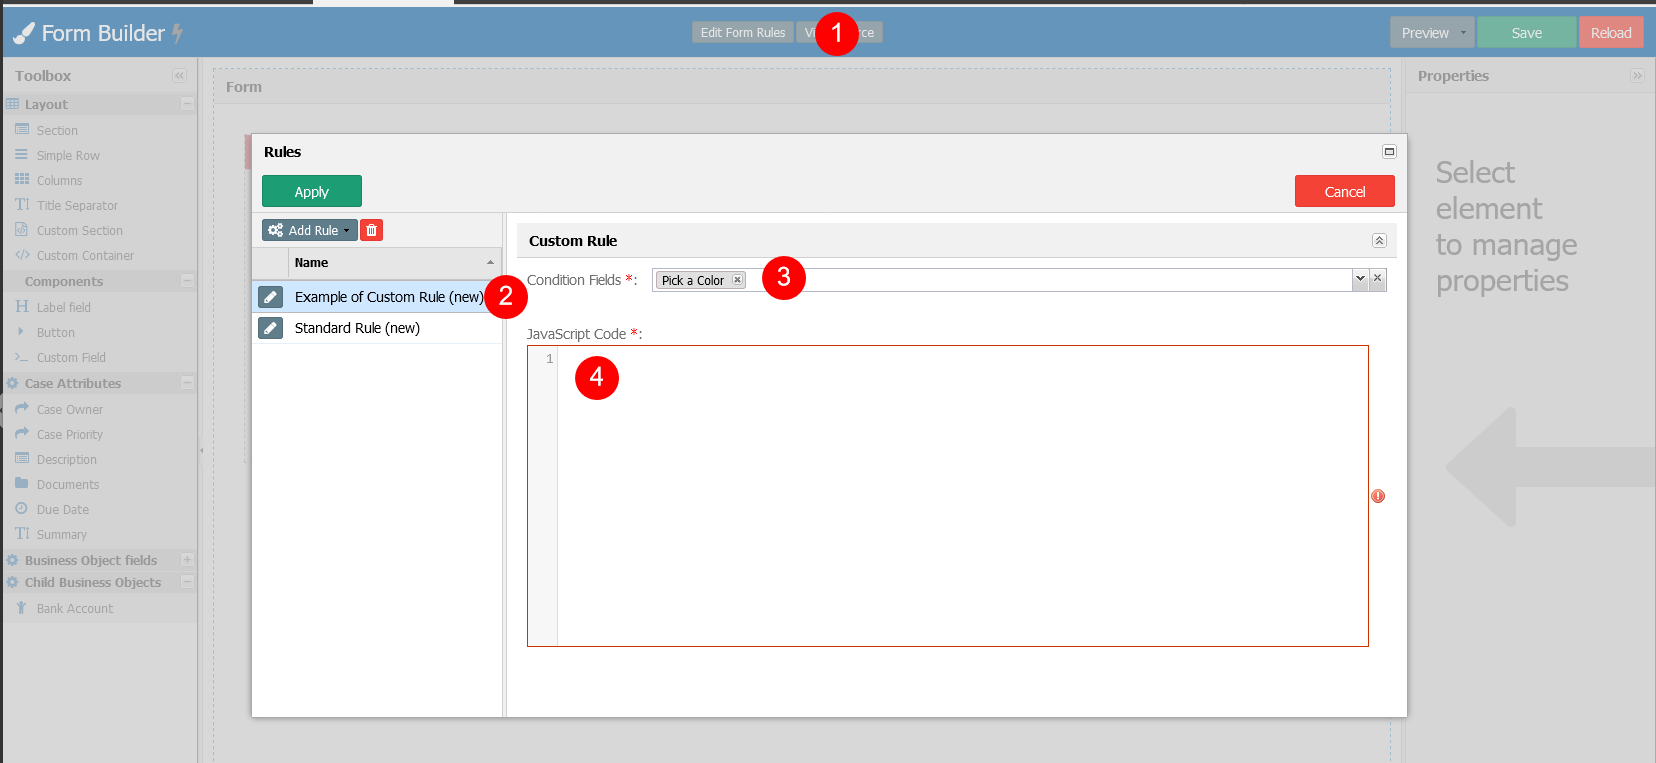
- Click the Edit Form rules button (1), add a new Custom Rule (2). Select the Condition Field (3) that will be used in the code. In our example, we will use the Pick a Color.
Copy the following JavaScript code and paste it in the JavaScript Code section.
Custom Rule Code
JSfunction (viewForm, bindObj, arrUIElements) { /*temporary function you can add to GlobalJS if you want*/ var CUST_syncLabelWithReq = function (colorStyle) { console.log('Function called -->', colorStyle); // "type": "field", // "title": "Credit Score", // "attributeCode": "CDM_AUTO_LOAN_CREDIT_SCORE", // "ref": "ref_CDM_AUTO_LOAN_CREDIT_SCORE" var tpl = ' <span class="req" style="color:' + colorStyle + '">Score Needed</span>'; var txtCreditScore = viewForm.lookupReference('ref_CDM_AUTO_LOAN_CREDIT_SCORE'); if (!txtCreditScore) { console.log('Field not rendered'); return; } var rawFieldLabel = txtCreditScore.fieldLabel.replace(' <span class="req" style="color:' + colorStyle + '">Credit Score</span>', ''); console.log('Color -->', colorStyle, 'New Label Style -->', tpl); txtCreditScore.setFieldLabel(tpl); } /*======================================*/ try { // "type": "field", // "code": "reference", // "title": "Pick a Color", // "ref": "ref_PICK_A_COLOR_ID", // "attributeCode": "PICK_A_COLOR_ID", // "referenceDetailName": "PICK_A_COLOR_NAME", var cmbPickColor = viewForm.lookupReference('ref_PICK_A_COLOR_ID'); if (!cmbPickColor) { console.log('Field not rendered'); return; } var dictStore = cmbPickColor.getStore(); //do dictStore.getRange() to see all records //get code ID var colorId = bindObj['PICK_A_COLOR_ID']; var mediumRec = dictStore.findRecord('ID', colorId); if (!mediumRec) { console.log('Record not found'); return; } var colorName = mediumRec.get('NAME'); // 'Red' var colorCode = mediumRec.get('CODE'); // 'RED' console.log('Color Selected: ', colorName, colorCode); // "type": "field", // "title": "Credit Score", // "attributeCode": "CDM_AUTO_LOAN_CREDIT_SCORE", // "ref": "ref_CDM_AUTO_LOAN_CREDIT_SCORE" switch (colorName.toUpperCase()) { case 'RED': console.log('Option RED ', colorName, colorCode); CUST_syncLabelWithReq(colorCode); break; case 'BLUE': console.log('Option BLUE ', colorName, colorCode); CUST_syncLabelWithReq(colorCode); break; default: console.log('Option DEFAULT ', colorName, colorCode); CUST_syncLabelWithReq('BROWN'); } } catch (err) { console.log(err); } }- The function receives three variables from the ExtJS framework:
viewForm, bindObj, and arrUIElements. The purpose of these variables is explained in the table below:viewForm:ThebindObj:arrUIElements:List of all UI elements in the MDM Form.
The general idea is to use the ID of the selected color to look up the CODE value in the combo box's store (Dictionary). The example below will make the "Credit Score" field depend on the "Pick a Color" value.
Using the parameter viewForm, the code retrieves the object of the Pick a Color field.
var cmbPickColor = viewForm.lookupReference('ref_PICK_A_COLOR_ID');Using the bindObj parameter, the code retrieves the selection of the Pick a Color field:
var colorId = bindObj['PICK_A_COLOR_ID'];var mediumRec = dictStore.findRecord('ID', colorId);var colorCode = mediumRec.get('CODE'); // 'RED'Using the CODE, we select the color to change the Credit Score field.
var tpl = ' <span class="req" style="color:' + colorStyle + '">Score Needed</span>';var txtCreditScore = viewForm.lookupReference('ref_CDM_AUTO_LOAN_CREDIT_SCORE');txtCreditScore.setFieldLabel(tpl);- In runtime, this will result in the following: