A new iReport report can be uploaded and configured into AppBase to make it visible under the Report Viewer menu.
The best practice is to upload the iReport file (.jrxml) to the AppBase Solution Resources and then configure the Report Viewer.
Upload the iReport File (.jrxml)
On the top right, navigate to → Application Studio → <<Solution>>
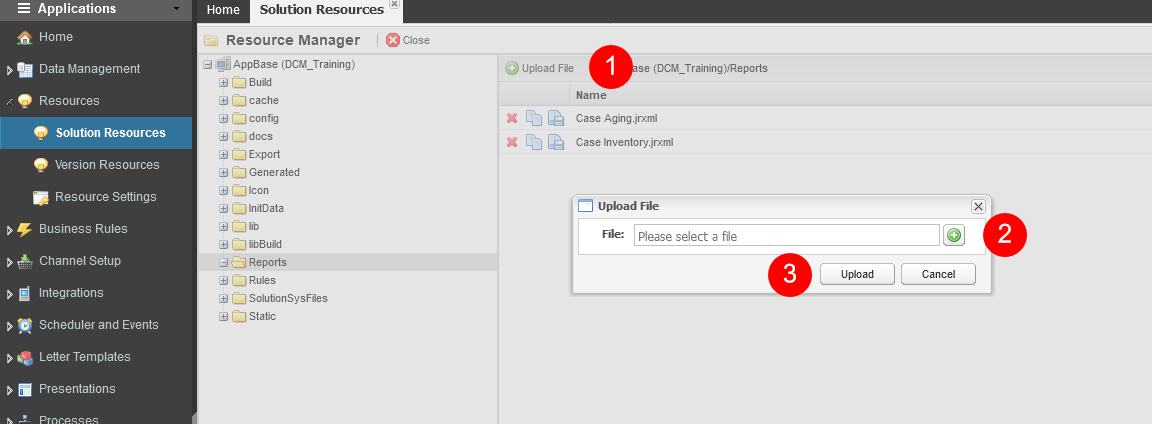
On the left, navigate to → Applications → Resources → Solution Resources
Select the Reports folder
Click on the Upload File button (1), in the pop-up window, click on the plus button (2) to select the file from your local folder.
Select the file iReport file from the local drive and click on the Upload button (3).
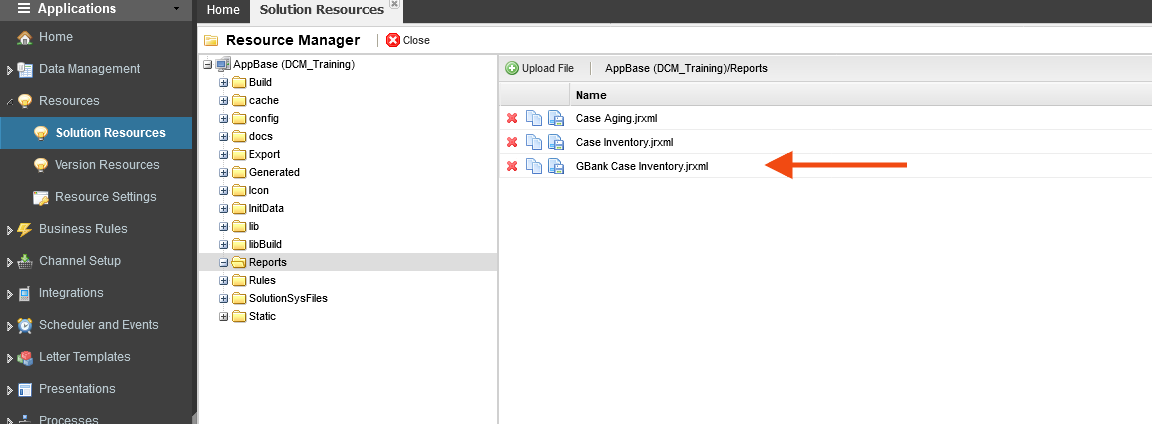
Check that you have the file in the right panel before continuing.
Add the iReport
Navigate to Applications →Reporting → Categories where you can add the report uploaded in the previous step.
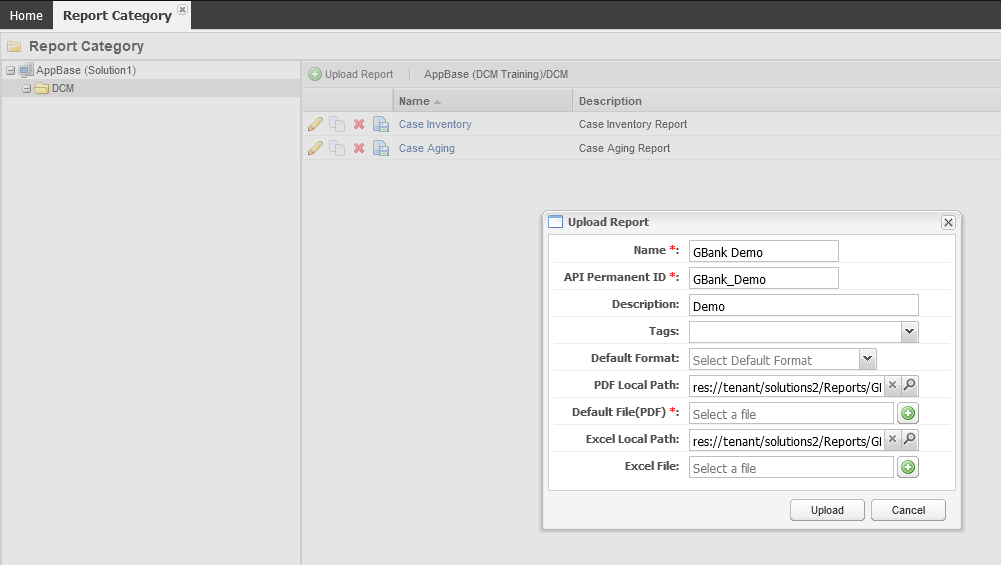
Select the folder Reports under AppBase and click on Upload Report button.
In the pop-up window, enter a Name and Description. Leave Tags blank.
Select the Default Format, if needed.
On the PDF Local Path field, click on the magnifier icon to select the uploaded report.
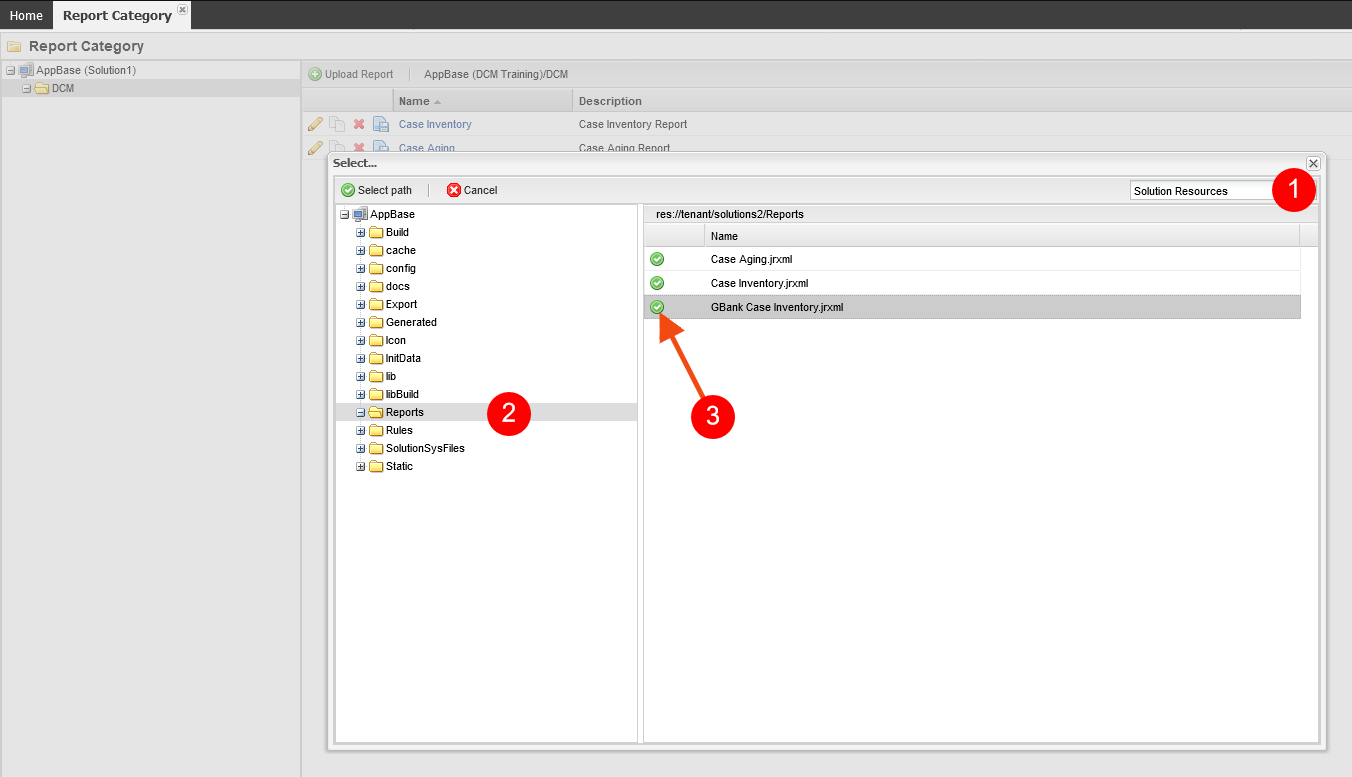
In the pop-up window, select the Solution Resources (1) from the dropdown list at the right corner (Be sure to change the path from Version Resources to Solution Resources on the upper right dropdown list). Under the Reports folder (2), click the Select path button, the green checkmark on the left side of the name of the report (3).
On the Excel Local Path field, click on the magnifier icon to select the uploaded report as in the previous step.
Click the Upload button when finished.
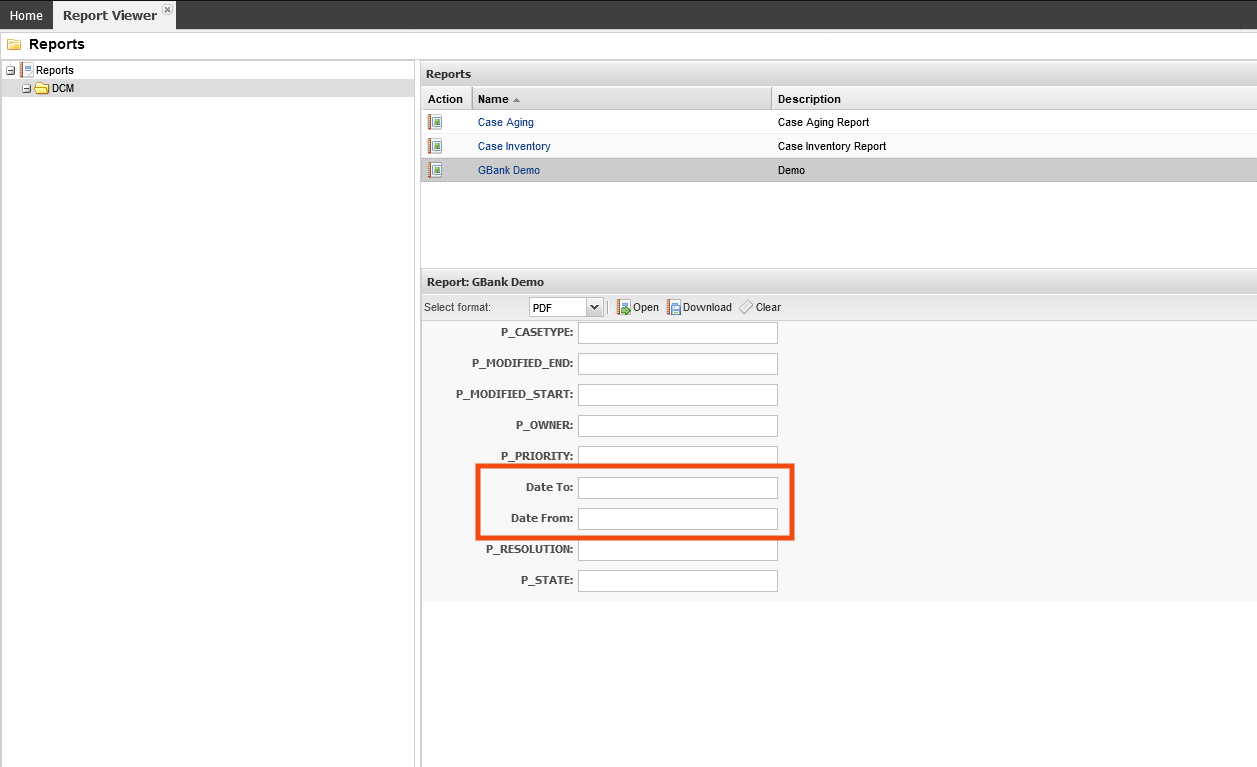
Click on the name of the recently added report (GBank Demo) and edit the Parameters section.
Double click the P_RECEIVED_START parameter to edit it.
Change the Required option to Yes and Title to Date From.
Save the changes.
Double click the P_RECEIVED_END parameter to edit it.
Change the Required option to Yes and Title to Date To.
Save the changes.
Navigate to Deployment Management > Deploy and run a deployment.
Test the Report
After deployment is completed, select the solution.
Navigate to → Case Management
Navigate to Admin Tools → Report Viewer
On the left panel, select the DCM folder
Select the Gbank Demo report clicking on the name hyperlink
Select a format: PDF or MS Excel
Validate that the changes to the title of the Date parameters are OK.
Set values for the filters if needed.
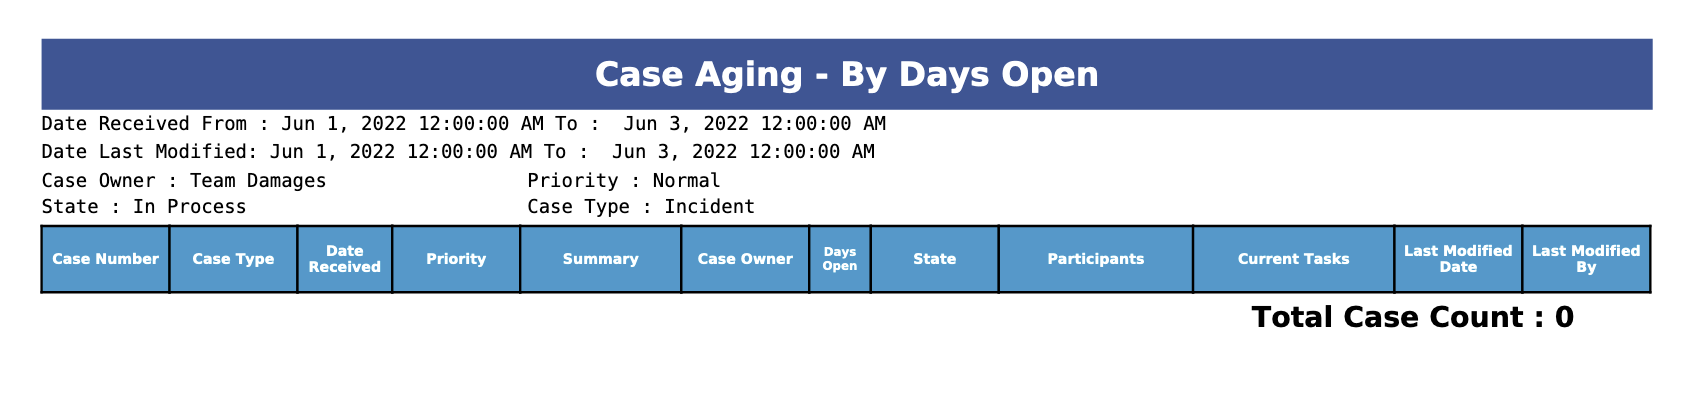
Clicking the Open button will create the report in the background and when finished the report will be shown in a PDF reader app or in MS Excel depending on the format selected.
Clicking the Download button, will create the report in the background, and when it is finished will save the report in the default download folder of the browser in the format selected. The name of the file will be like ROOT_CASE_AGING.
Click the Clear button to reset all the filters to the default values.