18. Milestone Diagram Configuration
Upon creating a new Case Type, the system automatically creates a Milestone Diagram for the Case Type. A Milestone can have SLAs, defined as the time a Case can be in that State. If an SLA is violated, it will execute any attached Events. A Milestone can have precisely one Goal SLA, one Deadline SLA, and any Other SLAs.
When we create an Auto Loan Case Type, the system automatically creates an accompanying auto loan milestone diagram, which we can now use to build our procedure. The steps below detail how to make the layout of the basic milestone diagram.
Steps
- Navigate to Case Setup → Data Models.
- Open the milestone editor by clicking on the Auto Loan hyperlink under the Milestone Diagram column.

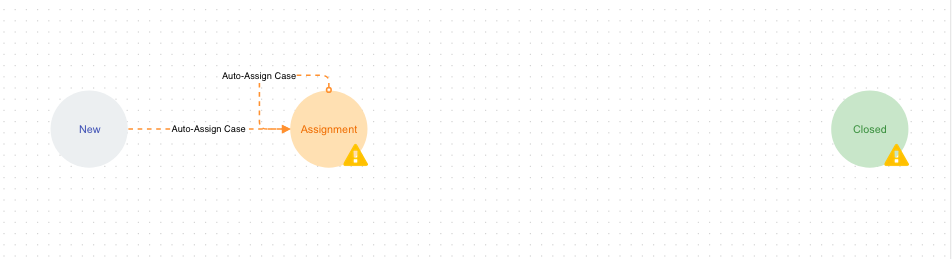
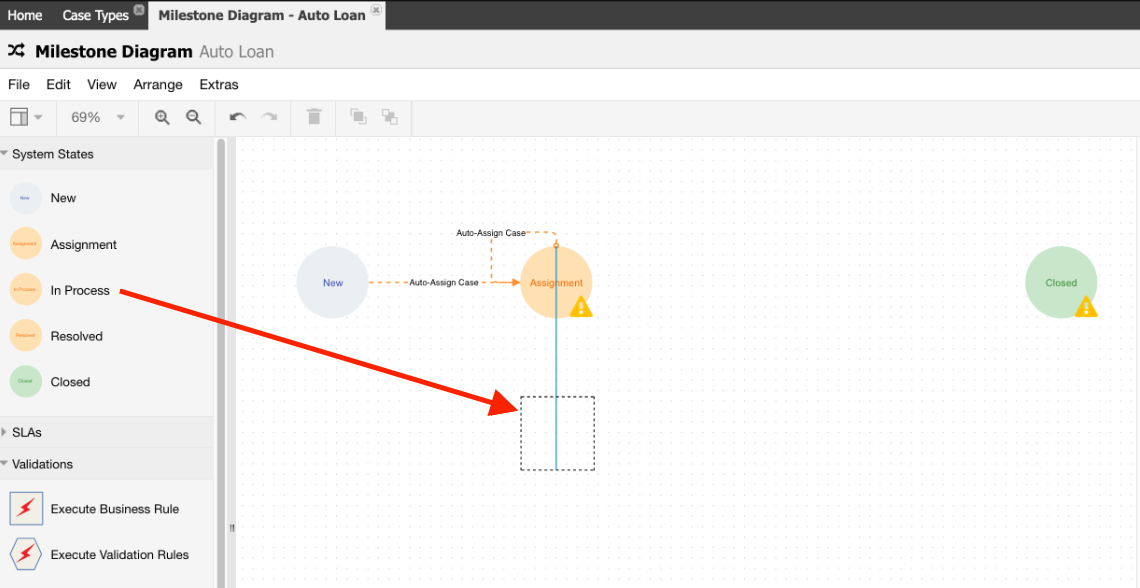
- Clean up the default diagram by deleting the In Process and Resolved default milestones states.
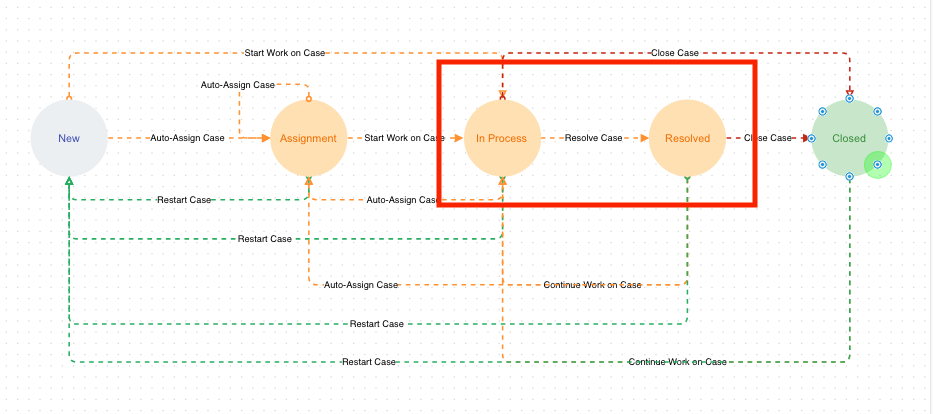
- Now delete the two (2) transitions named Restart Case. Compare your results with the following image.
- From the System States section at the left, drag a In Process milestone state to the diagram.
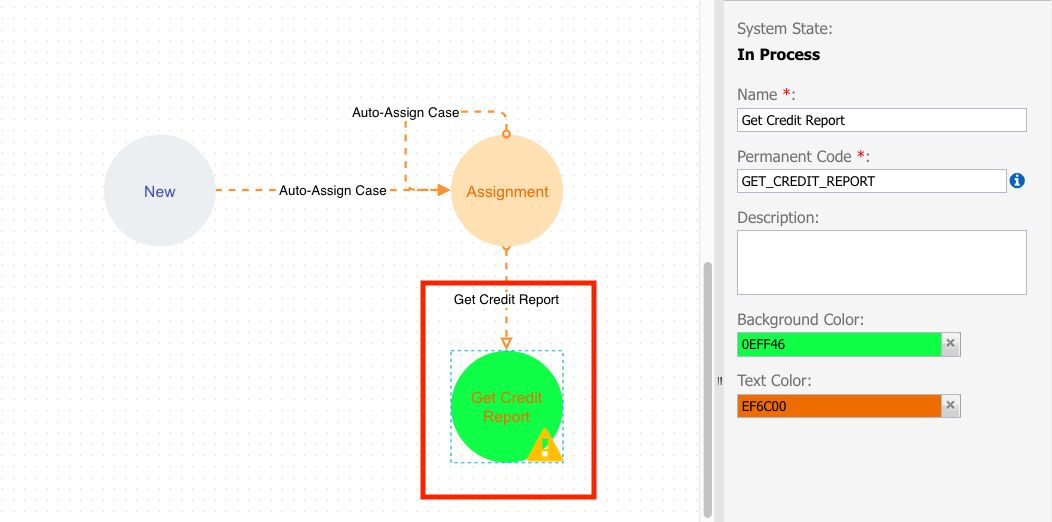
- Rename the milestone to 'Get Credit Report'.
- Change the Background Color of the milestone to Green (0EFF46).
- Add a path from the Assignment milestone to the Get Credit Report milestone and name it 'Get Credit Report'. If needed, update the Permanent Code to GET_CREDIT_REPORT. Compare your diagram with the following image.
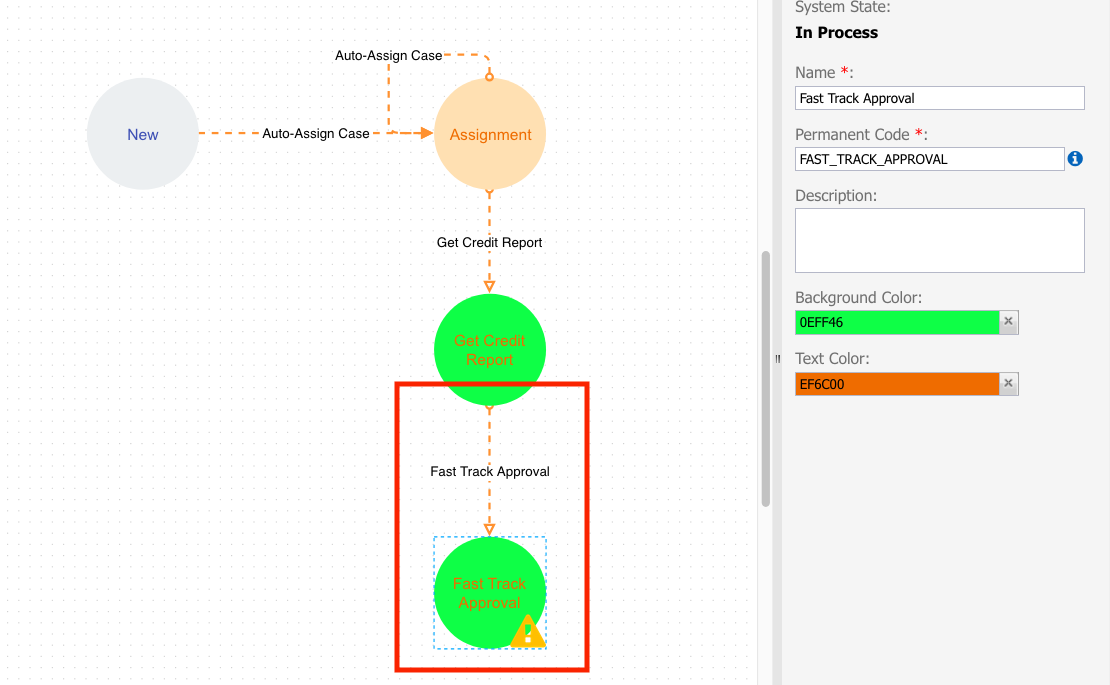
- Add a new In Process milestone state to the diagram and name it ‘Fast Track Approval’. If needed, update the Permanent Code to FAST_TRACK_APPROVAL.
- Change the Background Color of the milestone to Green (0EFF46).
- Add a path from the Get Credit Report milestone to the Fast Track Approval milestone and name it Fast Track Approval. If needed, update the Permanent Code to FAST_TRACK_APPROVAL. Compare your diagram with the following image.
- Add the following milestone states and their connecting paths as illustrated below.
- In Process: ‘Qualification Review’
- In Process: ‘Employment Verification’
- In Process: ‘Loan Assignment’
- Resolved: ‘Email Decision’
- Create the transitions as shown in the following image.
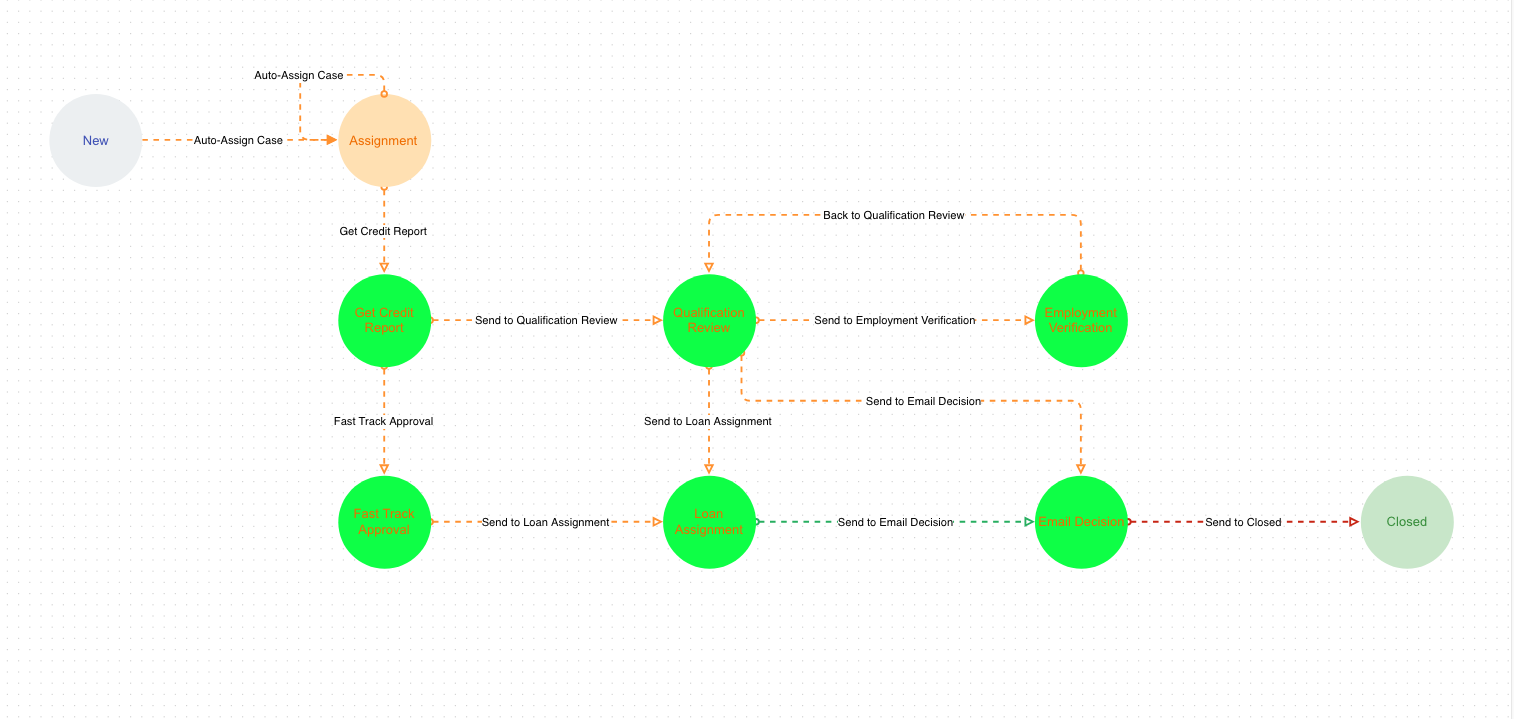
- Notice that the transition Back to Qualification Review is FROM Employment Verification TO Qualification Review, aware that this arrow should be pointing to the Qualification Review.
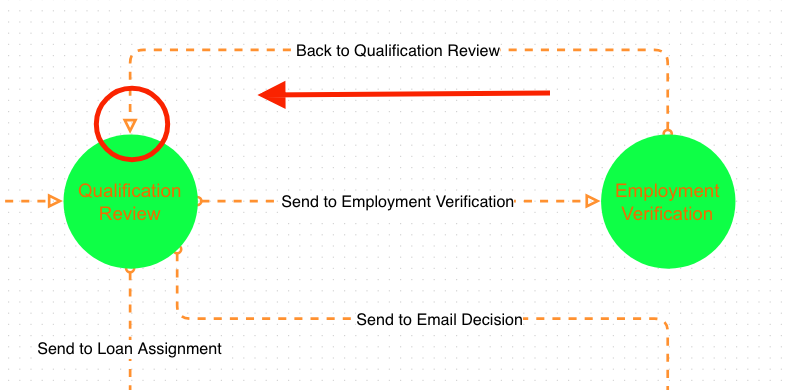
- Now that there are no more warning signs, save the model.
In this step, add the rule created to get the FICO score in the previous activity 16. Creating a Rule. From the left side, under the Basic Actions section (NOT Validations!), drag the Execute Business Rule to the Get Credit Report state.
On the right side, from the Business Rule dropdown list, select the Get Credit Score business rule.
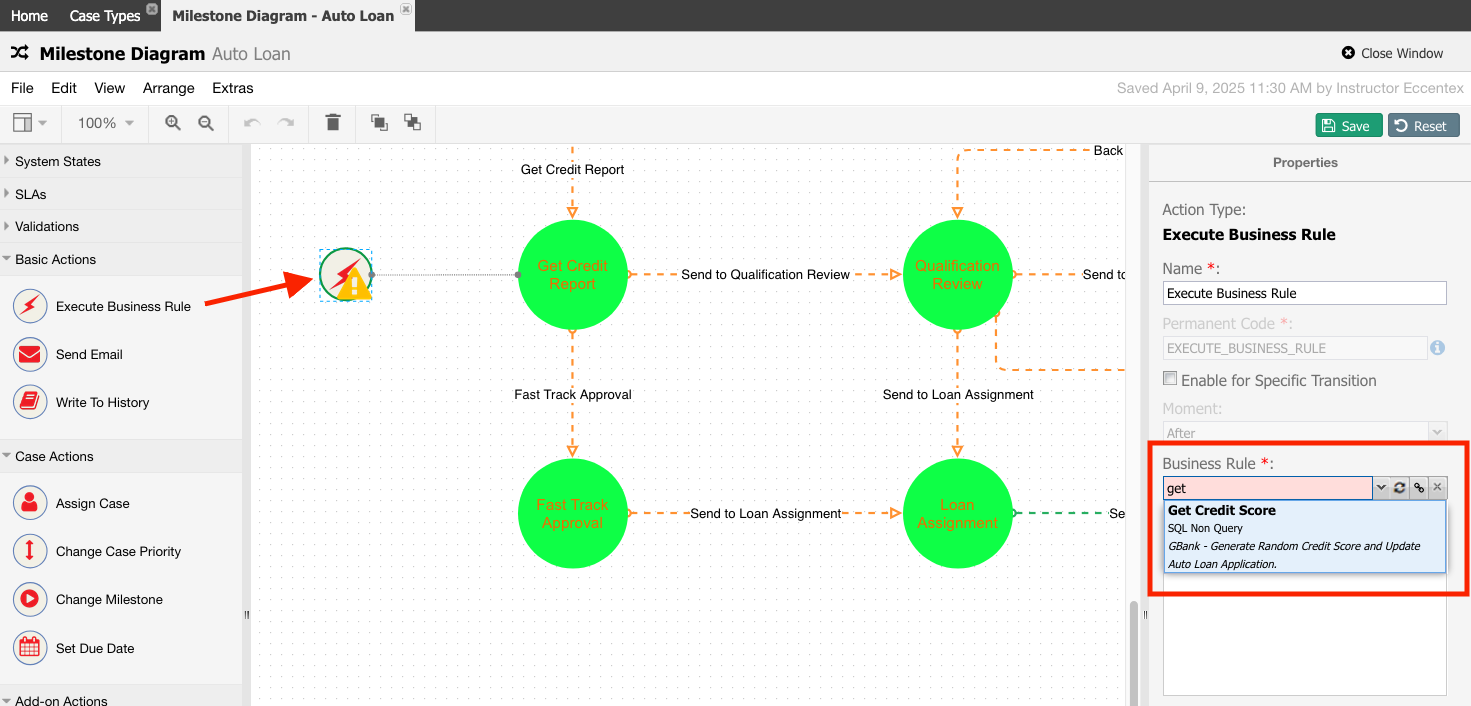
If you don't see the rule, go back to the previous activity (17. Registering a Business Rule).
Check the steps, and validate that the rule was deployed and the configuration is correct.
- Save the model.
From the left side, under the SLA's section, drag the Milestone SLA Deadline to the Assignment milestone.
- On the right side, set the Name to 'Assignment SLA Deadline' (1).
- Check the Enable for Specific Transition. It will show the Transition dropdown, select the Auto-Assign Case (New → Assignment) transition (2).
- Configure the SLA to 5 minutes (3).
- Validate your diagram withthe following image.
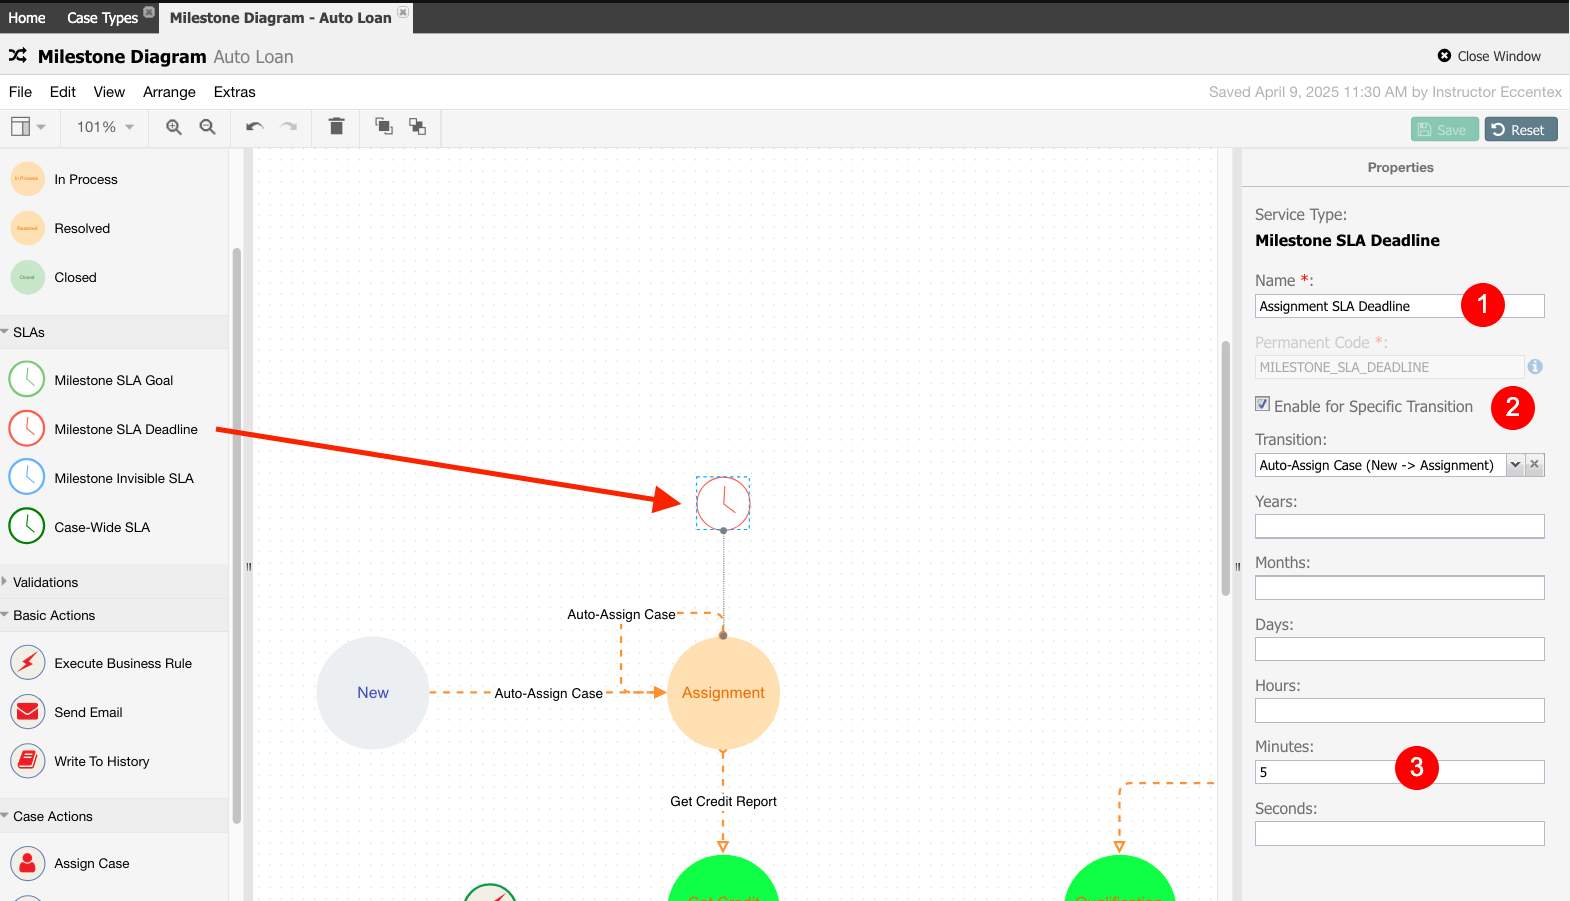
- Save the milestone diagram.
- Finally, we need to add the action to send email communication to the customer. From the Basic Actions, drag the Send Email to the Email Decision milestone.
Set the following parameters for the action:
- To: Static Email Addresses - Insert a valid email address.
From: Static Email Addresses - no-reply@myemailcloud.com
- Email Template: Business Rule - QA_email_getLtrTemplate
Subject: Static Subject - Loan Approval Letter
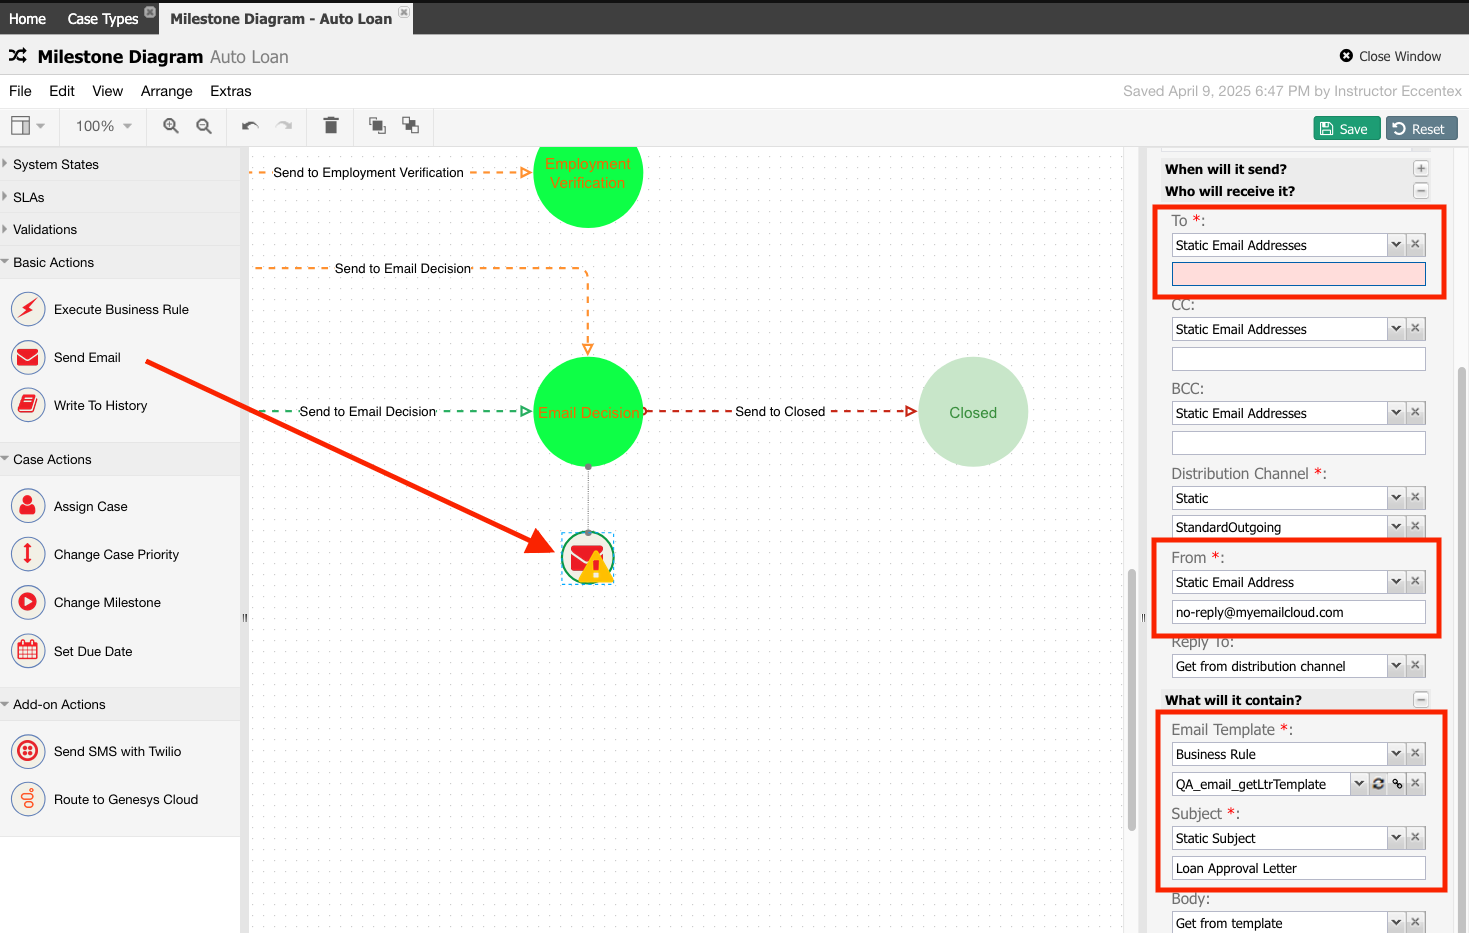
- Save the diagram.
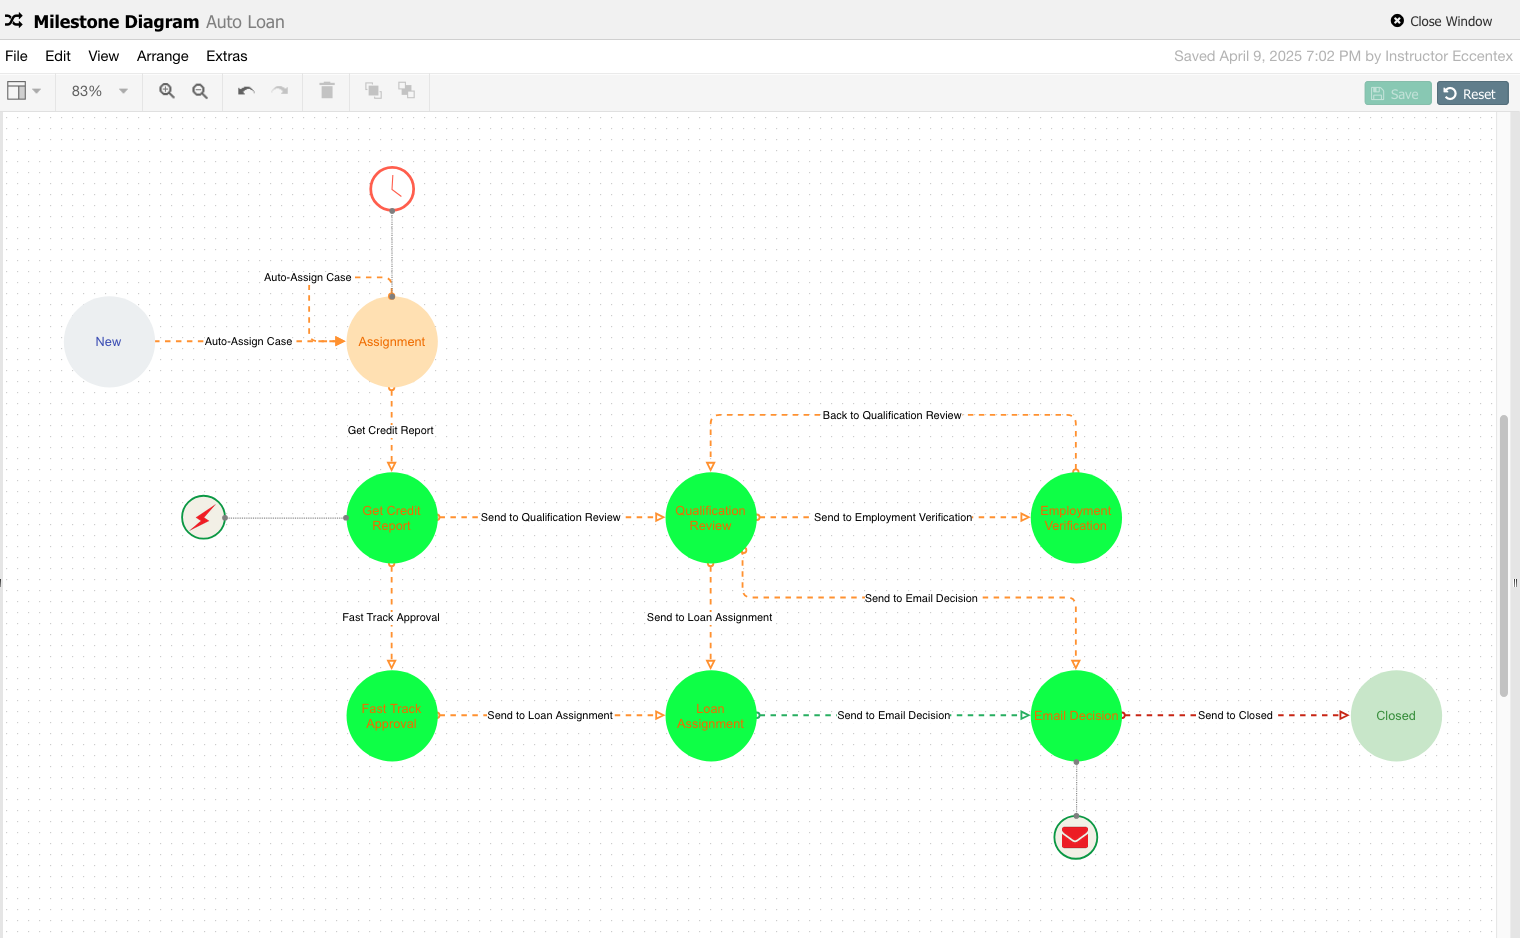
- We have completed the milestone diagram for our business scenario, and the diagram should look like the following image.