Connect to a Solution Database
When a solution is created, the underlying database is created at the same time. Once the iReport client has been installed (along with the ojdbc.jar file), you can now connect to your solution database to build reports.
The following steps will describe how to set up your connection in iReport.
You will need to speak to the system or database administrator of the database server where your solution resides to provide the connection string information.
Create the Connection Datasource
- Launch iReport and once it opens click on the ReportDatasources icon:

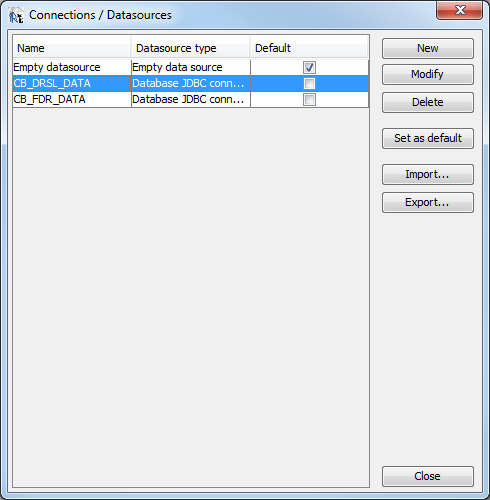
- A window showing a list of current data source connections will appear. Click the New button:

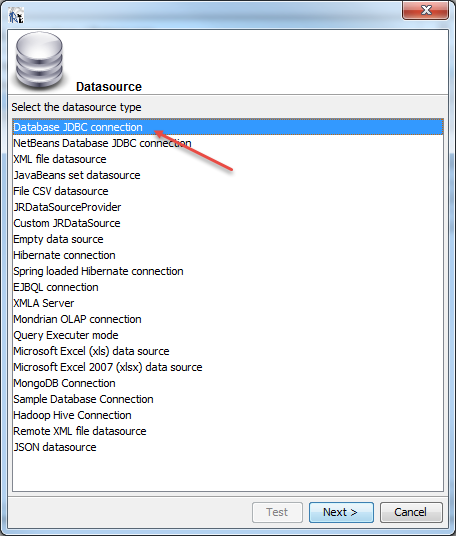
- Select the Database JDBC Connections data source followed by Next:

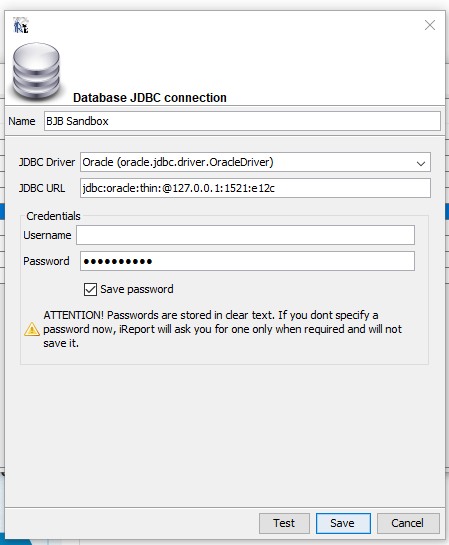
- Assuming a connection to Oracle, enter the details of the connections as below:
- Name: the name you want to give your connection so you can easily identify it
- JBDC Driver: as you are connecting to an Oracle database instance, select the Oracle driver
- JBDC URL: update the string to include the IP address, port number, and name of the Oracle instance.
- Username: the username as provided
- Password: the password as provided

The URL will always start with
jdbc.oracle:thin:@and you enter the IP, port, and SID after that. For example:jdbc:oracle:thin:@127.0.0.1:1521:e12c
- Click the Test button to check you can access your Solution database
- If all is good, click OK to close the test box.
- Click Save.
You should now see your new connection ready to go
Unless otherwise specified, you will often get connection details that will provide full access to the database.
This means you can make underlying changes to the database that could have ramifications on the system if you execute a SQL statement that changes data outside of the AppBase environment.
