
Document Actions
- Document Creation and Capture: Eccentex AppBase allows you to upload documents or through document capture, enabling you to import documents from various sources such as scanners, emails, or other external systems.
- Document Organization and Storage: With Eccentex AppBase, you can establish a well-structured and organized repository for your documents. You can create folders and subfolders to categorize documents based on criteria such as case type, date, or document type. This organization ensures easy retrieval and efficient management of your documents.
- Version Control: When working with documents, keeping track of revisions and changes is crucial. Eccentex AppBase offers version control capabilities, allowing you to maintain a history of document versions. This feature helps monitor document modifications, identify contributors, and revert to previous versions if needed.
- Document Workflow and Automation: To streamline document-related processes, Eccentex AppBase supports workflow automation. You can define workflows that automate tasks such as document routing, approval processes, and notifications. This automation reduces manual effort, enhances efficiency, and improves overall case management.
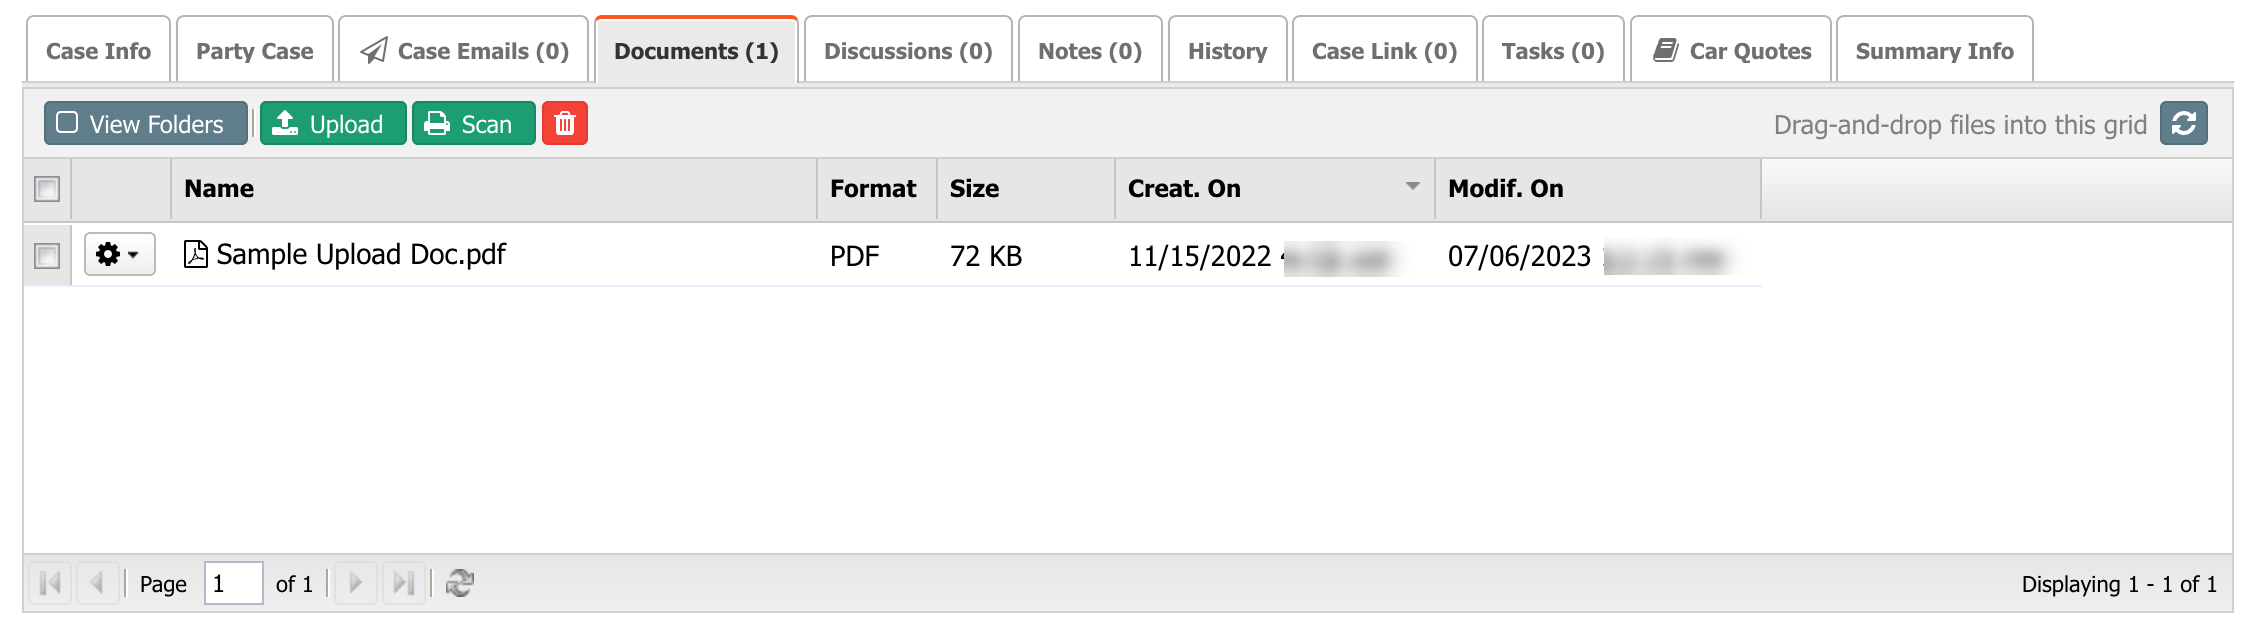
Upload
- To upload a new document, click on the Upload green button.
- In the File selection screen, select the document and click Open.
A file selection dialog or interface will appear, allowing you to choose the documents you want to upload. Use the file browser to navigate to the location on your computer where the documents are stored. Please select one or multiple documents by clicking on them while holding down the Ctrl or Shift key.
Once you have selected the documents, click the "Open" or "Upload" button in the file selection dialog. This will initiate the upload process, transferring the selected documents from your computer to Eccentex AppBase.
The progress of the file upload will be displayed, indicating the status and progress of each uploaded document. The process may take some time, depending on the file size and internet connection speed.
Once the upload is complete, you will typically receive a notification or see a confirmation message indicating the successful upload of the documents to the case. At this point, the documents are now available within the document management section of the case.
After the upload, you can review the uploaded documents within the document management section. You may have options to organize them into folders, assign tags, or provide additional metadata to enhance their categorization and searchability.
Scan
- To Scan a document, click on the Scan green button.
- The scan application will be opened. If you open it for the first time, the system will ask you to download and install it via the Click Once interface.
- Depending on your scanner and the scanning software integrated with Eccentex AppBase, you may have options to configure the scanning settings. These settings typically include parameters such as scan resolution, color mode, file format, and destination folder. Adjust the settings according to your requirements.
- After the scanning process is complete, you may have an opportunity to review the scanned images. Verify that the scanned documents are legible and accurately captured. Make any necessary adjustments or re-scan if needed.
- Scan the document and save it. It will appear in the list of documents.
Delete
- You can delete a document by clicking on the Delete red button
Confirm the deletion. AppBase may prompt you to confirm your intention to delete the document(s). This serves as a safety measure to prevent accidental deletions. Read the confirmation message carefully and proceed only if you are certain about deleting the document(s).
Once you confirm the deletion, AppBase will remove the selected document(s) from the system.
The scheduled deletion process ensures the system remains efficient and available to users during business hours while keeping the CMS free from clutter. To learn more about it, check the Document Operations article.
The document(s) will no longer be accessible within the application and will be permanently deleted from the document repository.
Add Notes
Adding notes to documents in Eccentex AppBase allows users to provide additional context, comments, or annotations related to the document. Notes serve as a way to enhance collaboration, provide instructions, or highlight important information.
- Click on the Notes tab.
- Enter the desired content for your note.
You can type in text, provide instructions, add comments, or include any relevant information you want to share with the document.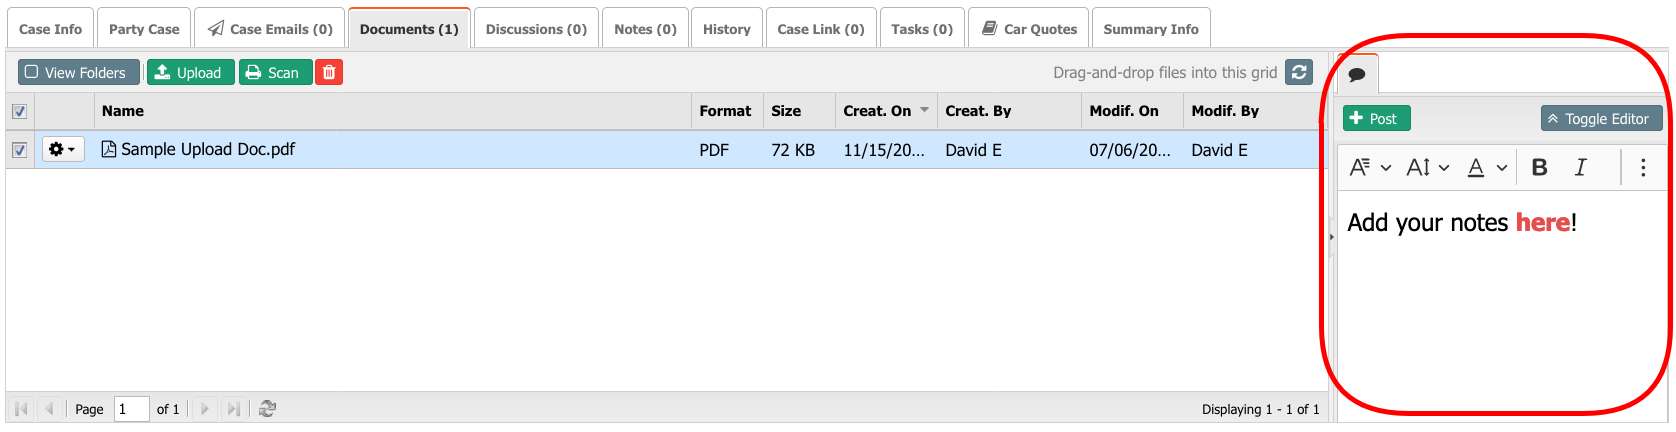
- Once you have entered the note content, save it using the Post button. The note will be associated with the document and stored within Eccentex AppBase.
- If you need to make changes to an existing note or remove it, you can typically find options to edit or delete the note within the notes section. These options allow you to modify or remove notes as needed.
The document notes will belong to the document only and will not be visible on the case.
Other Actions
There are other actions available for a specific document under the Gear button. Some actions will be turned off (grayed) as the action will depend on the document's format. In the image below, the action Edit (WebDAV) is disabled because the selected document is a PDF file.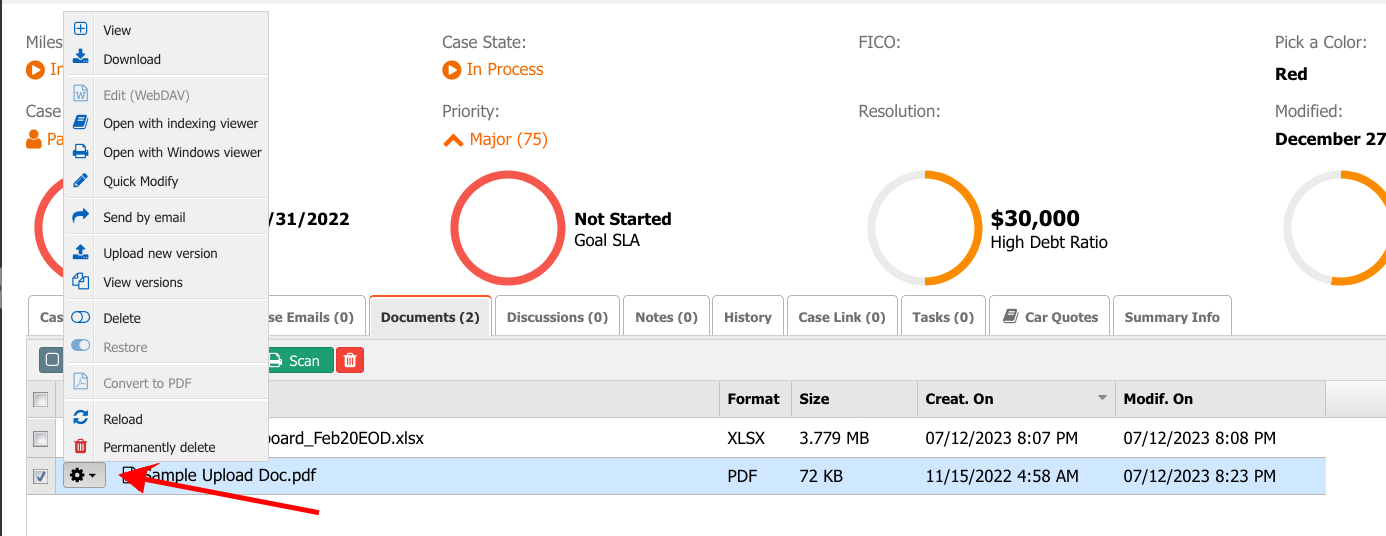
- View - will open the document in the Viewer window. The document viewer within Eccentex AppBase will display the contents of the selected document. The viewer may provide features such as zooming, scrolling, page navigation, and options for viewing different document formats (e.g., PDF, Word, Excel, and images). Navigate through Pages (if applicable): If the document has multiple pages, you can navigate through them using the provided controls within the viewer. This allows you to view different sections or pages of the document. Depending on the document viewer and the configured options in Eccentex AppBase, additional actions may be available while viewing the document. These actions could include downloading, printing, sharing, commenting, or annotating the document. Once you have finished viewing the document, you can close the document viewer within Eccentex AppBase. This will return you to the document list or the document management section of the case.
- Download - Download the document. After clicking the download option, a dialog box will appear, asking you to choose the destination folder on your local device where you want to save the downloaded document. Select the desired folder and click "Save" or a similar confirmation button. The document will start downloading from Eccentex AppBase to your chosen destination folder. The download progress may be displayed depending on your web browser settings. Once the download is complete, navigate to the destination folder on your local device where you saved the document. You can now access and open the downloaded document using the appropriate software or application that supports the document's file format.
- Edit (WebDAV): AppBase supports the Edit action using WebDAV (Web Distributed Authoring and Versioning). WebDAV is an extension of the HTTP protocol that allows users to edit and collaborate on documents stored on a remote server. Edit the file using the standard desktop application; when saving it, it will be uploaded to AppBase. A WebDAV client provides a seamless editing experience. It allows users to work with familiar editing tools while maintaining the document's integrity and version control within the application.

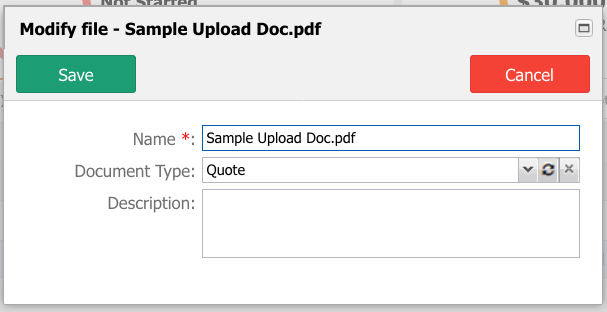
- Quick Modify: update the document info as Description and Document Type.
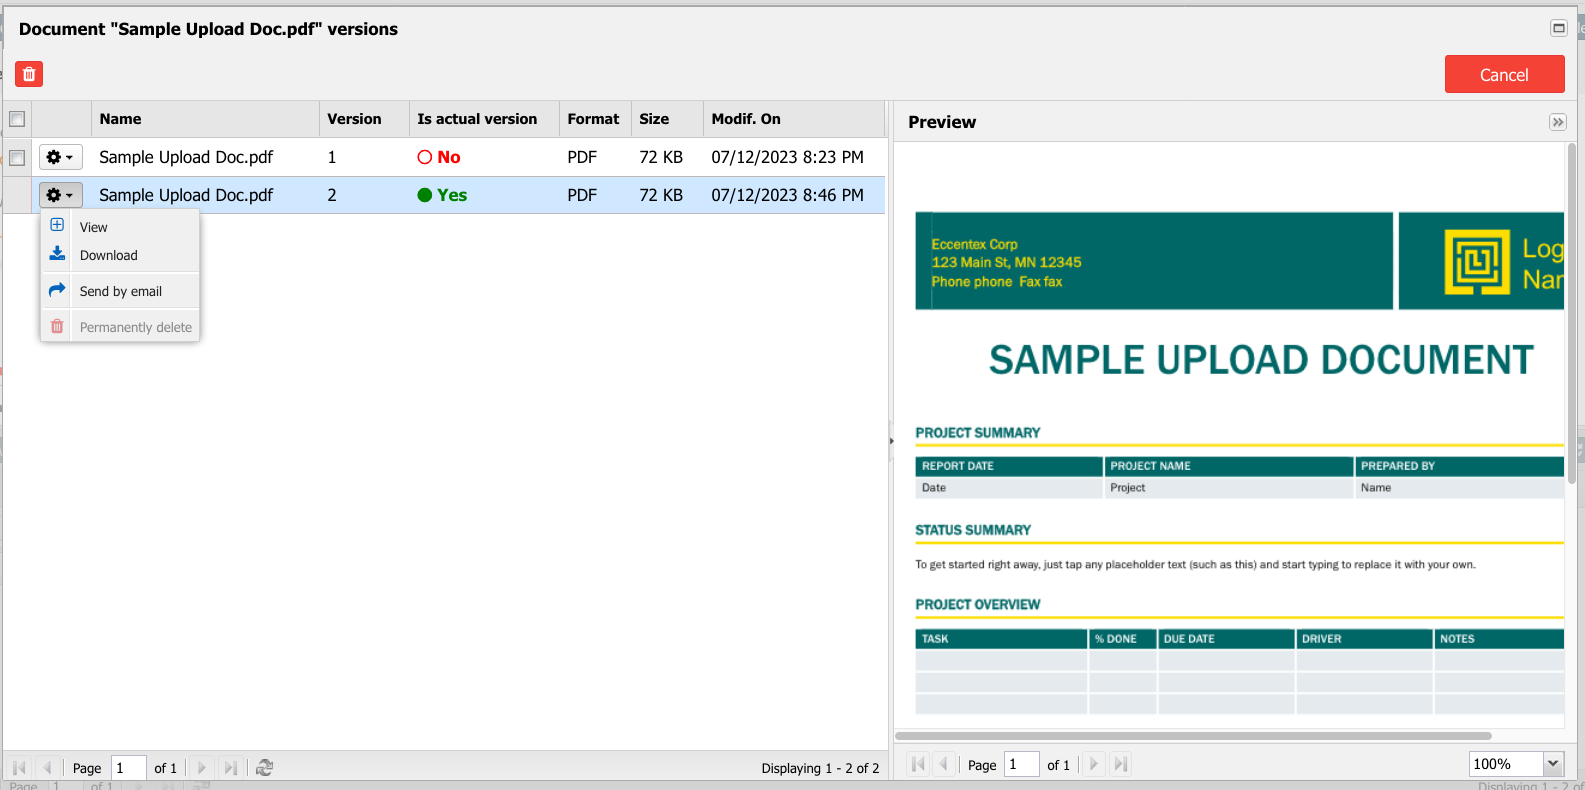
- View versions: View the versions of a document to track changes, compare revisions, and access previous iterations. The version history provides a timeline of modifications made to a document over time. Upon accessing the version history, you will be presented with a list or a timeline of the document's versions. Each version is typically accompanied by details such as the date of modification, the user who made the change, and a summary of the changes made. Depending on the interface, you may be able to click on the version to open and review it within the application or have the option to download and open it locally using the appropriate software. By accessing the version history of a document in AppBase, you can track its modifications, view specific versions, and compare changes. This feature enables you to monitor the document's evolution, revert to previous versions if needed, and maintain an audit trail of modifications made by different users.
- Reload - Reload document information
Permanently delete - Mark the document as permanently deleted. After confirming the deletion, Eccentex AppBase will remove the document from the system permanently. It will no longer be accessible within the application, and the document's data will be permanently removed from the document repository. It's important to exercise caution when performing permanent document deletions, as this action cannot be undone. Ensure that you have selected the correct document for deletion and verify that you no longer need the document or have a backup copy if necessary.
The scheduled deletion process ensures the system remains efficient and available to users during business hours while keeping the CMS free from clutter. To learn more about it, check the Document Operations article.