Often, a Case goes through a formal Milestone workflow to resolve it to a desired standard. At the conclusion, it is possible to capture the outcome of the step resolution process for reporting purposes. For example, was the step satisfactorily resolved to the complainant's wishes, or was it withdrawn?
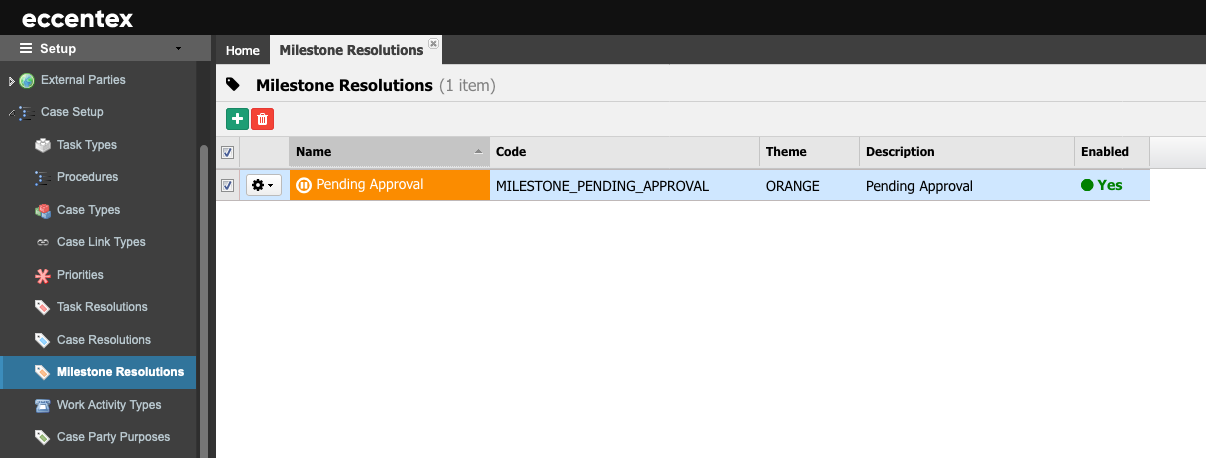
The following sections describe how to configure Milestone Resolution codes that are presented to the case worker to record this information.
Steps
On the top right, navigate to→ <<your solution>>
On the left, navigate to → Setup
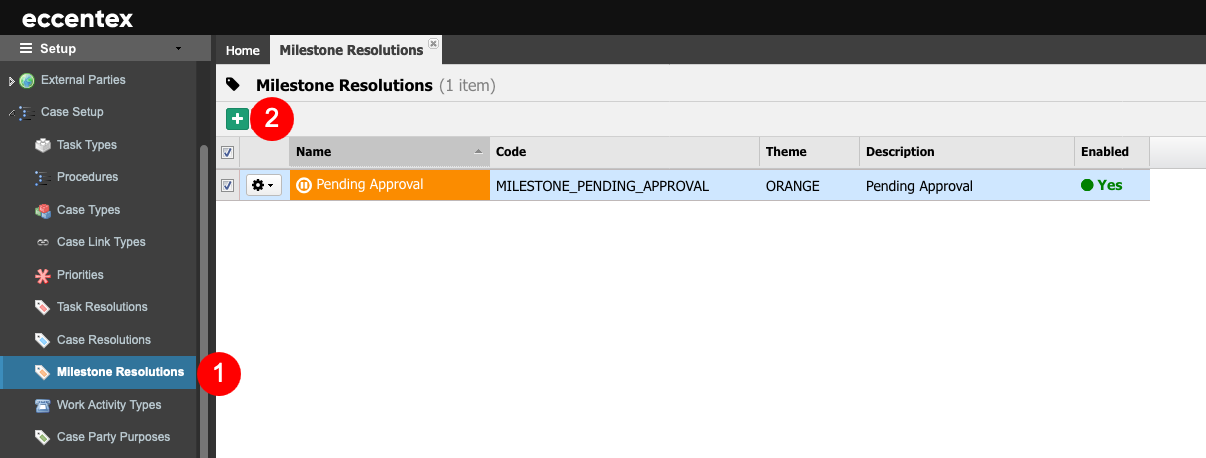
Navigate to Case Setup → Milestone Resolutions(1), click on the Add New button (2).
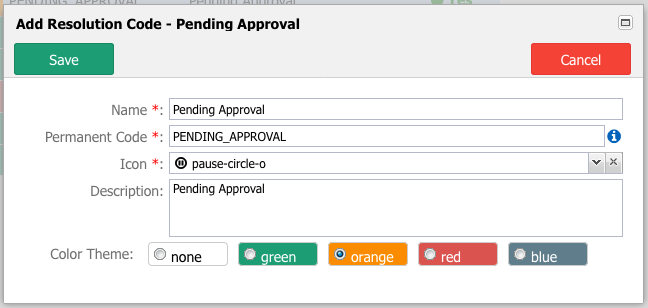
Enter theName for the Milestone Resolution.
ThePermanent Code field will be auto-populated using the Name field, subtracting dash (-) and any spaces or special characters; it also changes to uppercase.
You can override Code Value (ensuring no spaces or special characters are used). The code Value cannot be changed after saving.
Select an Icon from the dropdown list that best represents it. In our example, the pause-circle-o.
Insert a briefDescription. As this will appear to the case worker when they are working on the Task, it is a good idea to include as much instruction as possible so the user will understand what to do with it.
Select aColor Themeby clicking any of the colors. This will appear as background shading, and using colors can help apply additional context to the choice. For example -greenfor Approved versusredfor Denied. In our example,Orange.