
Configuring a Business Object
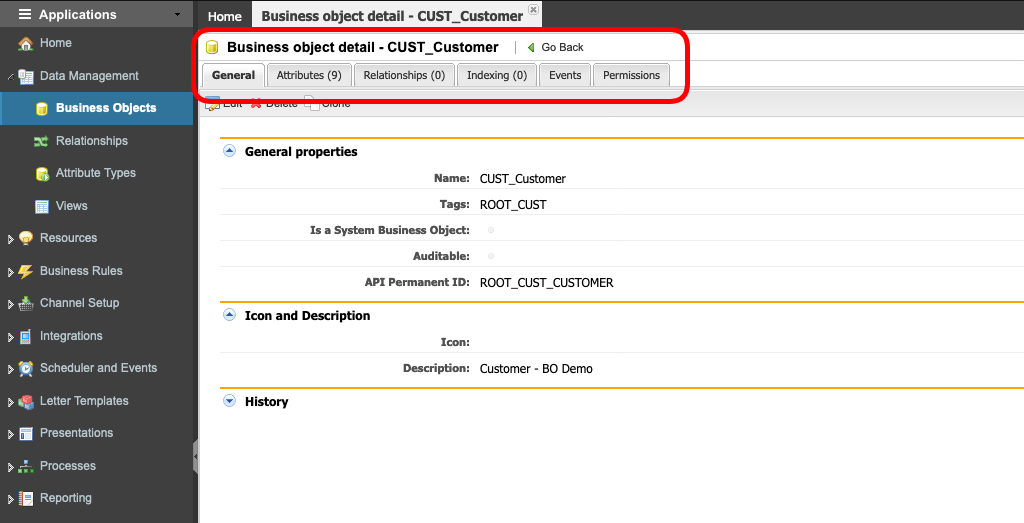
When opening an existing business object or after creating a new one on the Business Objects tab, you will notice a series of tabs that provides access to various aspects of the object, such as the Attributes, Relationships, Indexing, Events, and Permissions. The first tab you will see is the General tab, and it gives a basic overview of the business object being viewed.
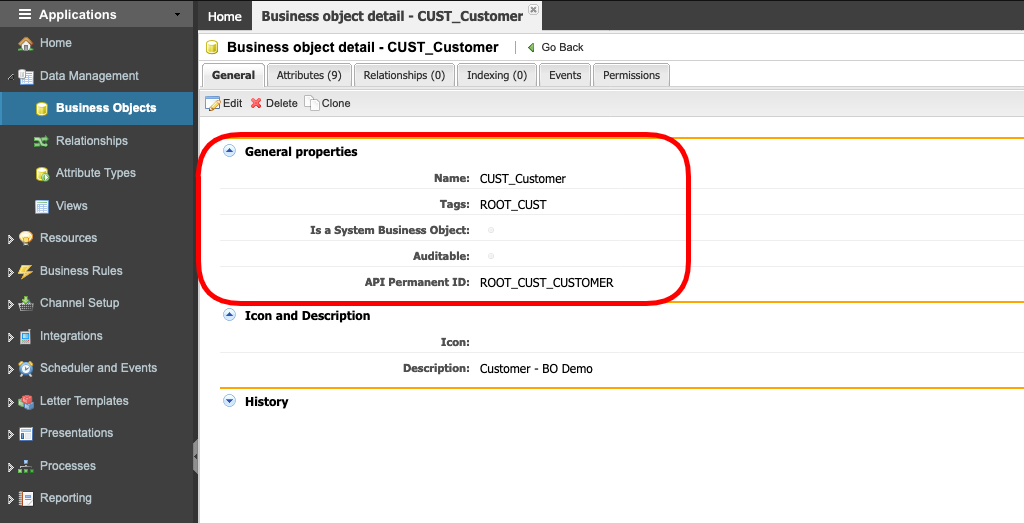
General Properties
The General Properties section displays the Business Object name, any Tags associated with an object, the API Permanent ID, whether or not it is used in a global search if it is auditable, and whether or not it is a System Business Object.
Attributes
The Attributes tab contains the list of attributes - or fields - defined for the business object and provides the means for creating, updating, or removing attributes. The attributes with the mark Is System indicates that the attribute is a system attribute and cannot be deleted.
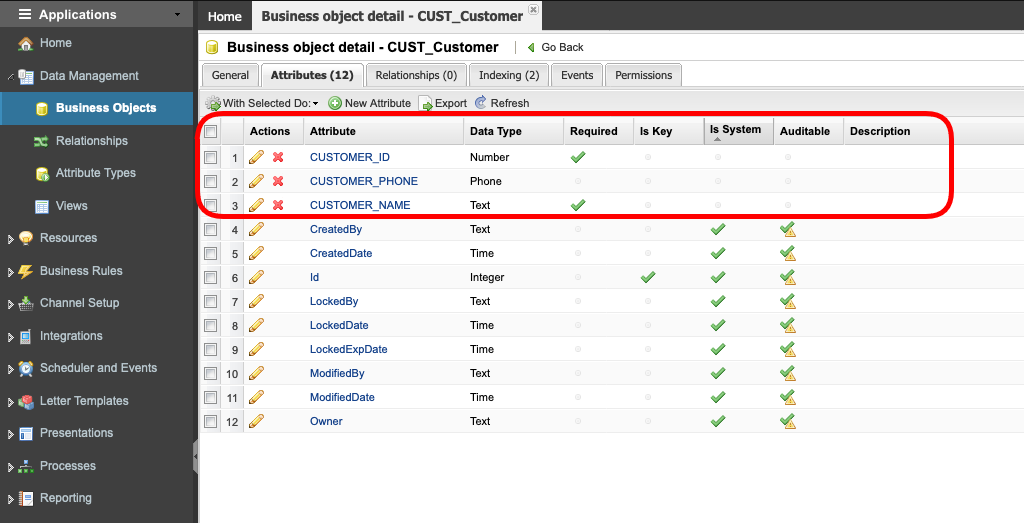
The following information is displayed for each attribute:
| Attribute | Description |
|---|---|
Actions | Lists the actions available for each attribute |
Attribute | Name of the attribute. The attribute name is listed as a hyperlink, so to access the attribute details, click on the hyperlink. |
Data Type | Type of data contained in the attribute |
Required | Indicates if the attribute is required |
Is Key | Indicates if the attribute is part of the primary key |
Is System | Indicates if the attribute is a system attribute. System attributes cannot be deleted. |
Description | Description of the attribute |
Last Modified | Timestamp when the attribute was last modified and the name of the user who performed modifications |
API Code | Unique identifier for the attribute. Once saved, it cannot be edited |
To learn how to create a new, custom, Attribute, revise the article Attributes Types
Relationships
A Relationship can be established between two business objects so that data can be split and stored in different Business Objects. For example, you can relate a Customer to an Order, an Order to a Product Part, and a Product Part to a Product Suite. There are two types of relationships that can be configured (also known as cardinality rules):
One source to many targets | Relates one object (source) to many other business objects (targets). For example, you might use this option to relate one case manager to many cases or one record in one business object to many records in another. |
| Many Sources to one target | This is the inverse of the option above. You might use this option to relate many documents to one folder, for example. |
To learn how to add a new Relationship, revise the article Relationships
Indexing
An index is a copy of selected columns of data from a table that can be searched very efficiently and is used to speed up the performance of queries. It does this by reducing the number of database data pages that have to be visited/scanned. AppBase leverages the power of indexes by letting developers create custom indexes.
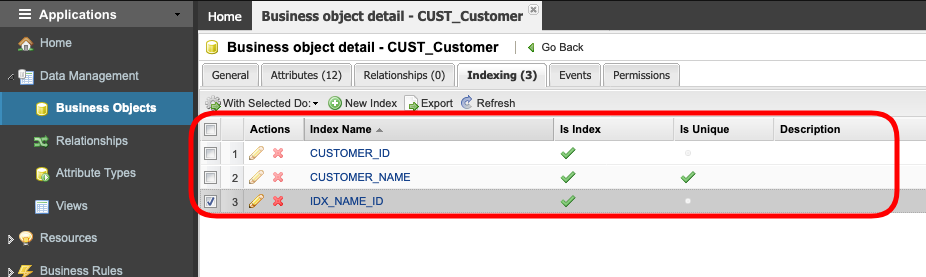
The following information is displayed for each Index.
| Attribute | Description |
|---|---|
Actions | Lists the actions available for each index |
Index Name | Name of the Index. The Index name is listed as a hyperlink. To access index details, click the hyperlink. |
Is Index | Indicates if the attribute is an index |
Is Unique | Indicates if the index is Unique |
Description | Description of the index |
API Code | API Code for the index. This is a unique identifier within AppBase. |
Adding an Index
- To add a new Index, click on the New Index button
- Enter a unique Index Name.
- Select in the Index Type if the index will allow duplicates or not.
- Enter a Description for the index.
- The API Permanent ID will be auto-generated based on the Index Name.
- In the Columns section, select the column(s) and the order in the Index. This order must be selected based on cardinality. Consult with your DBA about the best option.
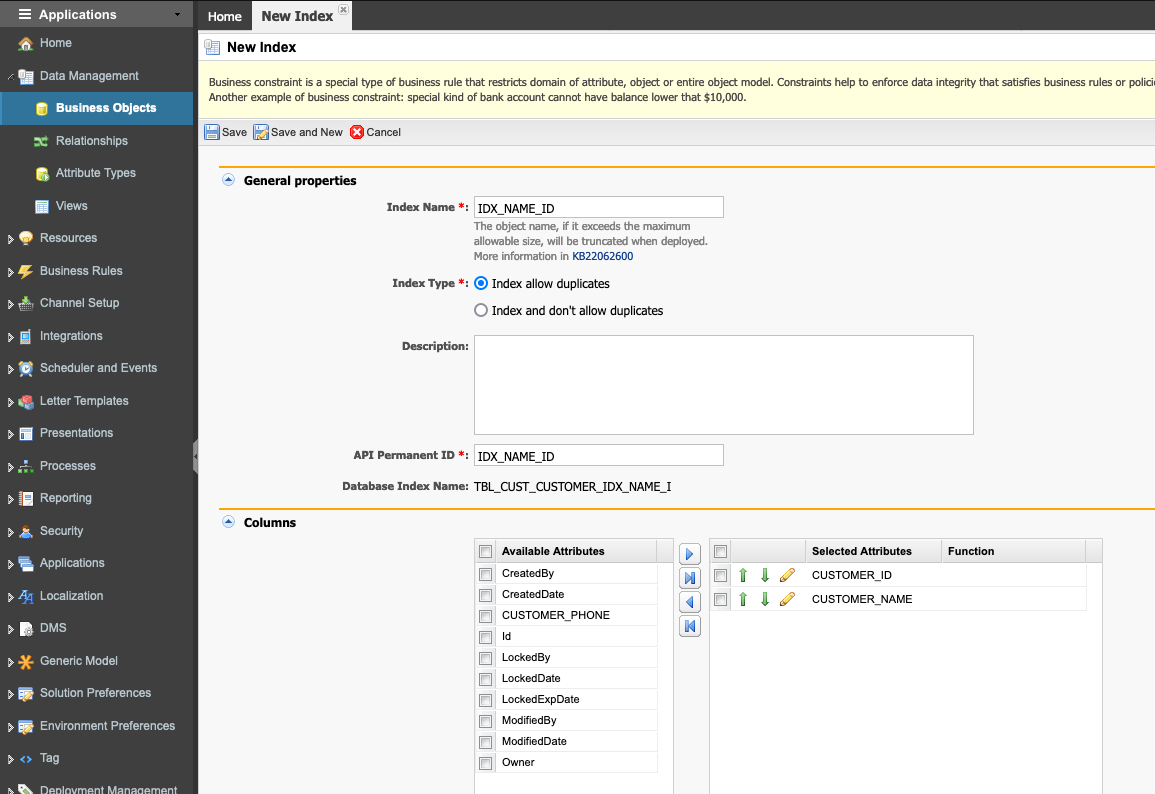
- Save the new index.
After adding Index(es) to the BO, you must run a deployment.
Events
When an event occurs for a business object - such as when a value is created or removed from that object - it is possible to trigger a business rule to cater to the following scenarios
| Event | Description |
|---|---|
| After create | Execute a rule after a create operation is executed. |
| After delete | Execute a rule after a delete operation is executed. |
| After insert | Execute a rule after an insert operation is executed. |
| After update | Execute a rule after an update to the object has been executed. |
| Before create | Execute a rule before a create operation is executed. |
| Before delete | Execute a rule before a delete operation is executed. |
| Before insert | Execute a rule before an insert operation is executed. |
| Before update | Execute a rule before an update operation is executed. |
| Delete | Execute a rule when deleting a record from the object. |
| Insert | Execute a rule when a new record is inserted into the object. |
| Update | Execute a rule while updating a record in the object. |
| Validate | Execute a rule to validate the data saved to the object. |
Add an Event to a BO
- To add the new event, click on the Add button, then select the type of the Event that will trigger it.
- Select the Rule to be run when the event is triggered.
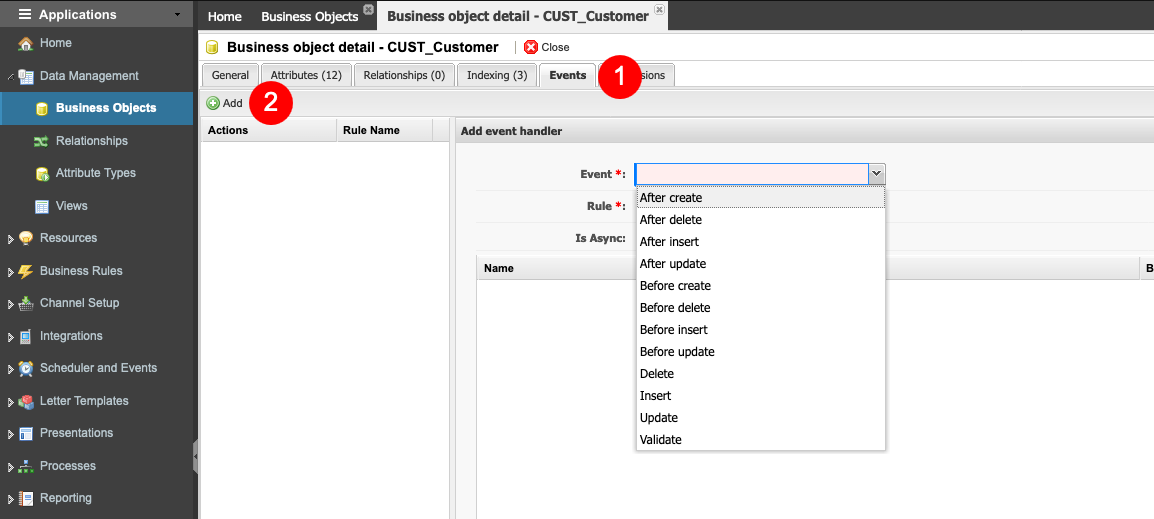
- Click Save to commit your change or Cancel to exit without saving.
After adding Event(s) to the BO, you must run a deployment.
Permissions
As AppBase implements Role and Group based security, it is possible to set permissions on business objects that help govern which users can view or edit values for that object.
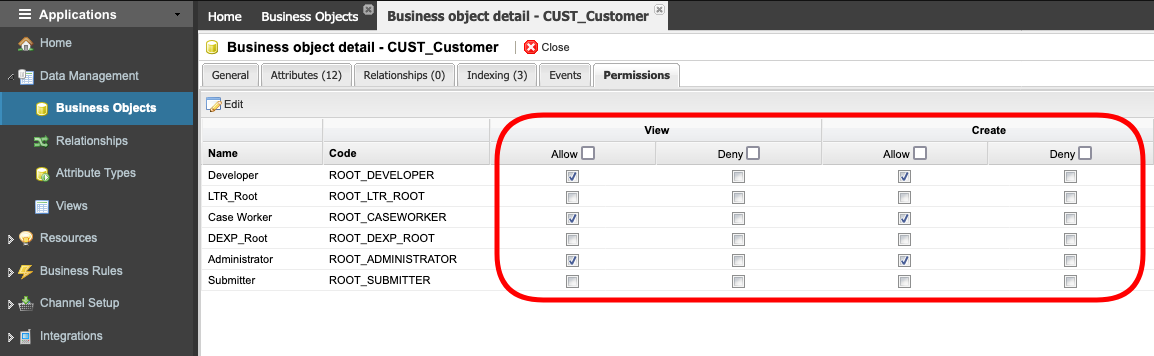
Note that you can also control the accessibility to a business object using various controls and scripts on pages and via business rules. This area is just one more additional way of managing data access.