Connecting to your organization's shared email account required setting up a Capture Channel. ServiceJourney is shipped with a default one called SJ Default Capture, that you can use. You can also create additional Capture Channels if you need to connect to multiple email accounts.
Step 1: Connecting to an email account
Note: ServiceJourney does not come with an email account. Your organization must manage it's own email server or subscribe to a cloud service such as Microsoft 365.
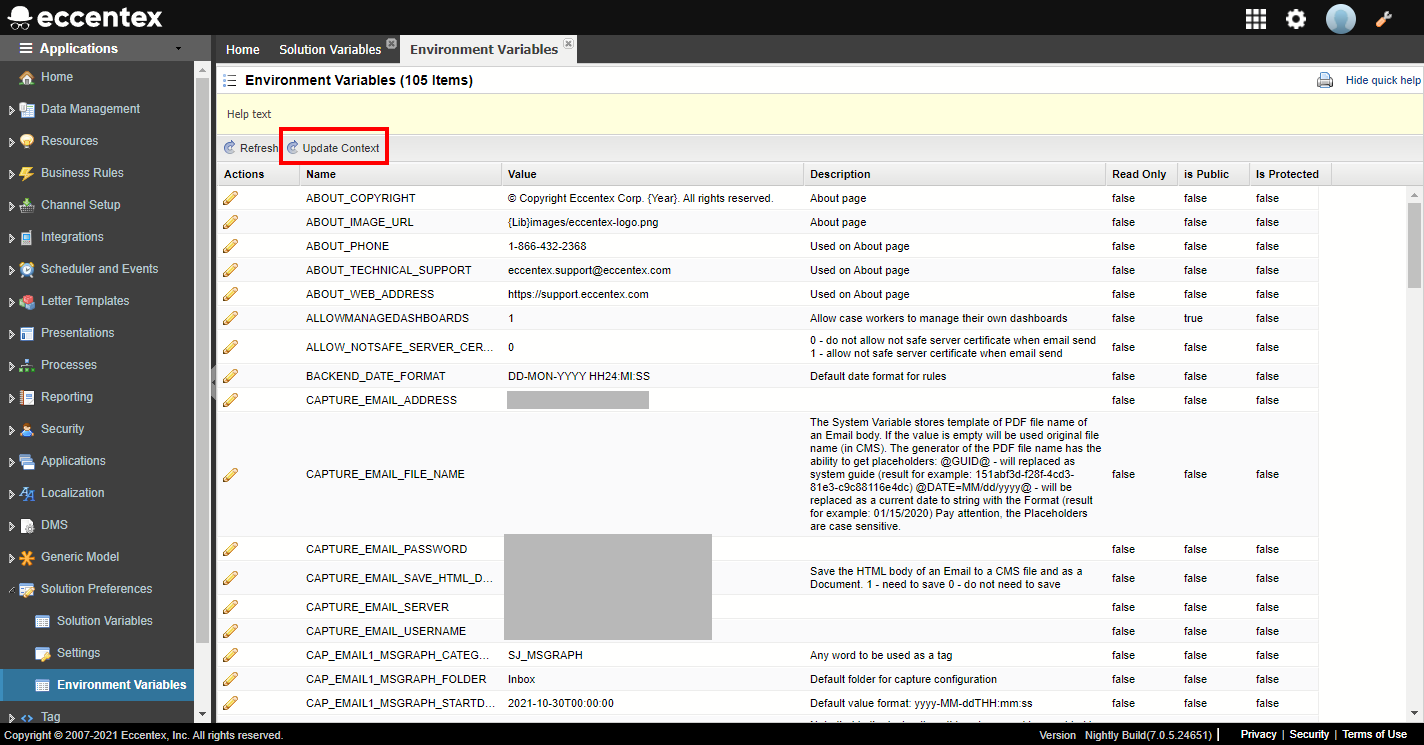
On the top right, navigate to → Application Studio → ServiceJourney
When done, click on theUpdate Contextbutton at the top
Step 2: Configuring how emails are processes
Define the basics of how emails are processed once they are captured.
On the top right, navigate to → ServiceJourney
On the left, navigate to → Case Management → Admin Settings → Email Capture
Click theSyncbutton to retrieve the latest Capture Channels definitions from AppBase.
Click on the next toSJ Default Captureand selectQuick Modify
Fill out the fields as needed, explanation of the properties are below
Click Save
Property
Descrption
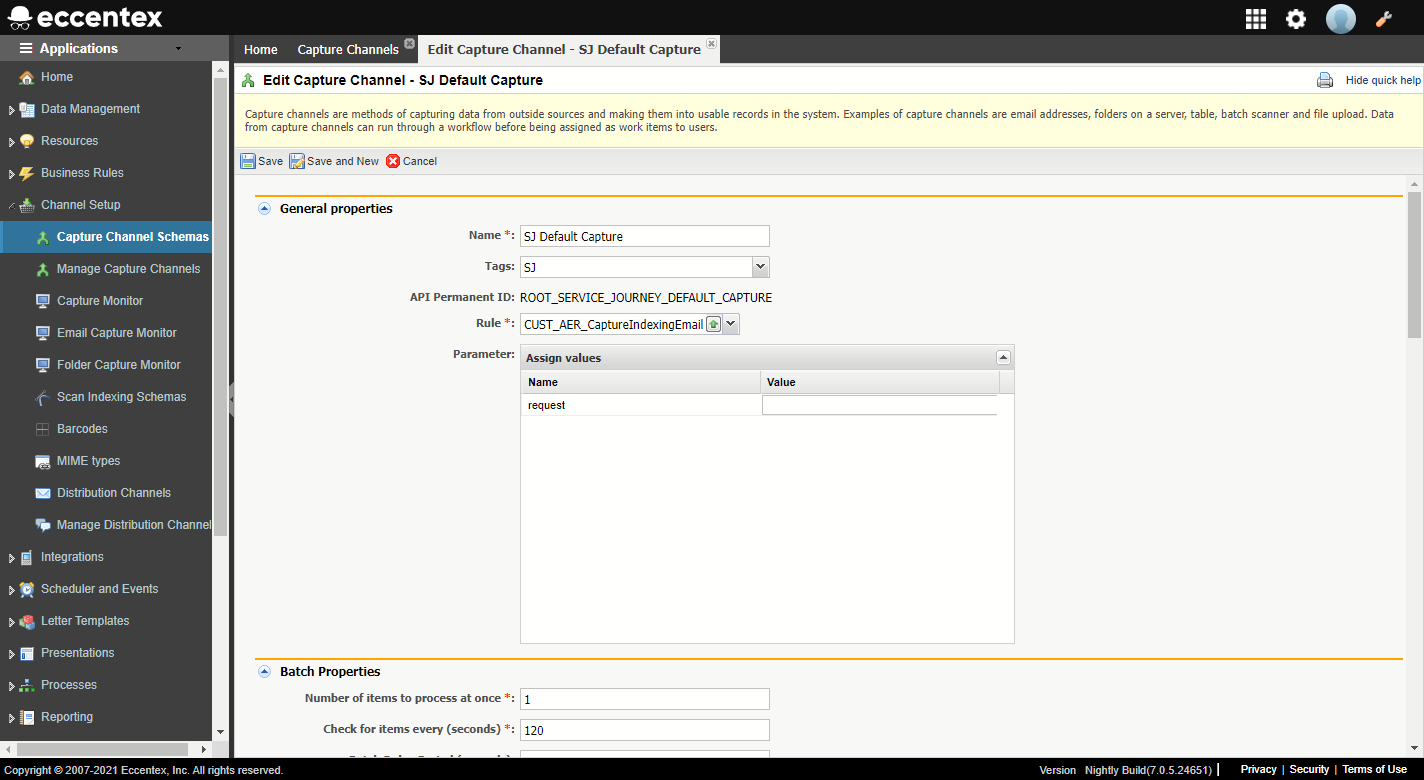
Channel Schema
The Capture Channel Schema configured in Application StudioCapturing inbound emails. By defaultSJ Default Capture.
If you don't see the Capture Channel in the drop-down list, click the Sync button to update the list from AppBase.
Config Name
Email Capture Config name
Channel API
The full API Permanent ID, including the environment ID (SJ_DEV_DEVELOPMENT.TENANT99), for example,SJ_DEV_DEVELOPMENT.TENANT99.ROOT_SERVICE_JOURNEY_DEFAULT_CAPTURE.
Channel Name
The Capture Channel Name configured in Application StudioCapturing inbound emails. The default value isSJ Default Capture
Enable Pre Processing
Enable the PRE processing of the incoming email using the rule defined in thePre Processor Rulefield.
Pre Processor Rule
Specify the rule name to PRE process the incoming email. By default is the C# ruleCUST_AER_PreProcessor
Enable Post Processing
Enable the POST processing of the incoming email using the rule defined in thePOST Processor Rulefield.
Post Process Rule
Specify the rule name to POST process the incoming email. By default is the C# ruleCUST_AER_PostProcessor
What to do during capture:
Process All Rules
Check to process all rules defined for this capture channel in theEmail Routers Configwhen processing an incoming email.
Uncheck to stop processing the rest of the rules defined for this capture channel in the Email Routers Config when a rule matches.
The rules will be processed based on the rule Order Number defined in the Email Routers Config, (ie, 1 is first, 999 is last).
Default is YES (checked).
Send Auto Response
Check to send an Auto Responsewhen processing an incoming email using theEmail Routers Config-Auto Replayrule configuration.
Default is YES (checked).
Dynamic Timings
Enable the Genesys Queue Wait Time.
SeeAuto Response Levelsfields below for additional configurations.
For new emails:
Create Case
Check to automatically create a new email case as defined in the Email Case Type.
Uncheck to not create an email case. In this scenario, the incoming email will be routed using the rule defined in theCapturing inbound emails.
Default is YES (checked).
Create Notification
Check to create a Genesys Notification for the new incoming email using the rule defined in theNotification Rulefield.
Default isYES(checked).
Case Routing Type
Indicates how to create an interaction in Genesys for new emails. Create the interaction to popup as a Case or as a Task page.
Default isCase
For reply emails:
Notification on Reply
Check to automatically send a confirmation email to the sender using the configuration onHow and which reply to send?section inEmail Routers Config.
Default is YES (checked)
Reply Routing Type
Indicates how to create an interaction in Genesys. When replying to an email create the interaction to popup as a Case or as a Task page.
Default isCase
Options during capture
Use Email Meta Data
Check to compute the hash from the incoming email and save relevant information in the Email Meta Data Generic Object for use in reporting and duplicate case identification.
Uncheck to not log extended debug info to the Email Capture Monitor.
Adv. TO handling
Check to use advanced TO address processing using headers.
Newer email servers provide headers. If no header is found, will use the TO address.
Uncheck to not use advanced TO address processing using TO address.
Default Queue
Set the name of the default Genesys Queue for all capture channel rules. For example:SJ DCM
Default Priority
Select the default priority for the Email Case created.
Default isNORMAL.
Default Genesys Prio(rity)
Set the default Genesys priority for this interaction.
Default is0(zero).
Default Provider
Set the default Genesys Interaction type as the provider.
Uncheck to force email rule to define the Genesys Interaction as the type provider.
Default isDCM Email.
Default Object Type
Set the default Genesys Object Type to push (Case or Task).
Default isCase
Default Task Name
Set the default Genesys interaction name (task).
Default isEmail.
New Party Type
Type of the new EP created when receiving the new email. From Dictionary-Category-Person.
Default isCUSTOMER.
Case Party Type
Select the Party Type for the EP that is attached as a Case Party to the new Case.
Default value isRequester.
Misc. Settings
Create External Party
Check to automatically create an External Party record if there is no CRM record found with this/these FROM email address(es).
The new External Party Type will be the one defined in the New Party Type field int the Options during capture section. Default isCUSTOMER.
Default is YES (checked).
Add EP to Case
Check to add the External Party (EP) to the case as a Case Party using the role set in theCase Party Typethe field in the sectionOptions during capture.Default value isRequester.
Default is YES (checked).
Set SLA on Case
Check to re-calculate the SLA to adjust it based on Business Hours and/or Holidays
Uncheck to use SLA configured by theCategorization.
Default is YES (checked).
Detect Language
Check to use the Detect Language function (from Genesys). This feature requires a Genesys licensing.
Default is FALSE (unchecked)
Check for Duplicates
Check to enable duplicate case detection. This feature uses the Email Meta Data object records to identify if the incoming email is a potential duplicate of a previous email.
Default is FALSE (unchecked)
Auto Response Levels
Start (0 seconds)
This level 0 is during auto-replies based on the Queue Times for the queue assigned to the capture channel. Different versions of the LTR Template will be sent for each level – for example, AR_LEVEL_0
Level 1
This Level 1 is during auto-replies based on the Queue Times for the queue assigned to the capture channel. Different versions of the LTR Template will be sent for each level – for example, AR_LEVEL_1
Default value 100 seconds
Level 2
This Level 2 is during auto-replies based on the Queue Times for the queue assigned to the capture channel. Different versions of the LTR Template will be sent for each level – for example, AR_LEVEL_2
Default value 1500 seconds
Case Title Format
Regex expression for custom case numbering schemes. Used when a new email comes in to search for the Subject and/or Body using a Regex expression and it will attach the incoming email to the matched existing case instead of creating a new unrelated case.
Additional CDM Fields
For the email to case type created, it accommodates dynamically any additional MDM fields added to the case model in the following format:Brand|Market|CustomerNbr
How to handle reply emails?
Email Case Type
Define the Case Type for the emails.
Default isEMAIL.
Email State Closed
Define the Milestone State ID for the closed email case.
Default isDEFAULT_CASE_CLOSED.
Email State ReOpen
Define the Milestone State ID for the reopened email case.
Default isREPLIED.
Notification Rule
Define the rule to notify Genesys when an email is created.
Default isROOT_CUST_PURECLOUD_CREATEMAIL.
Re-Open Rule
Define the rule to change the milestone of the email case when it is reopened (Replied).
Default isROOT_CUST_CS_ROUTEMILESTONE.
JavaScript errors detected
Please note, these errors can depend on your browser setup.
If this problem persists, please contact our support.