Every Case Type has its own set of forms for creating, updating, and viewing a Case. Furthermore, every Case Type can have its own set of fields and sub-objects in addition to the standard Case Data Model.
Steps to Configure the Existing Forms
On the top right, navigate to → ServiceJourney
On the top left, navigate to → Setup
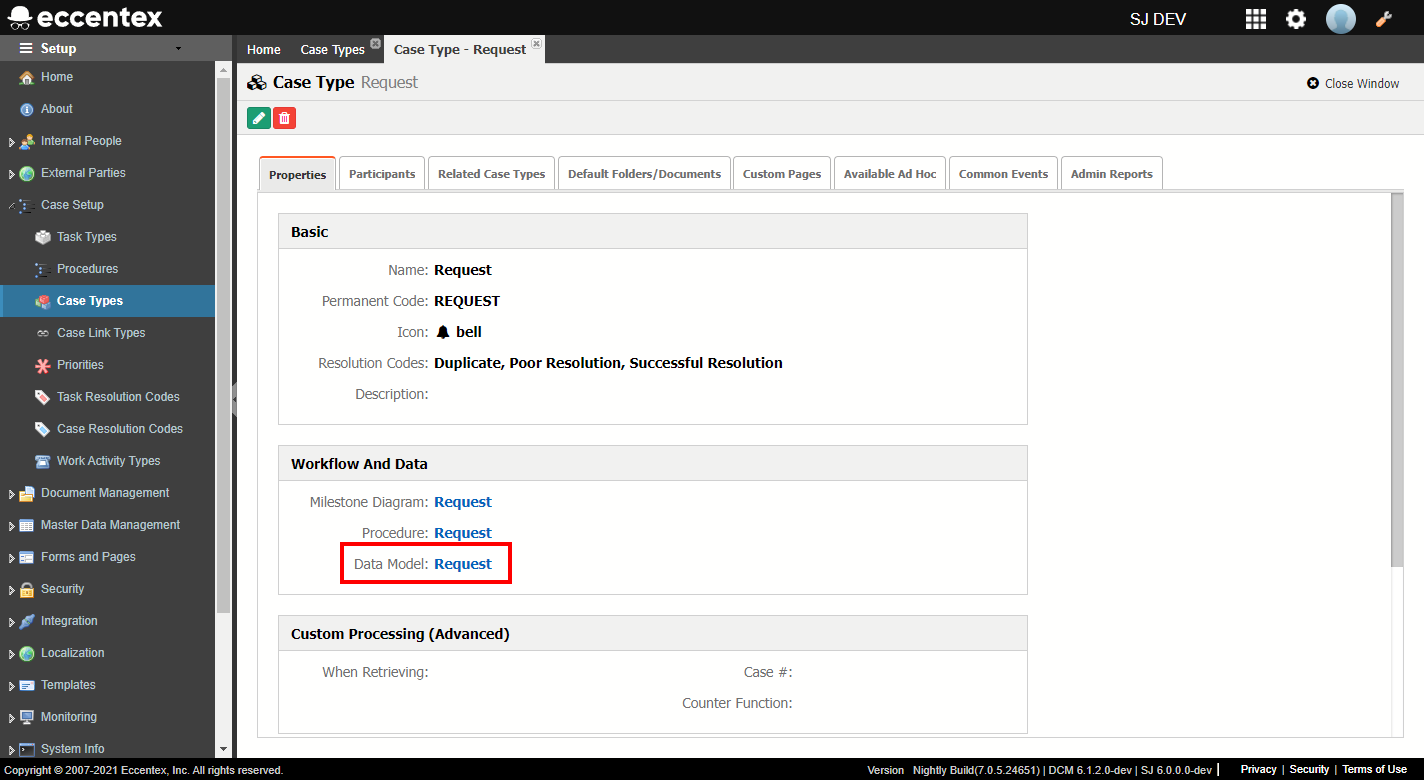
In the left panel, menu navigate toCase Setup → Case Types
Click on the hyperlink of the Case Type you want to manage
Click on the Data Model hyperlink in the Properties tab
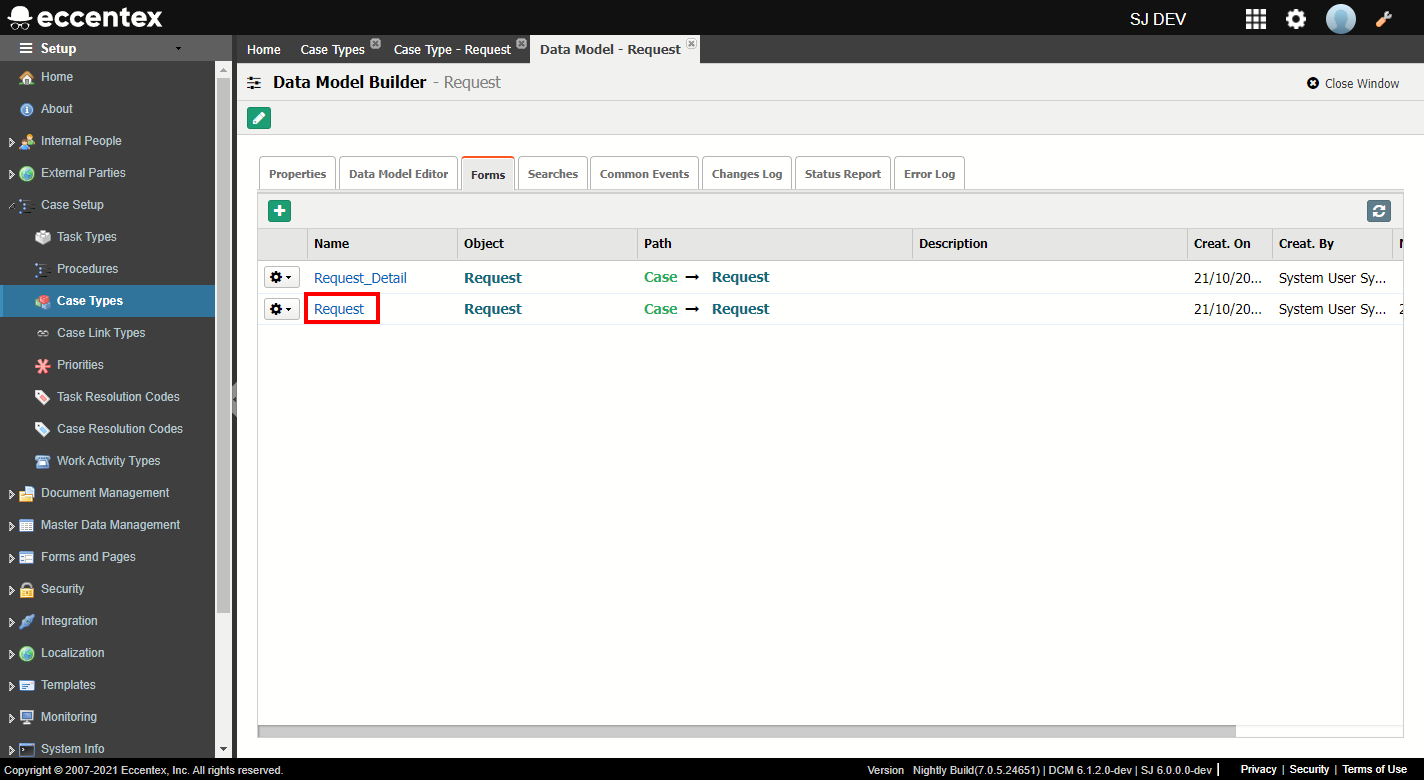
Navigate to the Forms tab
Click on the hyperlink next to the form that you want to modify
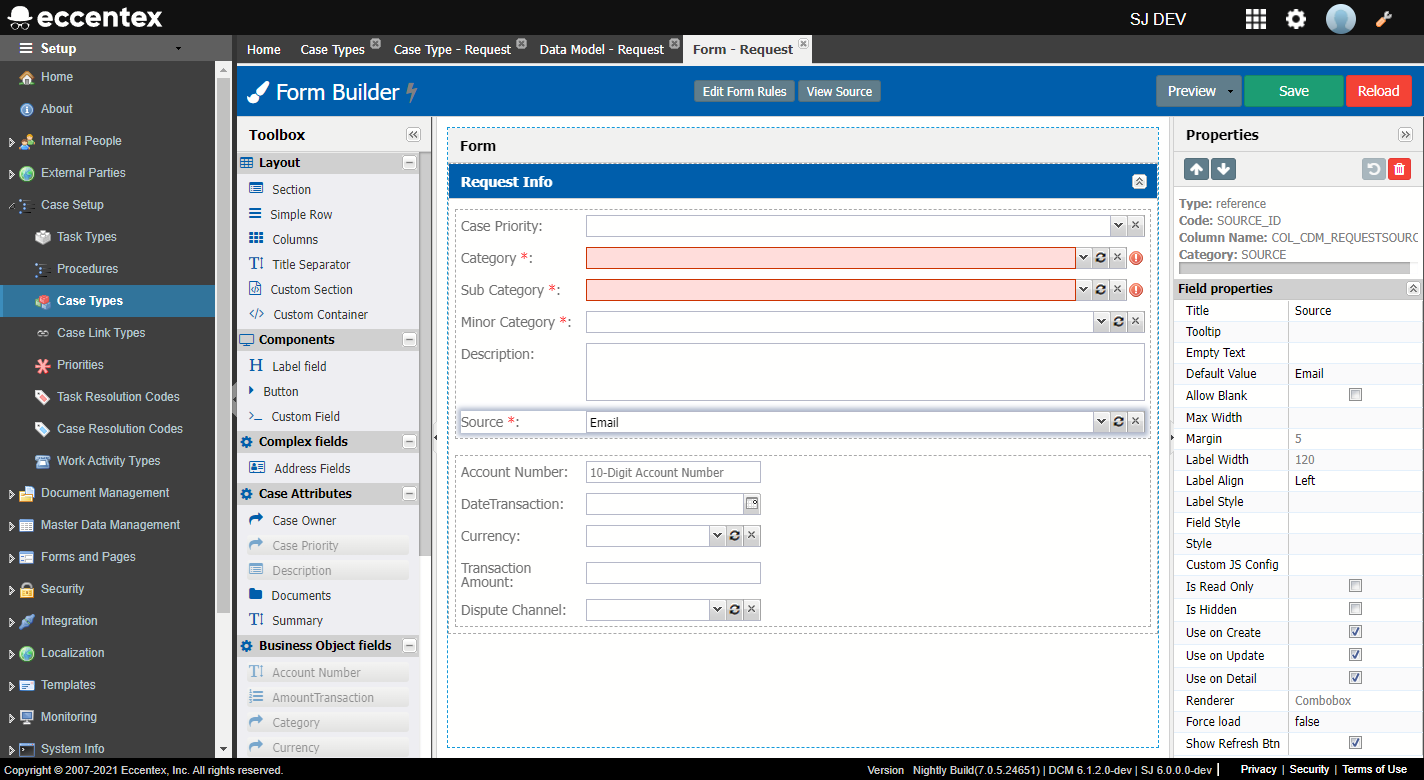
Modify the form as needed
Click Save
Steps to Create a New Form
On the top right, navigate to → ServiceJourney
On the top left, navigate to → Setup
In the left panel, the menu navigate toCase Setup → Case Types
Click on the hyperlink of the Case Type you want to edit
Click on the data model hyperlink in the Properties tab
Navigate to the Forms tab
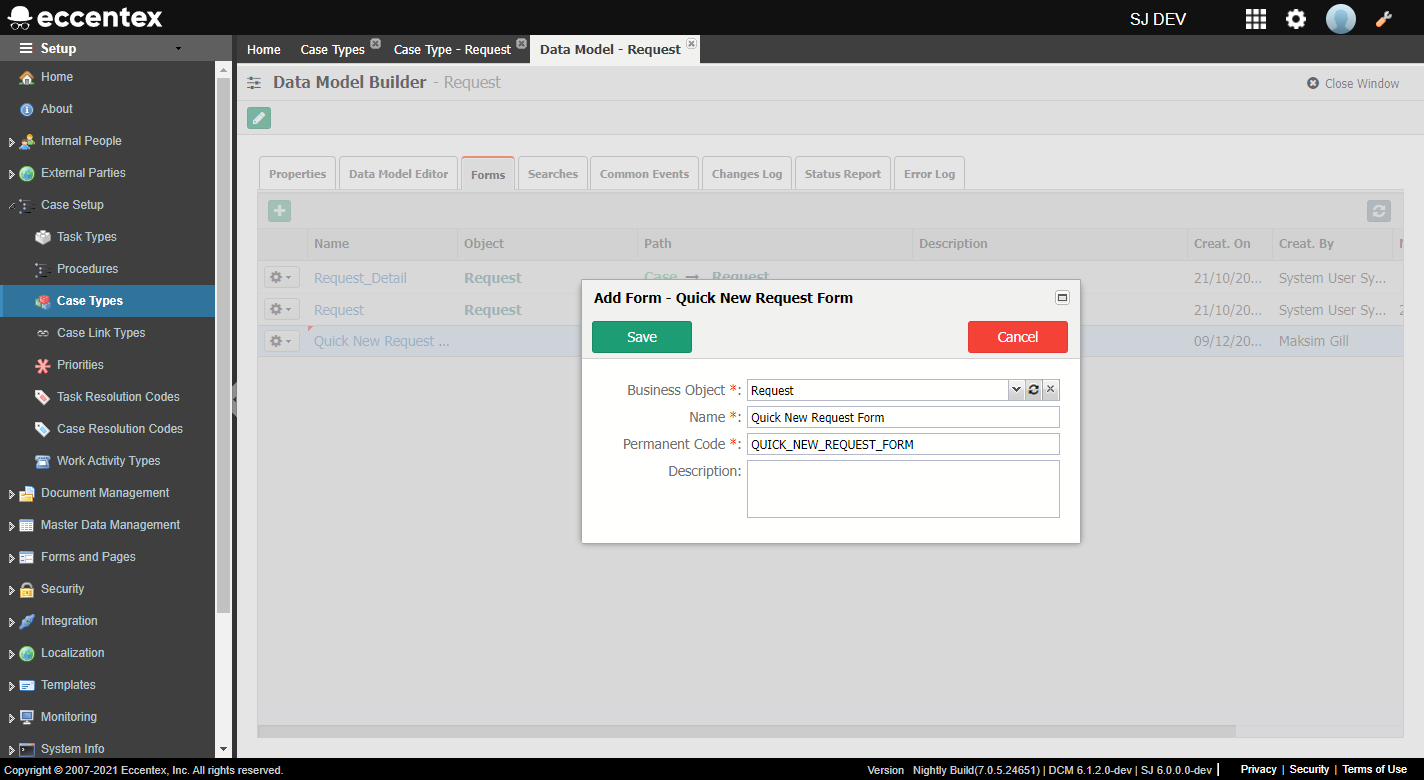
Click on green button
In Business Object, select the option the Case Type's name
Fill out the rest of the form
Click Save
Click on the hyperlink of the newly created form
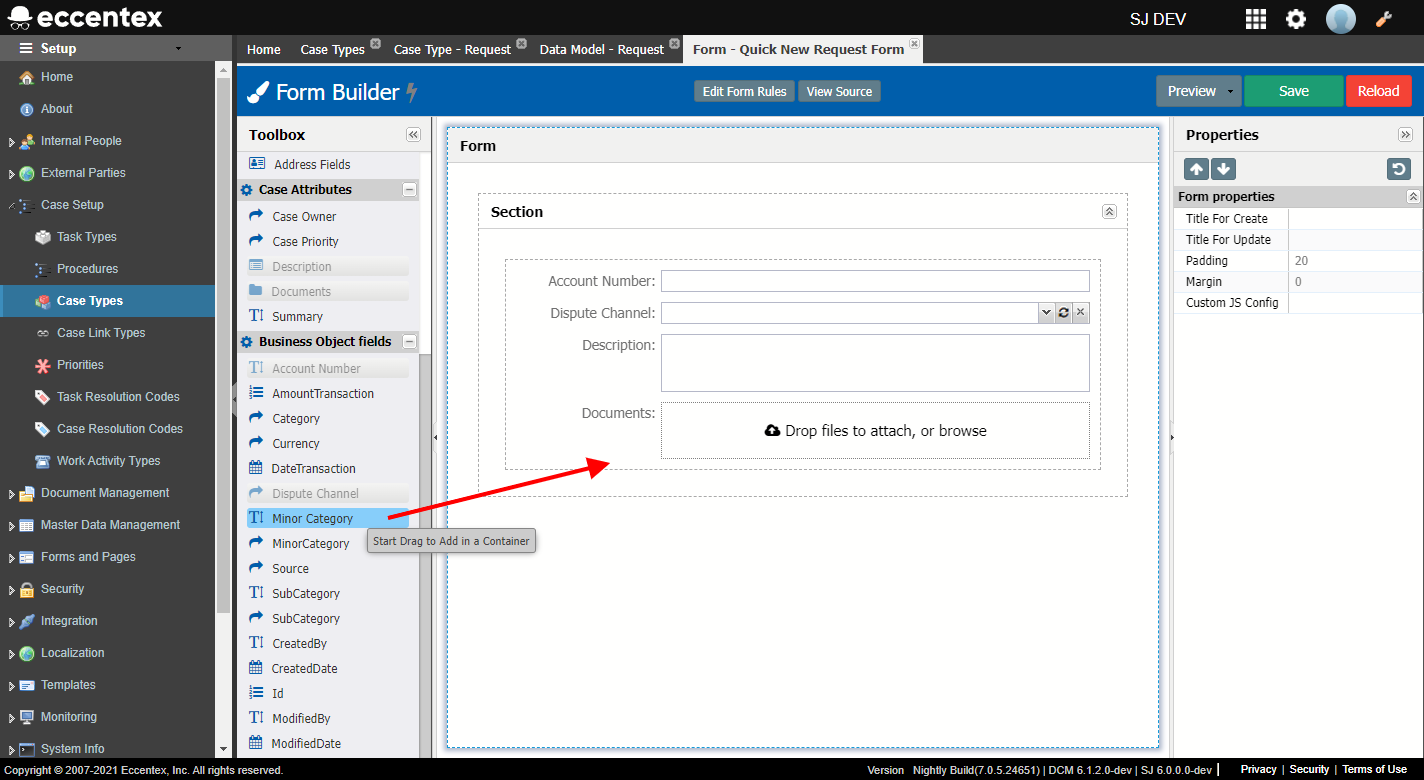
Design the new form by drag-and-dropping the design elements and fields onto the canvas
Click Save
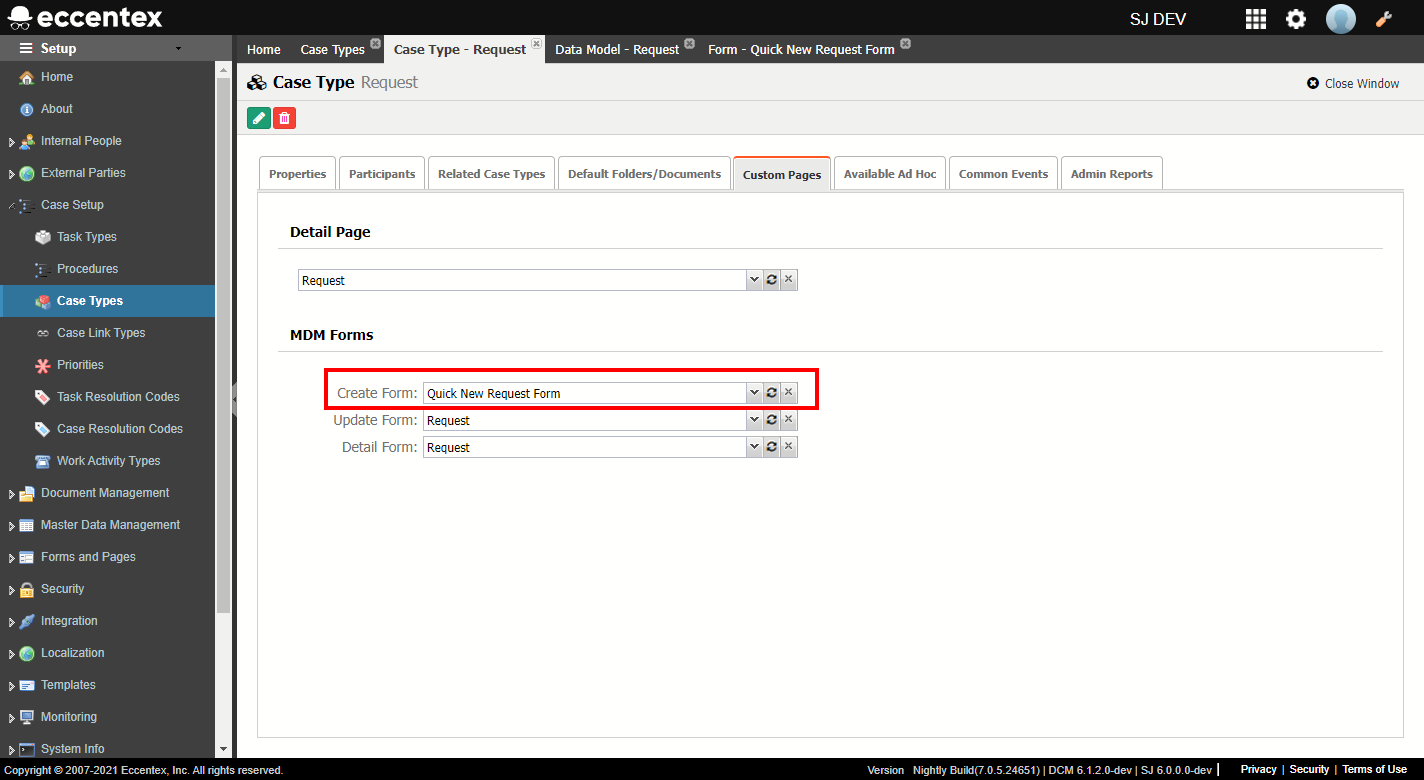
Navigate back to your Case Type detail page
Navigate to the Custom Pages tab
In the MDM Forms section, locate the place where you want the new form to show up
Select the newly created form, if it's not showing up then click on the button next to it
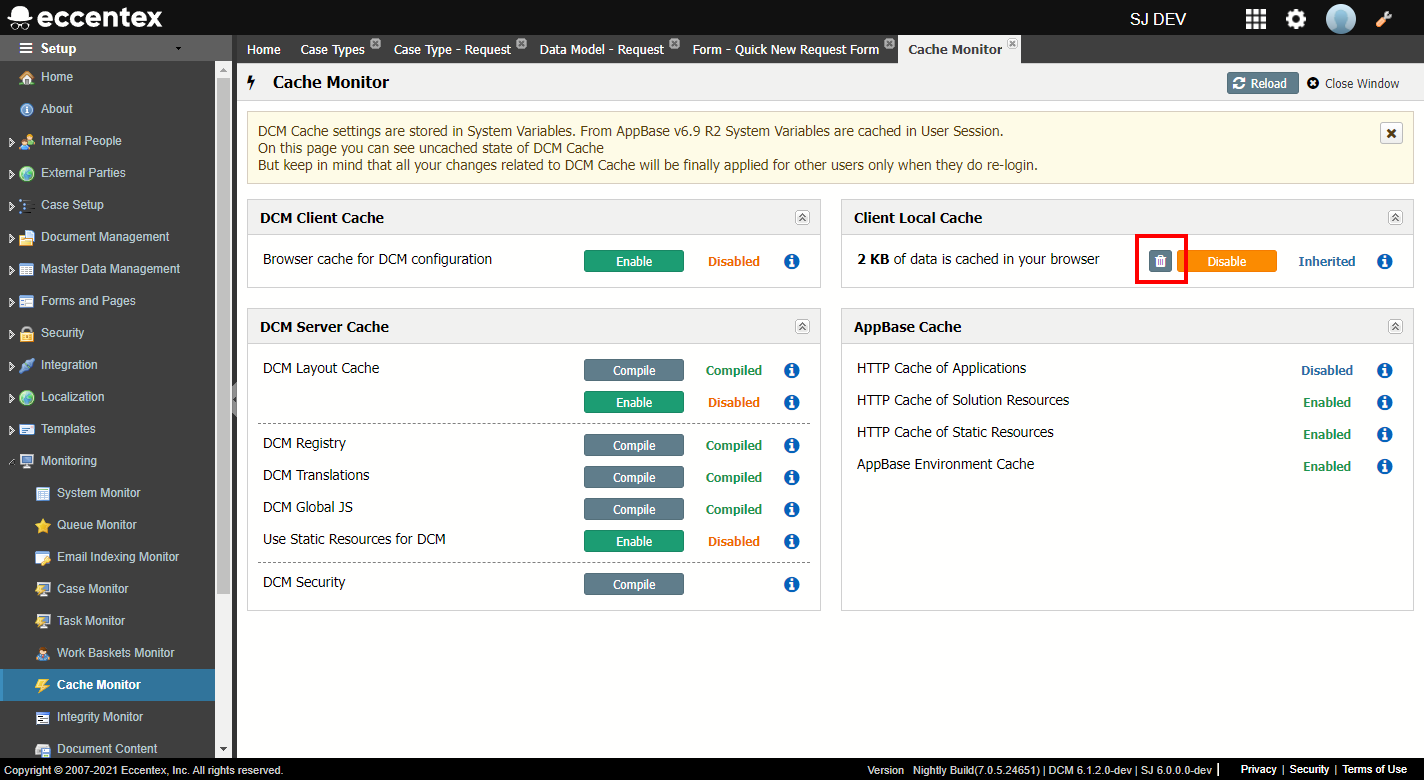
You may need to clear the cache before the form shows up to your users.
Clearing the UI Cache
To improve the user experience, many configurations are cached. Some changes made to forms and pages may not show up until the cache is cleared. You can manually clear the cache if needed.
On the top right, navigate to → ServiceJourney
On the top left, navigate to → Setup
In the left panel, the menu navigate toMonitoring → Cache Monitor
If the cache is enabled, then click on the icon in the Client Local Cache panel