You can create an email template with rich HTML formatting, rather than plain text.
Steps to configure
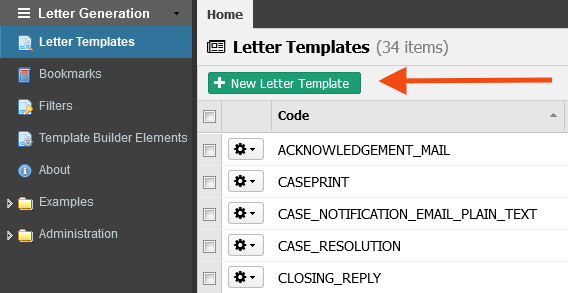
On the top right, navigate to → ServiceJourney
On the left, navigate to → Letter Generation → Letter Templates
Click the New Letter Template button
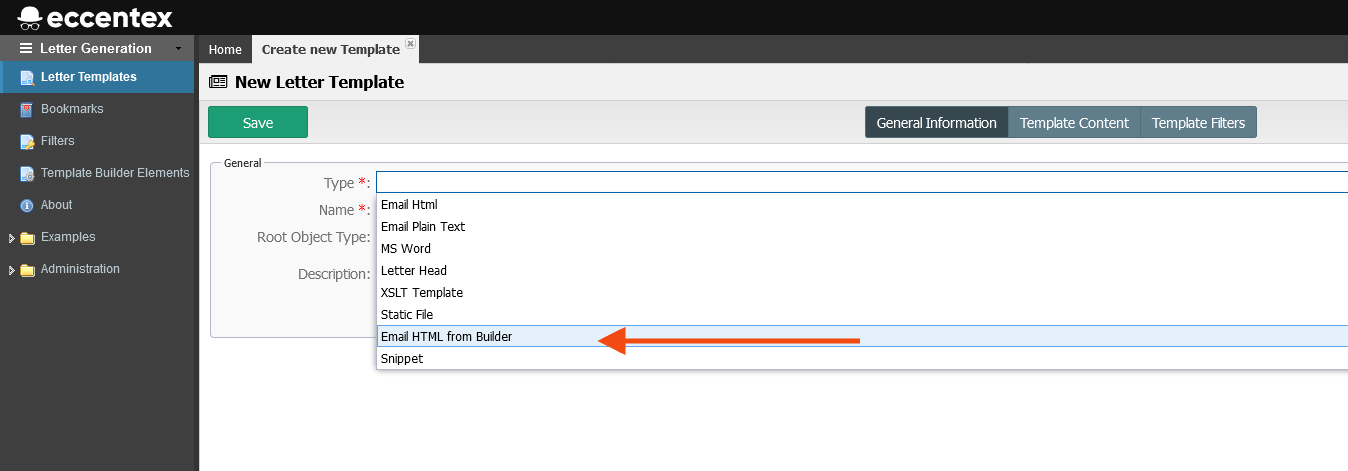
In the New Letter Template window select Email HTML from Builder type for the new template
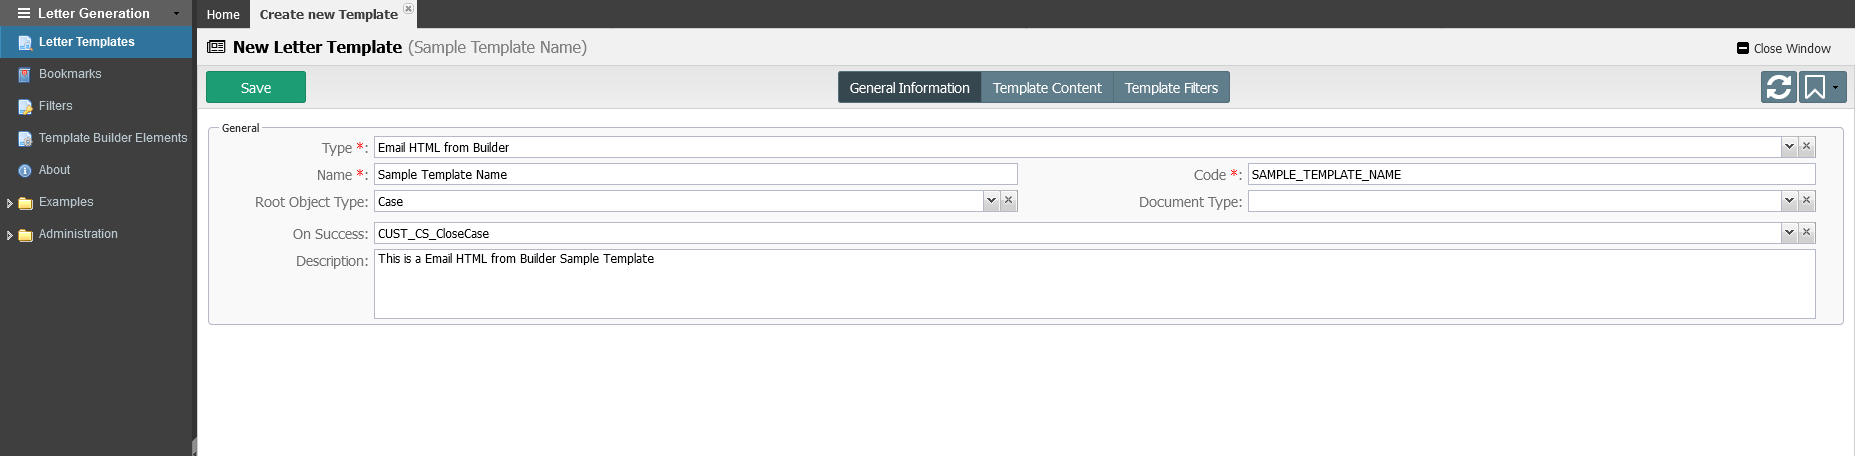
Fill in the fields, as shown below.
General Information Tab
Name: Type the name of the template (for example Sample Template) (note that the Code field is automatically set to SAMPLE_TEMPLATE, it could be overwritten if needed)
Root Object Type: Select Case as we want to have the DCM Case entity to be the context for the template.
Document Type: OPTIONAL. Select the Document Type if there is configured in Setup.
On Success: OPTIONAL. Select here the rule you need to execute after the email/template is successfully sent.
Description: OPTIONAL. Type some meaningful description to describe the use of the template
Click the Save button.
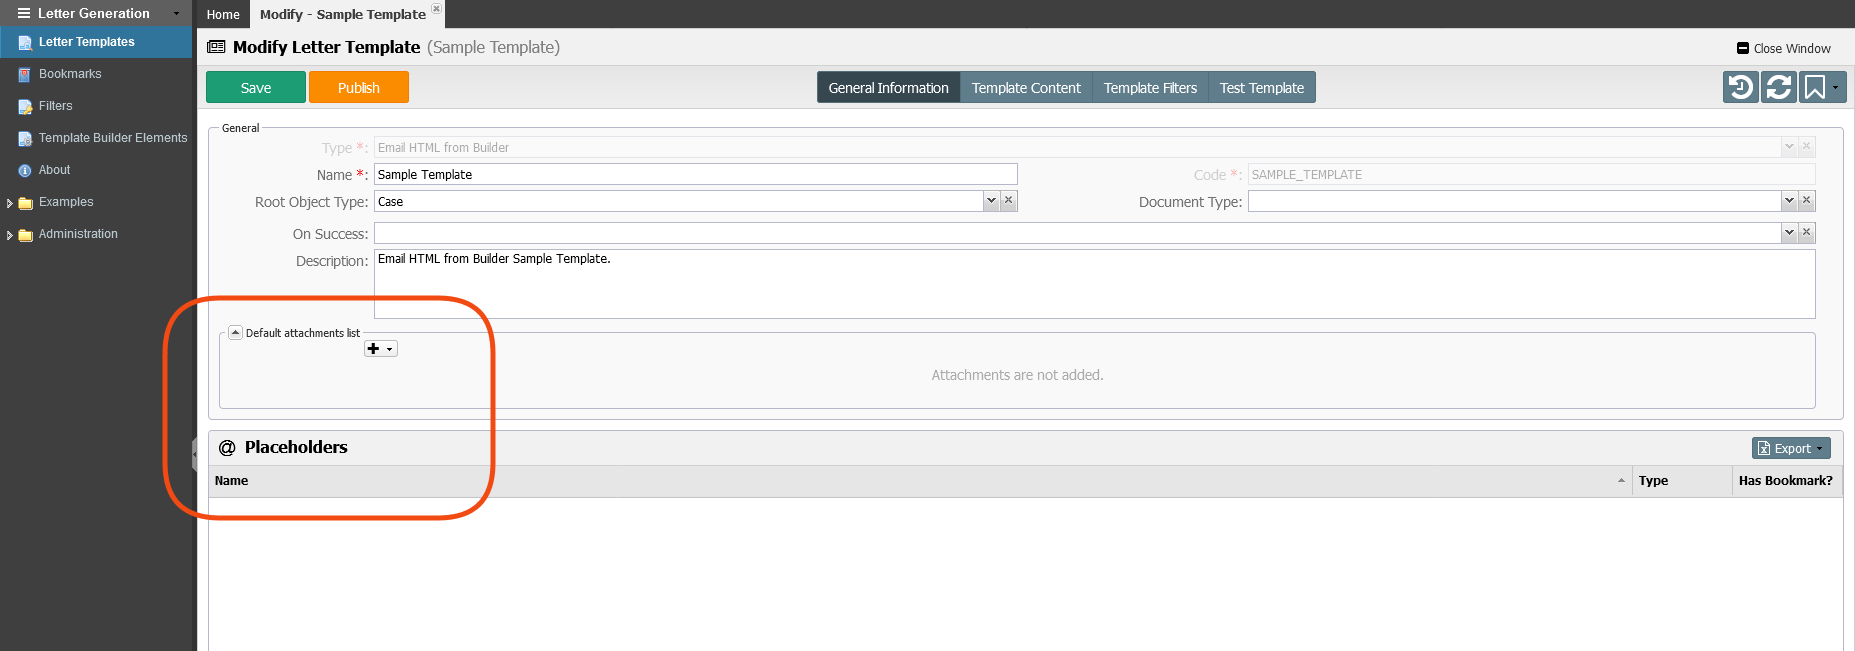
After saving the template the General Information tab will show two new sections:Default attachments list and
The Default attachments list lets you upload a file and add it as an attachment or use a letter template.
Placeholders show the list of all the placeholders that are used in this letter template. The initial list is empty.
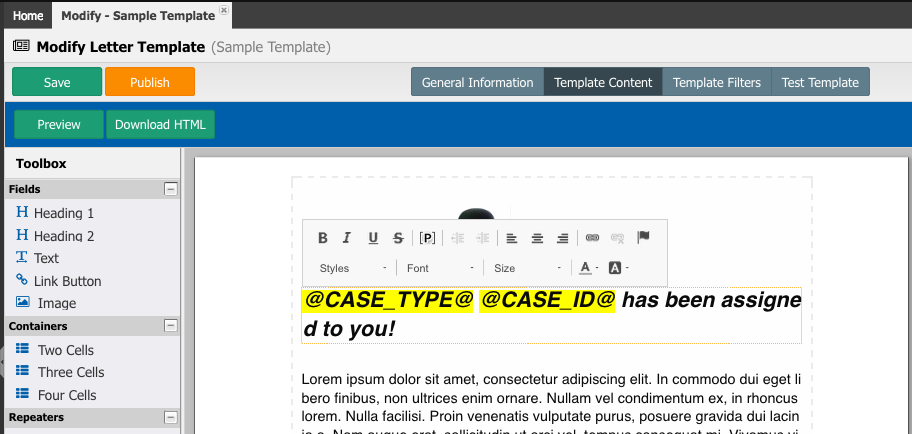
Adding Content to the Template
Email Settings
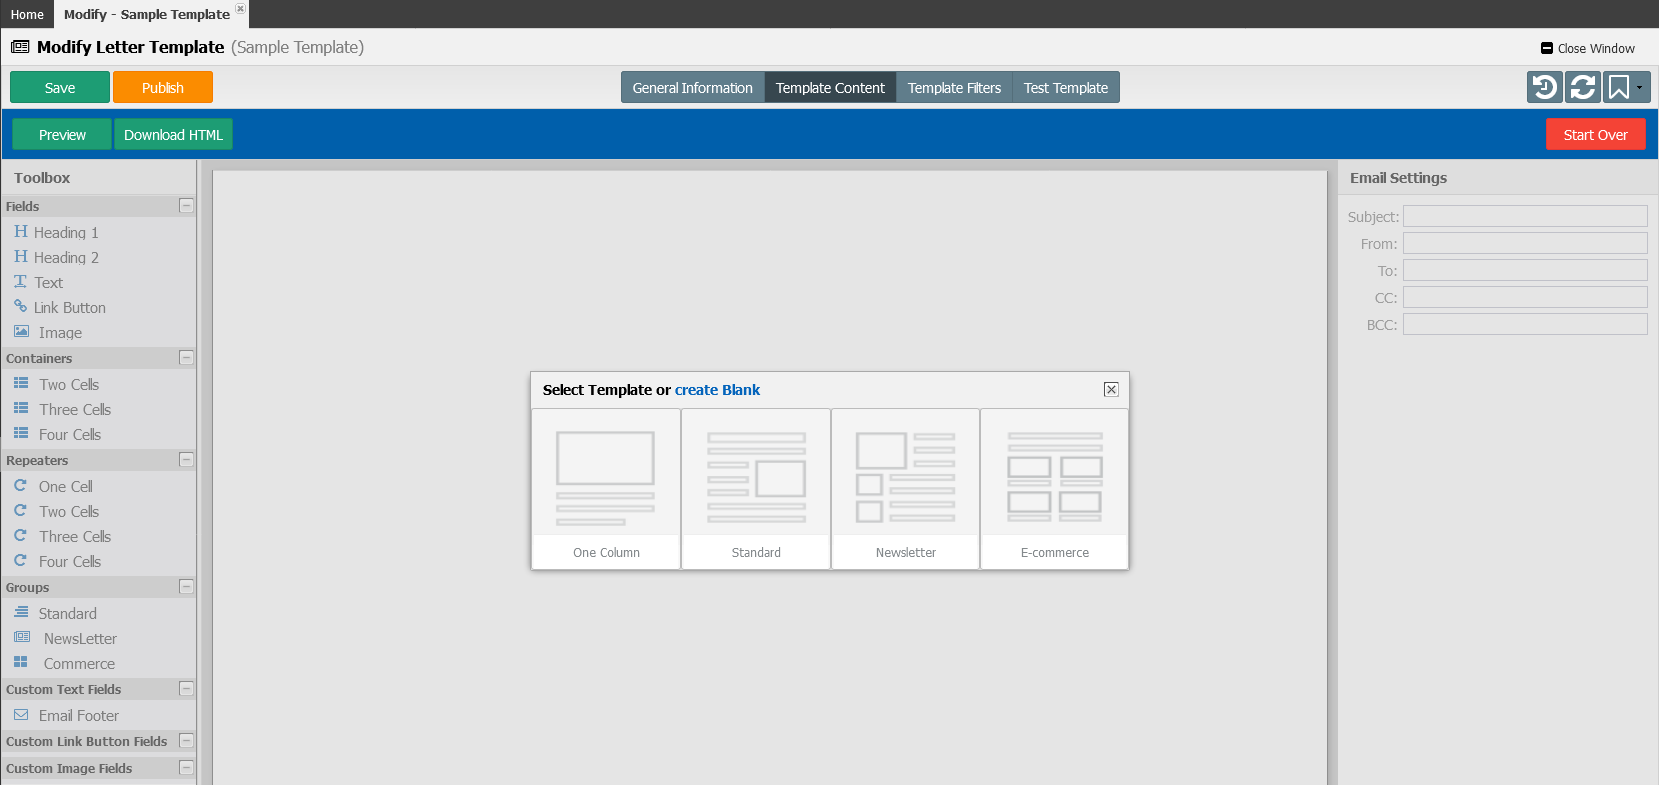
Select the Template Content tab
Select the One Column layout
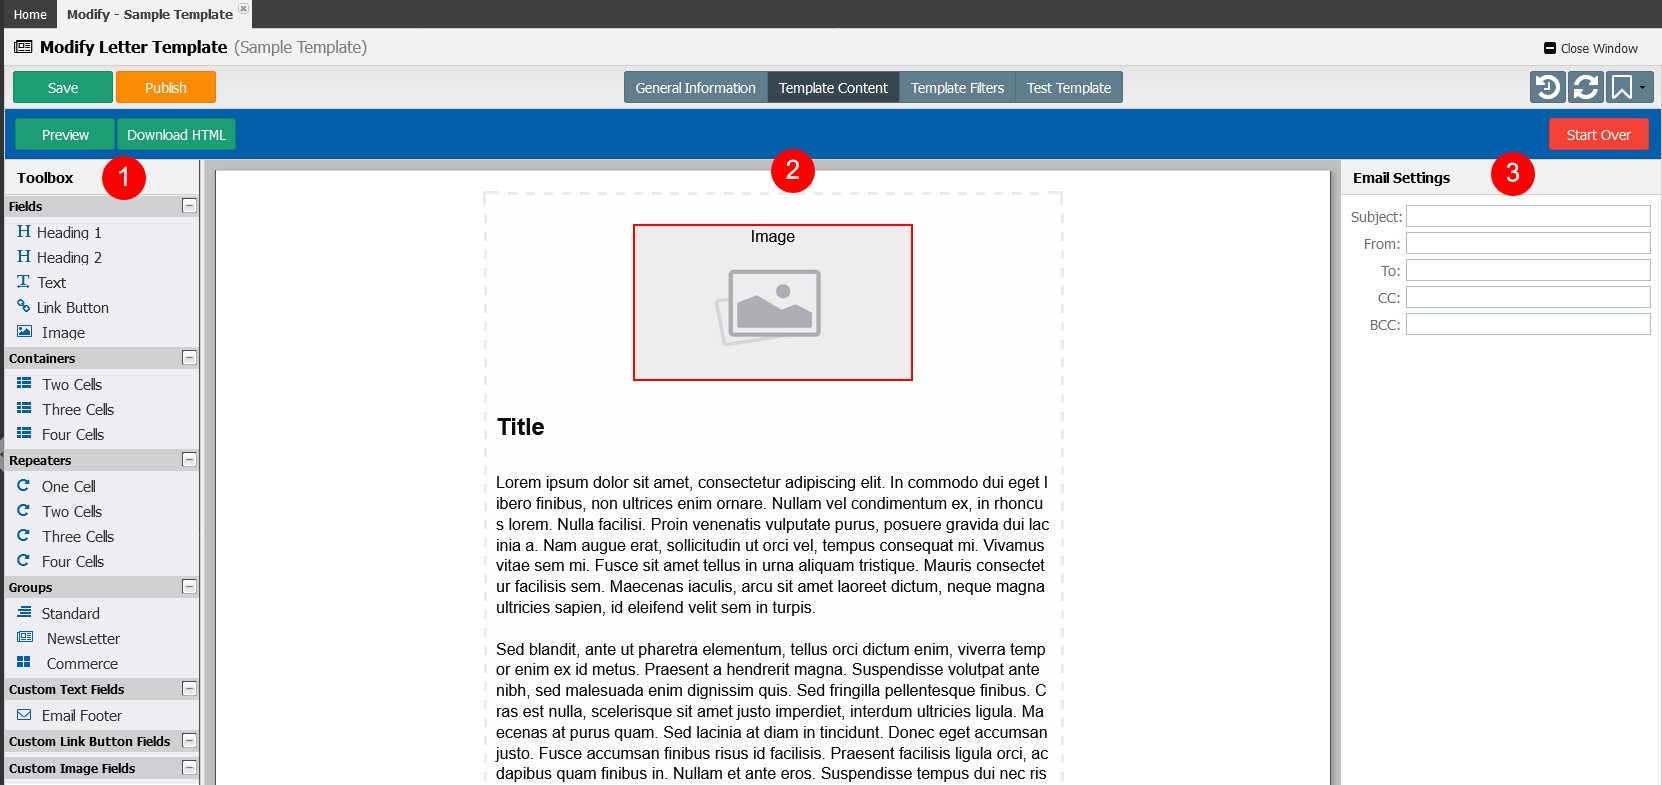
The screen has three sections: Toolbox (1), Edit(2) and Settings(3)
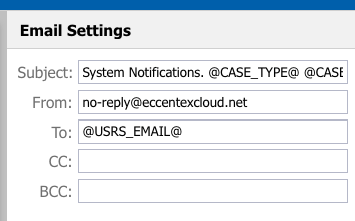
Email Settings
Subject : Email subject is an important line of the email and should give some clue to the recipient about the content. Examples System Notifications. Complaint CASE-9999-999 has been assigned to you!. We can insert predefined placeholders to make the text dynamic. Example: System Notifications. has been assigned to you!
From: this is the email address of the sender. For example: no-reply@eccentexcloud.net. You can also use placeholders to calculate the address from the Case. For example:
To: this is the email address of the recipient(s). For example: name@email.us. If you need to add more than one recipient, use a semi-colon to separate the addresses.For example: name1@email.us; name2@email.us. You can also use placeholders to calculate the address from a Case, External Party, etc.. For example:
CC: this is the email address of the copied recipient.
BCC: this is the email address of the blind copied recipient
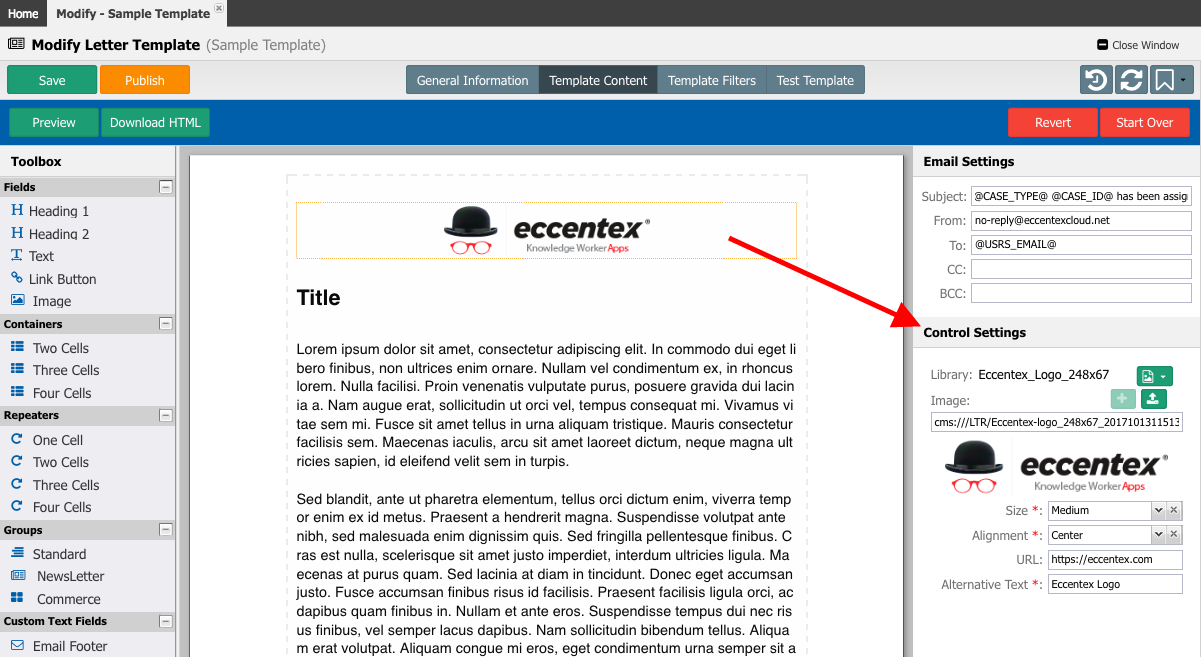
Header Image
Click on the image to see available parameters on the right panel
Image - Control Settings
Library: You can choose any image already in Confluence. For example the company logo.
Image: You can use this option to upload a new image.
Preview Image: A preview of the image selected.
Size: You can choose Small, Medium, or Large.
Alignment: You can choose, Left, Center, or Right
URL: this is the URL you will be redirected to when you click on the image. For example https://eccentex.com
Alternative Text: this is an alternative text shown when there is a problem loading the image. For example Eccentex Logo.
Save the changes.
Title
For the title let's just repeat a part our the subject and set it to has been assigned to you!
Since it looks a bit too large let's make the font size a bit smaller. Select the text using CTRL+A, then select the new size, for example, 20px.
Save the changes.
Text
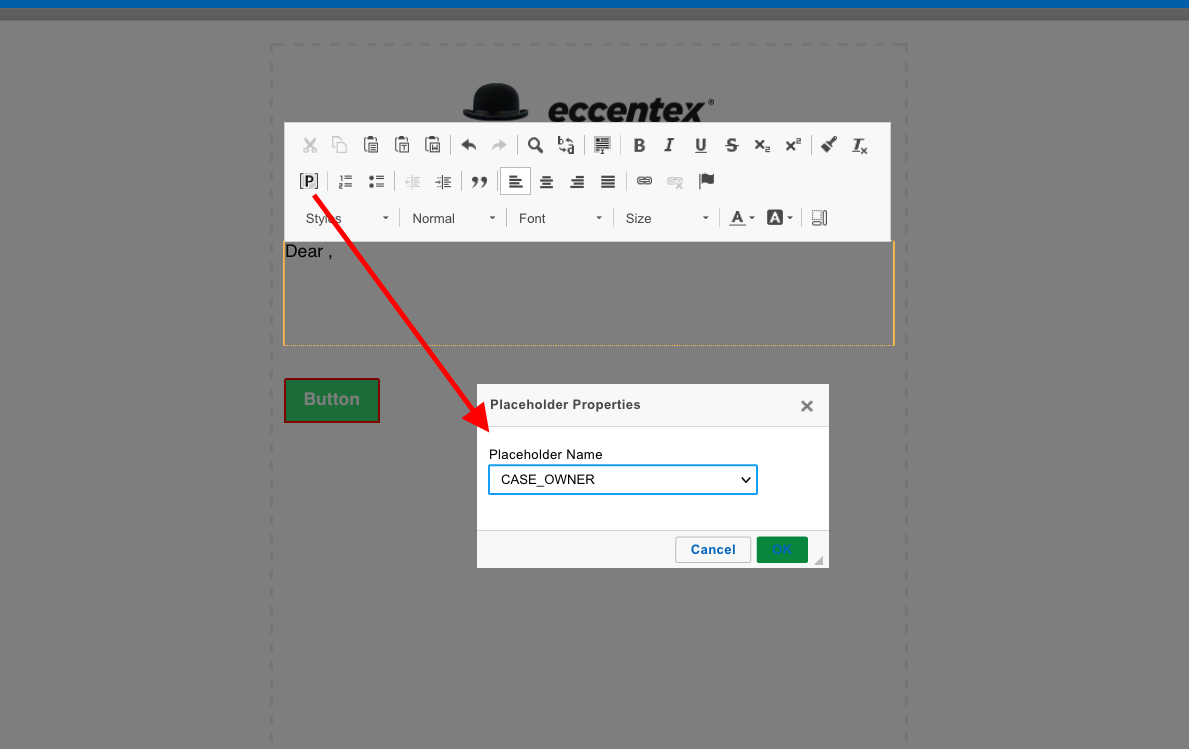
Now let's replace the default text with something meaningful for the recipient. The first line would be a salutation, for example, 'Dear John Examiner,'. In order to write a salutation, we need to get the examiner's name, in our DCM implementation the complaint examiner is the case owner so we'll use the @CASE_OWNER@ bookmark.
To do this change click on the text area and insert a new line with the word 'Dear '.
We already learned how to use the bookmarks tab to copy-past available placeholders but the builder's text editor also has another convenient way to add placeholders via the placeholder button in the menu.
Click the placeholder button, and select CASE_OWNER from the list. Click OK to insert it into the text.
Save the changes.
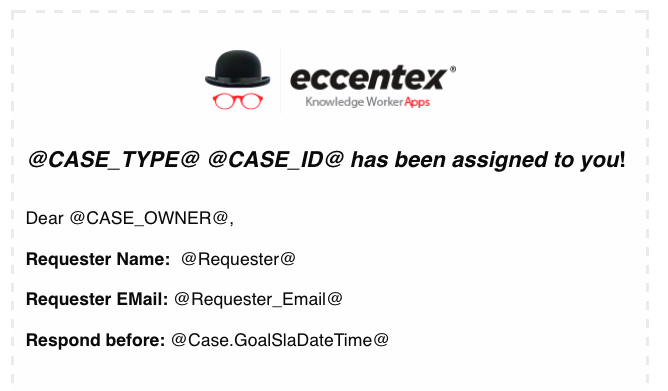
Add more info from the case to the body of the email as follow:
EMail Body Text
Requester Name: @Requester@
Requester EMail:@Requester_Email@
Respond before:@Case.GoalSlaDateTime@
Save changes.
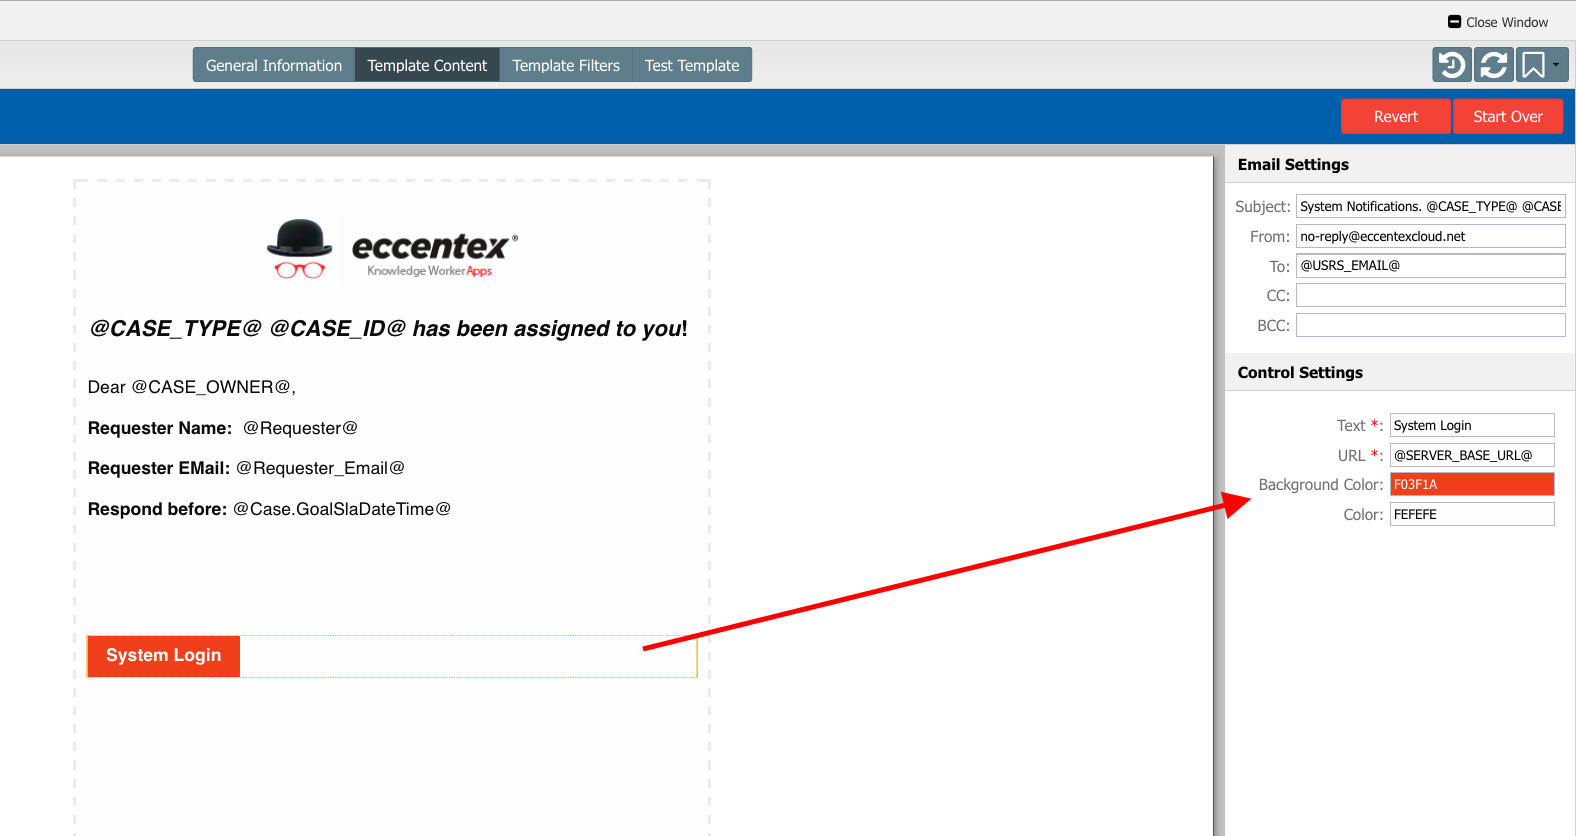
Link Button
Finally, configure the Link Button at the bottom of the email with a link to the login page.
Update button properties with the following:
Text: This is the text in the button, for example System Login
URL: This is the URL address to link to when the button is pressed, for example, if we use the system @SERVER_BASE_URL@ placeholder, it will insert the base URL for the actual solution, for example, https://mysite.eccentex.cloud/Ecx.Web.
Background Color: Background color of the button in HEX format. When you click the field it opens a color palette.
Color: This is the color of the text in the button in HEX format. When you click the field it opens a color palette.
Save the changes
That is it on the template content. Let's test it.
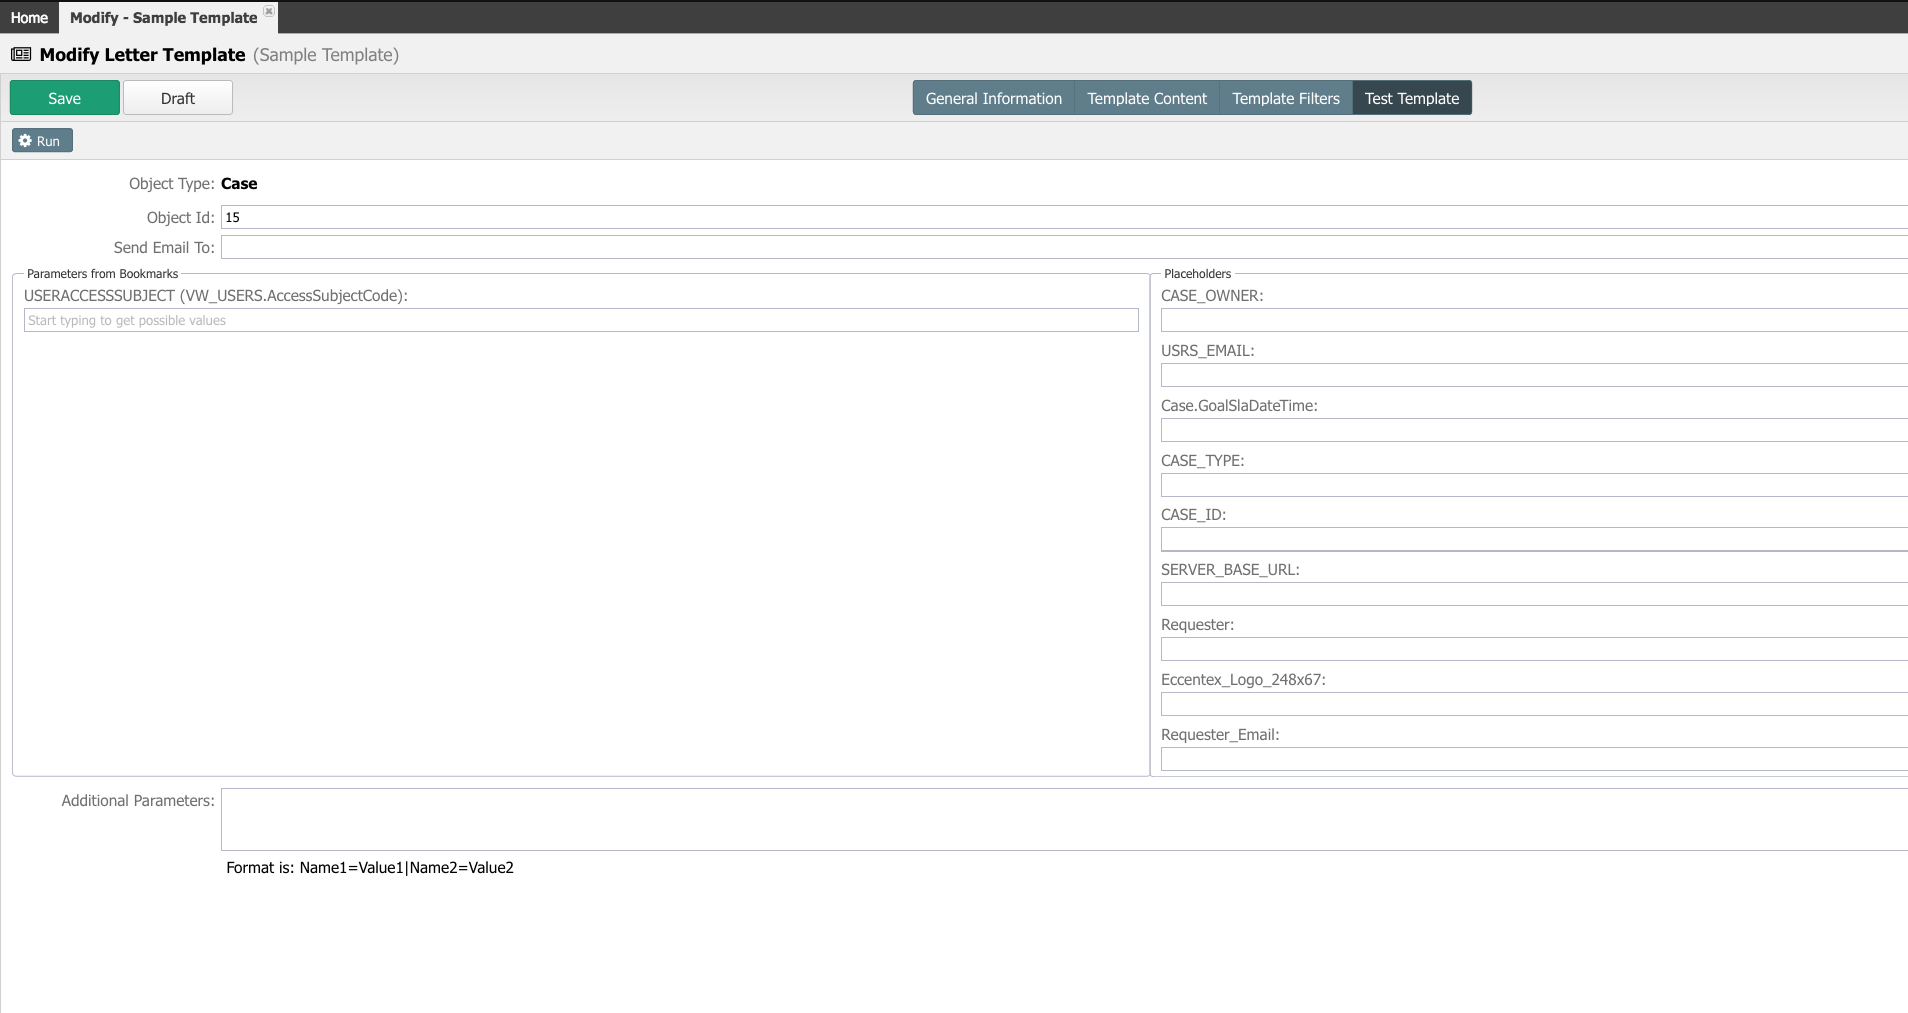
Testing the Configuration
Save the template progress
Select the Test Template tab
Enter a valid Object Id. in our example, we selected the Case as Object Type so the Object Id will be the record Id of the Case. This record will be used to generate our email. Let's type any known case record Id number (15 in the below screenshot) or select one of the suggested as you type in the Object Idfield
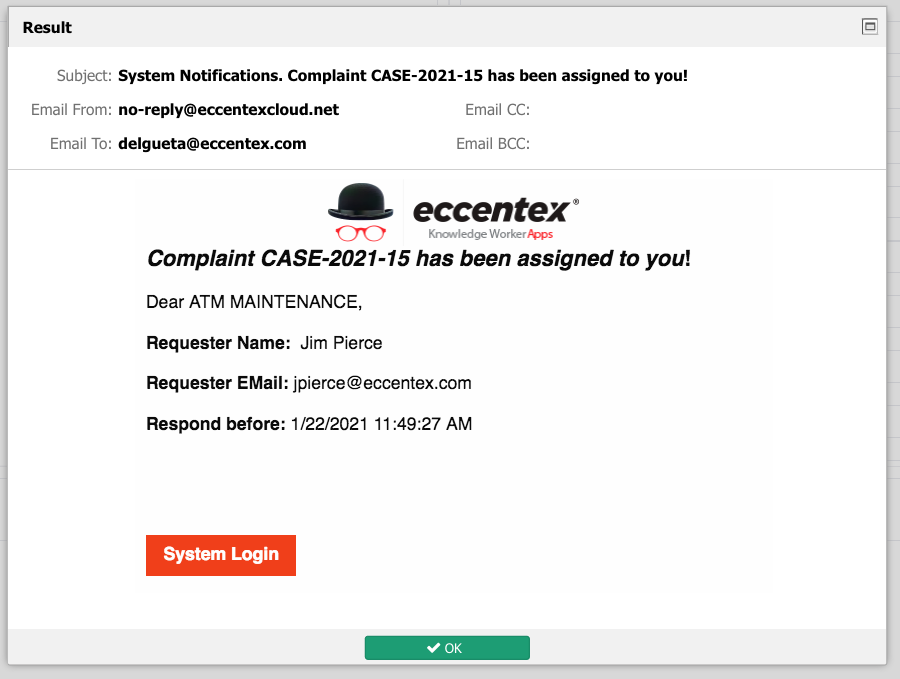
Click the Run button on the left upper corner. We should see a pop up with the following :
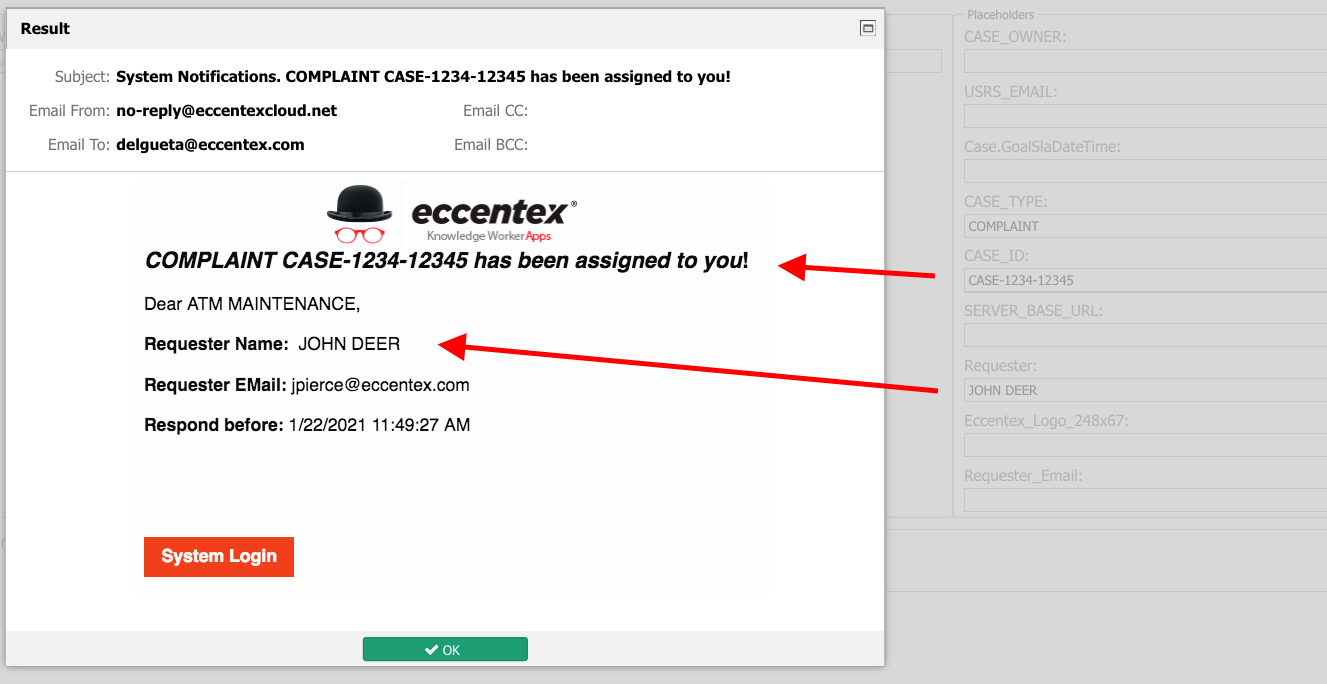
Placeholders fields set is there to overwrite placeholder values instead of resolving them.
Type CASE-1234-12345 in the CASE_ID field and COMPLAINT in the CASE_TYPE field and JOHN DEER in the Requester field.
Click the Run button. We should see a pop up with the following :
The Additional Parameters section is for more advanced use cases where a template has placeholders linked with bookmarks that depend not only on object context (Object Type, Object Id) but on additional parameters.
Publishing the Template
The template is not available to the system or users while is in Draft state. To publish the template, click the Publish button.
Once it is published it becomes available.
If you need to un-publish the template wu=hile you make updates on it, click the Draft button.
JavaScript errors detected
Please note, these errors can depend on your browser setup.
If this problem persists, please contact our support.