A Database user (Tenant Password Policy Configuration) in AppBase is a user account created manually by a system administrator directly via the User Management screens. The steps below detail how to create a new user for the first time in the system.
The other type of user in the system is a Federated user is simply a user account created due to an integration with Active Directory, ADFS, or a SAML identity management system.
Creating a user manually
On the top right, navigate to → Manage Users
Click the New User button
Fill out the appropriate fields
Click Save
Users need to log out and log back in for these changes to take effect
Details of a User Account
Property
Description
Sample
General Information
First Name*
Enter the full First name of the user
John
Last Name*
Enter the Last name of the user
Smith
Email *
Enter the user's email address
Note this is important when resetting a user's password and it is often used in business rules within a solution for forwarding information t.
john.smith.2021@email.cloud
Enter this user's business phone number.
555-555-5555
Supervisor
Select the user's immediate Supervisor account from the drop-down list.
This relationship can be referenced in a business rule or other objects to apply restrictions for example.
Lara Smith
Position
Enter the position or job description.
Senior Developer
Title
Enter a title or job description.
Mister
11/17/22
User ID for Skype
jhon_smith_22
Cellphone
Enter this user's mobile phone number.
555-555-5555
Fax
Enter this user's business FAX phone number.
User membership
Auth Configuration
Select the Authorization configuration.
Tenant Password Policy Configuration (default)
Active Directory
SAML (for web browser Single Sign-On (SSO))
AppBase supports several auth configuration types and can be configured in the User management → Auth Configurations.
Tenant Password Policy
Where the user account resides
DB (Local. Default)
Federate (AD or SAML)
DB
Valid user name
jsmith
Password
Assign a valid password to the user. Must follow the Password Policy.
jsmi@0022
Confirm password.
jsmi@0022
Status
Status of the account
Active
Inactive
Active
Address Information
Country
Select the Country from the drop-down list.
United States
Street
Full street address
123 Main St.
City
City
Los Angeles
ZIP
Postal code
99002
State
State
CA
User Preferences
Select to set the locale based on desktop configuration
The default is not checked
Locale
Select the user's usual location from the drop-down list. It must be defined in the system.
English (United States)
Native Name
The native name of the locale
English (United States)
Enter the user's preferred format for short dates
M/d/yyyy
Enter the user's preferred format for long dates
dddd, MMMM d, yyyy
Enter the user's preferred format for short times
h:mm tt
Enter the user's preferred format for long times
h:mm:ss tt
Define the first day of the Week. Common values are Sunday or Monday.
Sunday
Time Zone
Select the user's Time Zone from the drop-down list.
(GMT-07:00:00) Pacific Daylight Time (North America) (America/Los_Angeles)
Import users from a CSV file
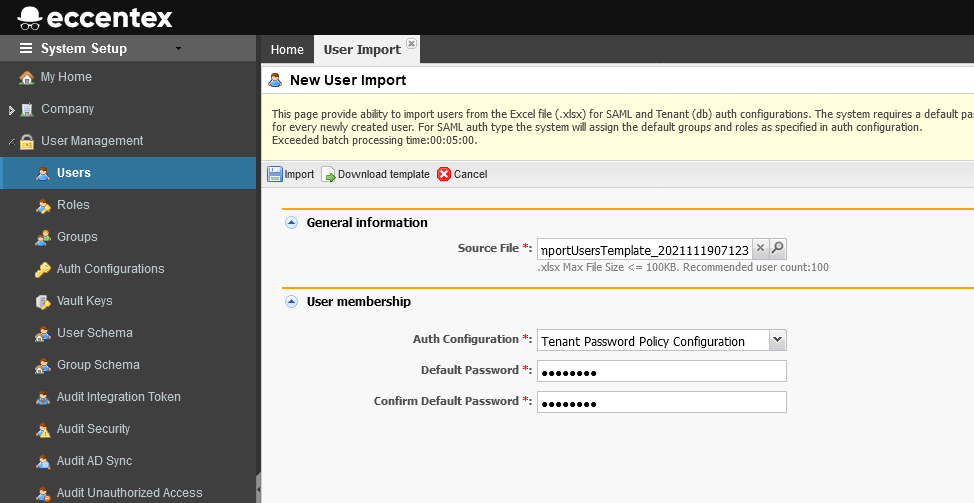
On the top right, navigate to → Manage Users
Navigate to User Management → Users
Click the User Import button
Click theDownload template button
Open the downloaded Excel file to add the users to it.
Save the file
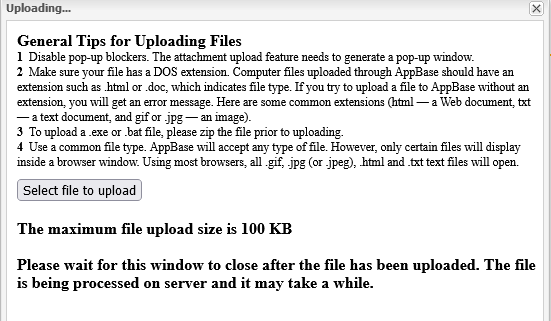
To select the Source File, Click the magnifier button and Select file to upload from your computer.
Select the Auth Configuration from the list. The default setting is Tenant Password Policy Configuration.
Set a Default Password for all the importing users. It must be a valid password.
Re-enter the password in the Confirm Default Password
Click the Import button.
Setting up Single Sign-On (SSO) with Microsoft Azure Active Directory (AD)