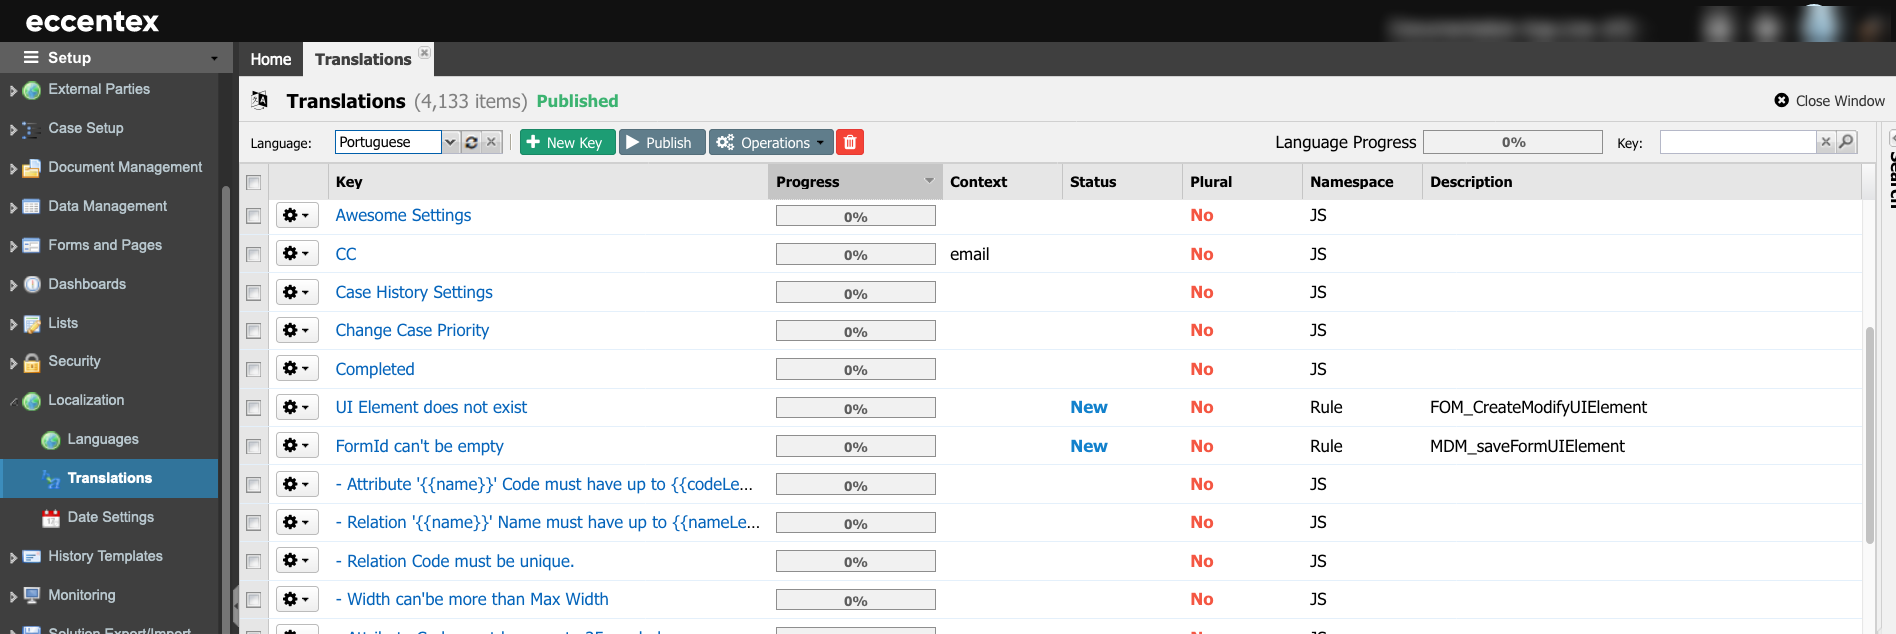
The translation is a hub for managing the application's text elements. It allows developers and administrators to add, modify, or update translations without changing the application's underlying code.
Steps
On the top right, navigate to → <<your solution>>
On the left, navigate to → Setup
Navigate toLocalization → Translations.
Verify that the status of the Translations is Published.
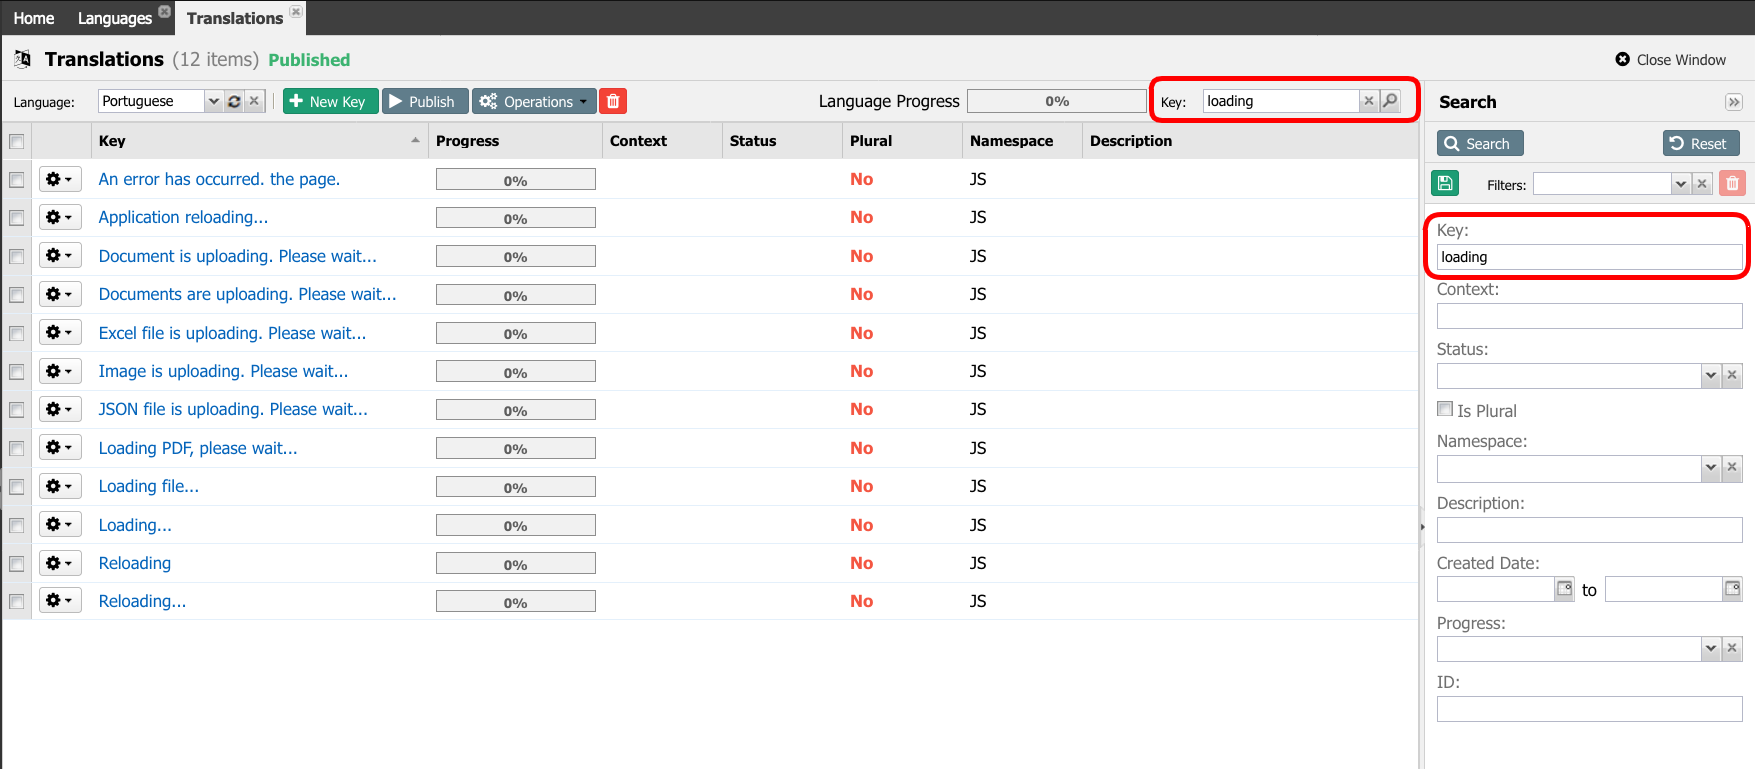
You can use the search on the top-right or the Search panel to edit a specific key. In our example, we are searching for all the keys that contain the text 'loading' in any part of the key.
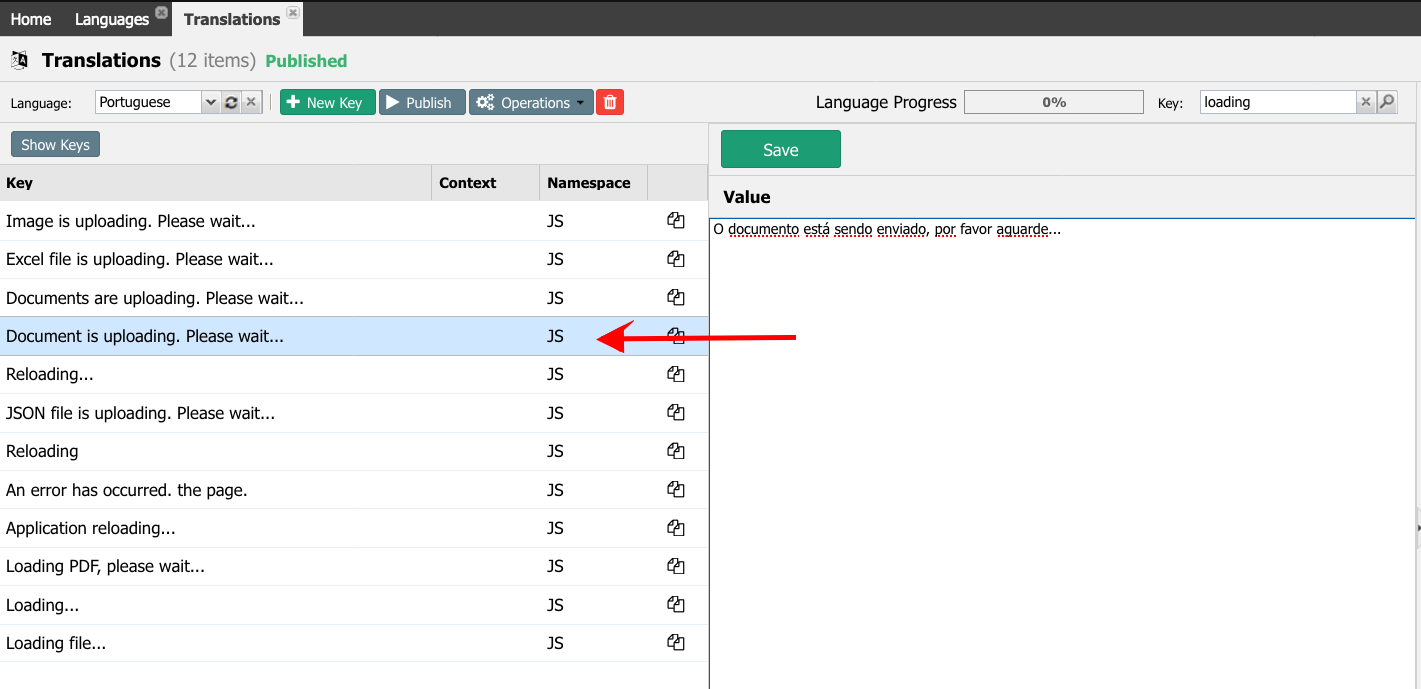
To edit a Key, click on the hyperlink. This will open the left panel where you can add the translated text.
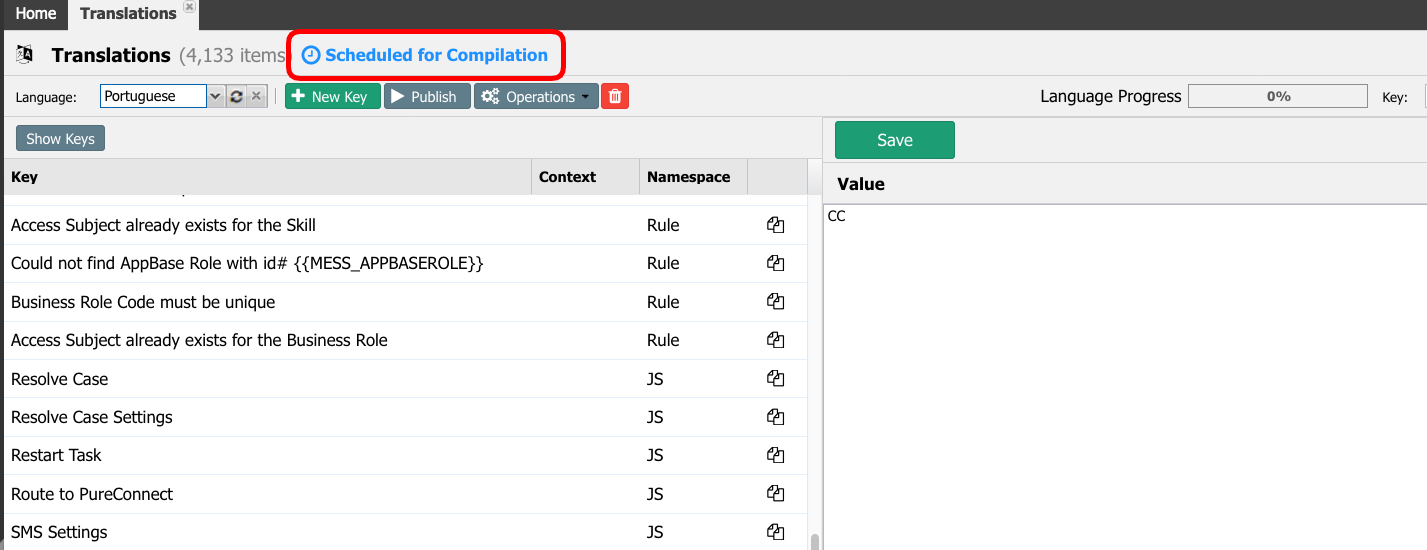
Save the translation. It will schedule the process of compilation. You can manually start the compilation process by clicking the Publish button.
Under the column Progress, you can see if the key has or does not have a translation. The 0% means Not Translated/No Entry. The 100% means the key has a translation.
The Language Progress bar on the top of the grid indicates the overall progress.
A typical DCM solution has approximately more than two thousand keys. Editing them in the Web UI is impractical. You can use the Export/Import tool to export all the keys to an MS Excel file and add the translations to the exported file. Then, when completed, upload the translated keys using the Import operation. For more details, go to the Export/Import Translations article.