Distribution channels are used to define outgoing email settings and to specify the email account to send messages from. You cannot send email in ServiceJourney until at least one distribution channel is configured and enabled. There are two types of mailboxes that can be used with ServiceJourney: SMTP mailboxes and Microsoft 365 accounts. Either of those options need to be provisioned by your organization.
Emails can be sent automatically as part of a business process or manually by a user during their day-to-day work. A copy of all outbound emails and their attachments are saved to either a Case or a Party that they are associated with.
You can configure multiple email accounts from which to send messages from. This can be used to distinguish between transactional and marketing emails, or to support a multi-brand business.
Steps to connect your email account
On the top right, navigate to → Application Studio → ServiceJourney
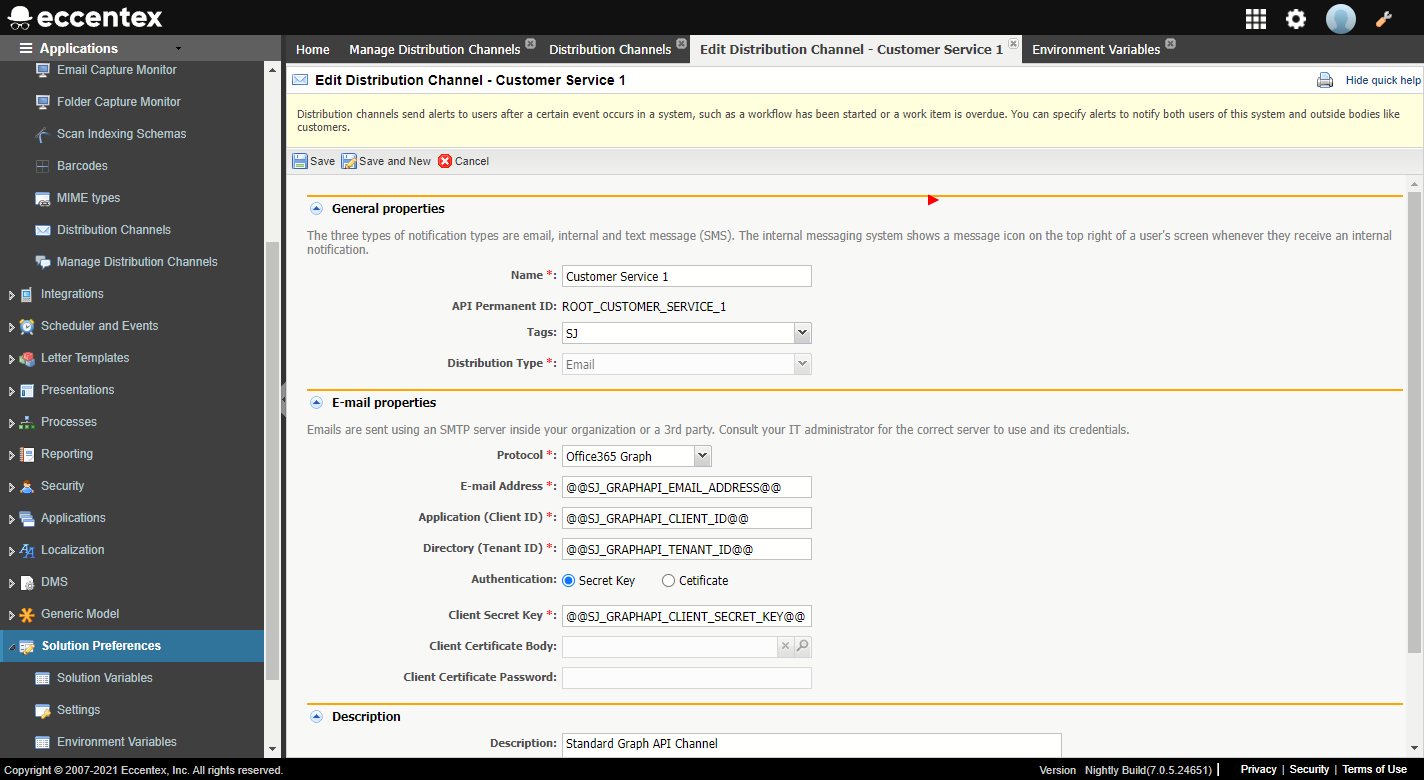
Once inside Application Studio, navigate to Channel Setup → Distribution Channels → Customer Service 1 → Edit
Select the Protocol you wish to use to send emails out from your organizations. Fill in the fields, as shown below.
Client Certificate Body: upload the certificate if you select "Certificate"
Client Certificate Password: @@SJ_GRAPHAPI_CERTIFICATE_PASSWORD@@ if you select "Certificate"
SMTP settings
Protocol: SMTP
SMTP Server: @@SJ_SMTP_SERVER@@
SMTP Username: @@SJ_SMTP_USERNAME@@
SMTP Password: @@SJ_SMTP_PASSWORD@@
Port: @@SJ_SMTP_PORT@@
Click Save
If you changed anything in Channel Setup → Distribution Channels → Customer Service 1 page, go to Deployment Management → Deploy and deploy the solution
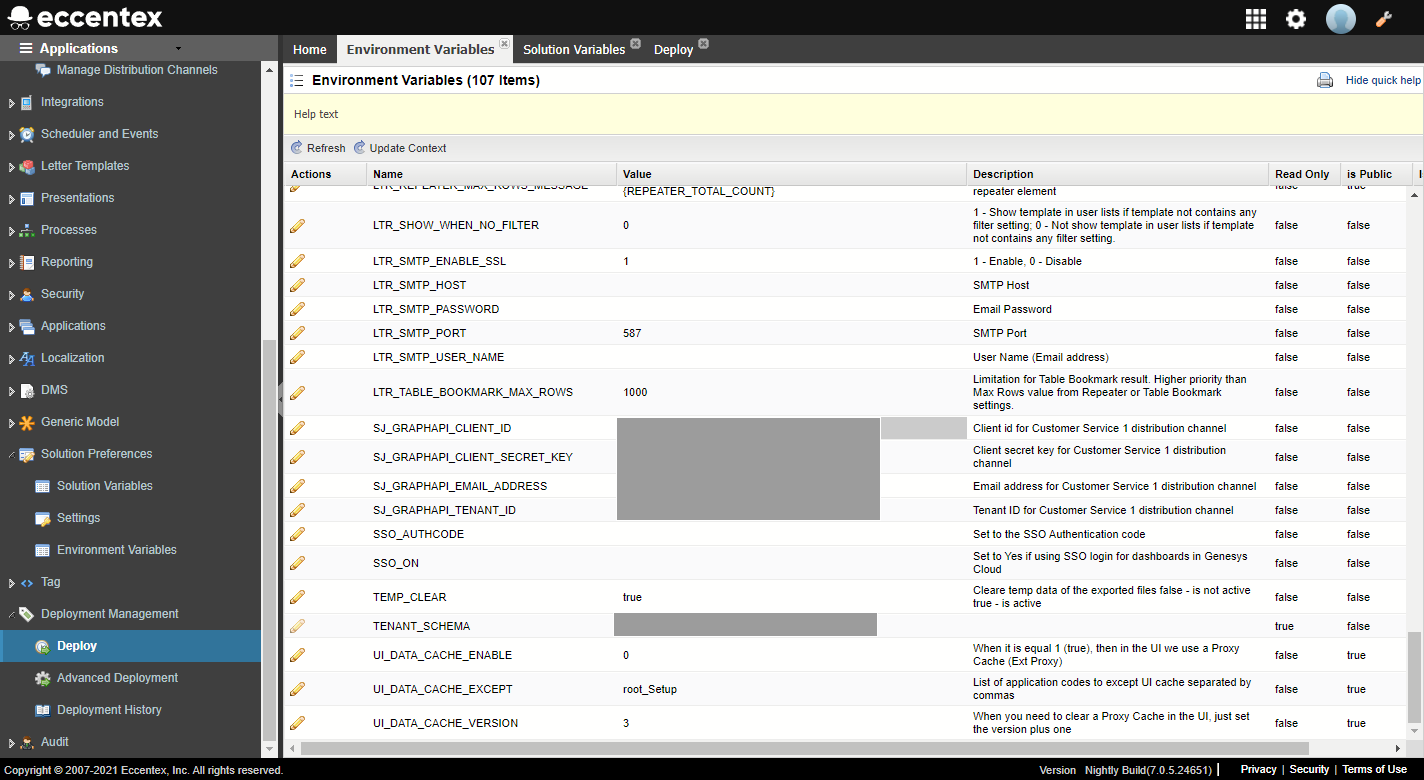
Navigate to Solution Preferences → Environment Variables
Click on the icon next to appropriate values and set your email account info
When done, click on the Update Context button at the top
On the top right, navigate to → ServiceJourney
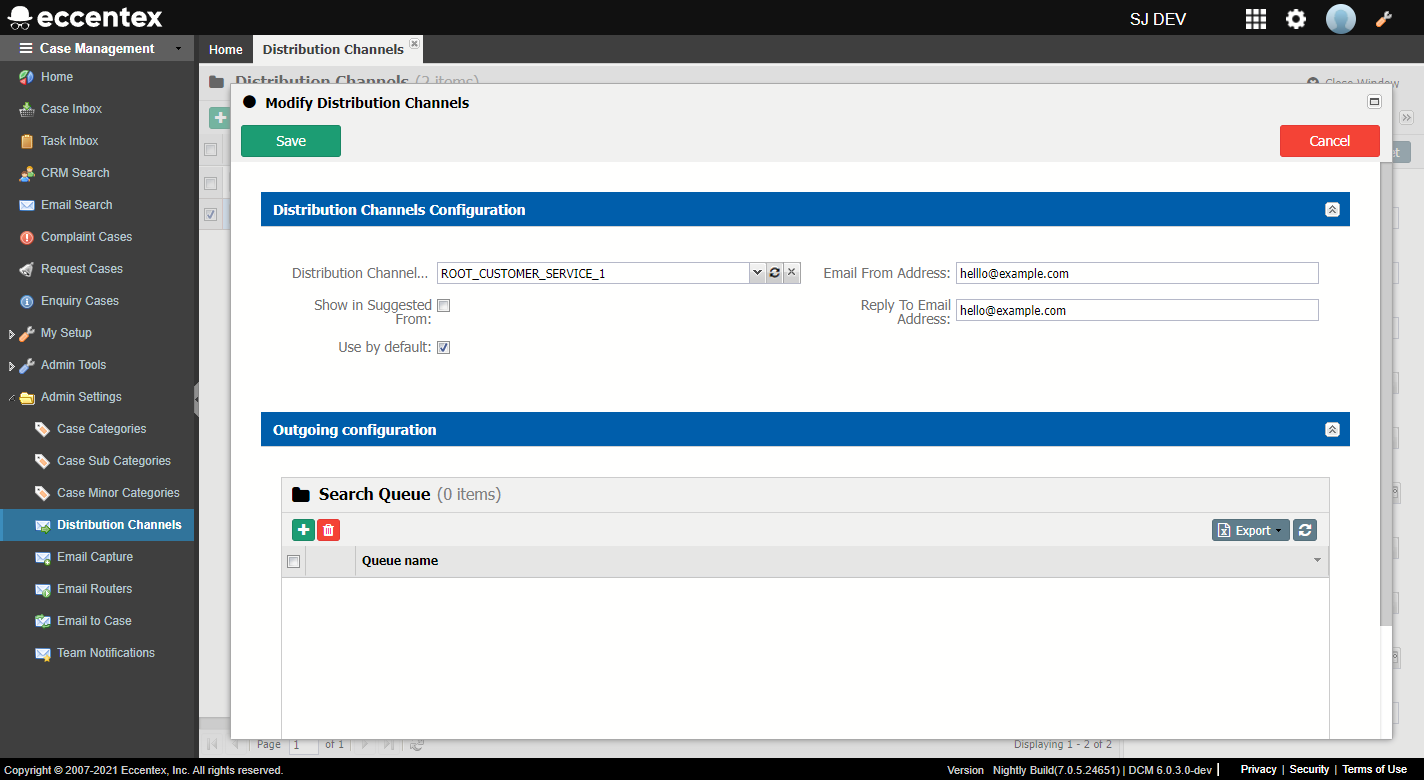
On the left, navigate to → Case Management → Admin Settings → Distribution Channels
Click the Sync button
Click on the next to Customer Service 1 and select Quick Modify
Set the Email From Address and Reply to Email Address to the correct values
Testing the configuration
On the top right, navigate to → ServiceJourney
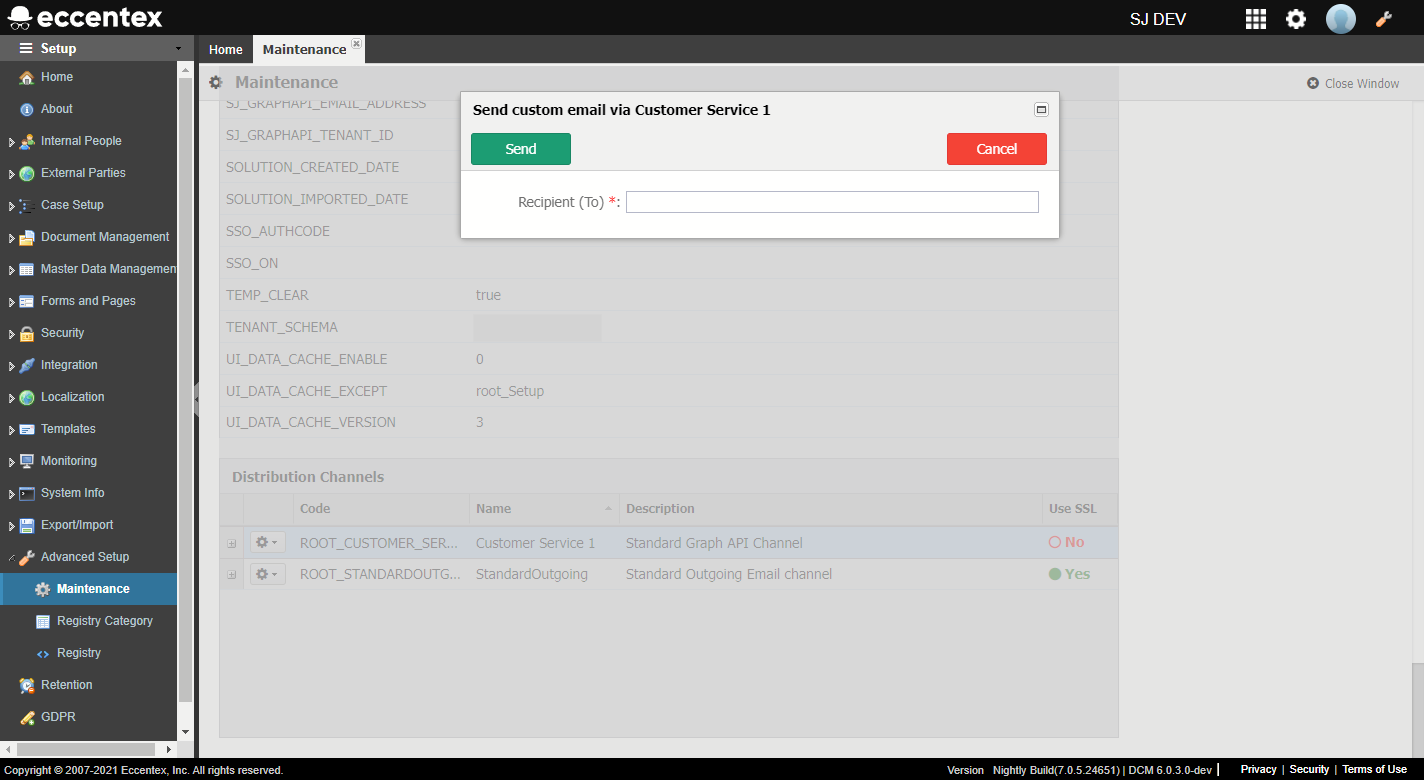
On the left, navigate to → Setup
Once inside Setup, navigate to Advanced Setup → Maintenance and ensure the System Variables you configured in Application Studio are correct
Scroll down to Distribution Channels and click on the next to Customer Service 1 and select Test via Distribution Channel
Fill in your email address and verify that the email has arrived
Business-specific Distribution Channel properties
Administrators can set several properties that control how email distribution channels are used by agents to communicate with customers.
On the top right, navigate to → ServiceJourney
On the left, navigate to → Case Management → Admin Settings → Distribution Channels
Click on the next to your distribution channeland select Quick Modify
After configuring the outgoing email distribution channel that customers use to communicate with customer service agents, the administrator can set the following email-specific properties.
Property
Description
Distribution Channel
Select the Distribution Channel you configured in Application Studio.
Email From Address
The email address will appear in the From field of the email. This is usually the same email address as the one set in the Environment Settings in Application Studio.
Reply-To Email Address
The email address to which a Reply or a Reply All gets sent to when a customer responds to an email. This is usually the same as the "Email From Address", but doesn't have to be. For example, you may send an email from noreply@example.com but want customers to respond to a support@example.com address.
Show in Suggested From
Checking this box will allow a customer service agent to choose this Distribution Channel when sending an email to a customer. For example, you may want the agent to be able to choose a specific brand from which to respond to a customer.
Use by default
Checking this box will pre-select this Distribution Channel in the From field when customer service agents begin writing an email to a customer.